
Keep a record of your FaceTime calls by recording them on your devices
Save those FaceTime calls for later.
FaceTime calls are a great way to stay in touch with people you care about, whether on an iOS device or a Mac. However, what do you do if you want to save those special moments or use FaceTime as an interview tool? Luckily, using your Mac or iPhone, you can record those calls to view later.
Here’s how you can record FaceTime calls taken on both Mac and iPhone.
How to record a FaceTime call on your Mac
If you’re looking to record a FaceTime call on your Mac, you can use macOS screen recording feature to your advantage.
- Open FaceTime on your Mac.
- Press Command + Shift + 5 on your keyboard.
-
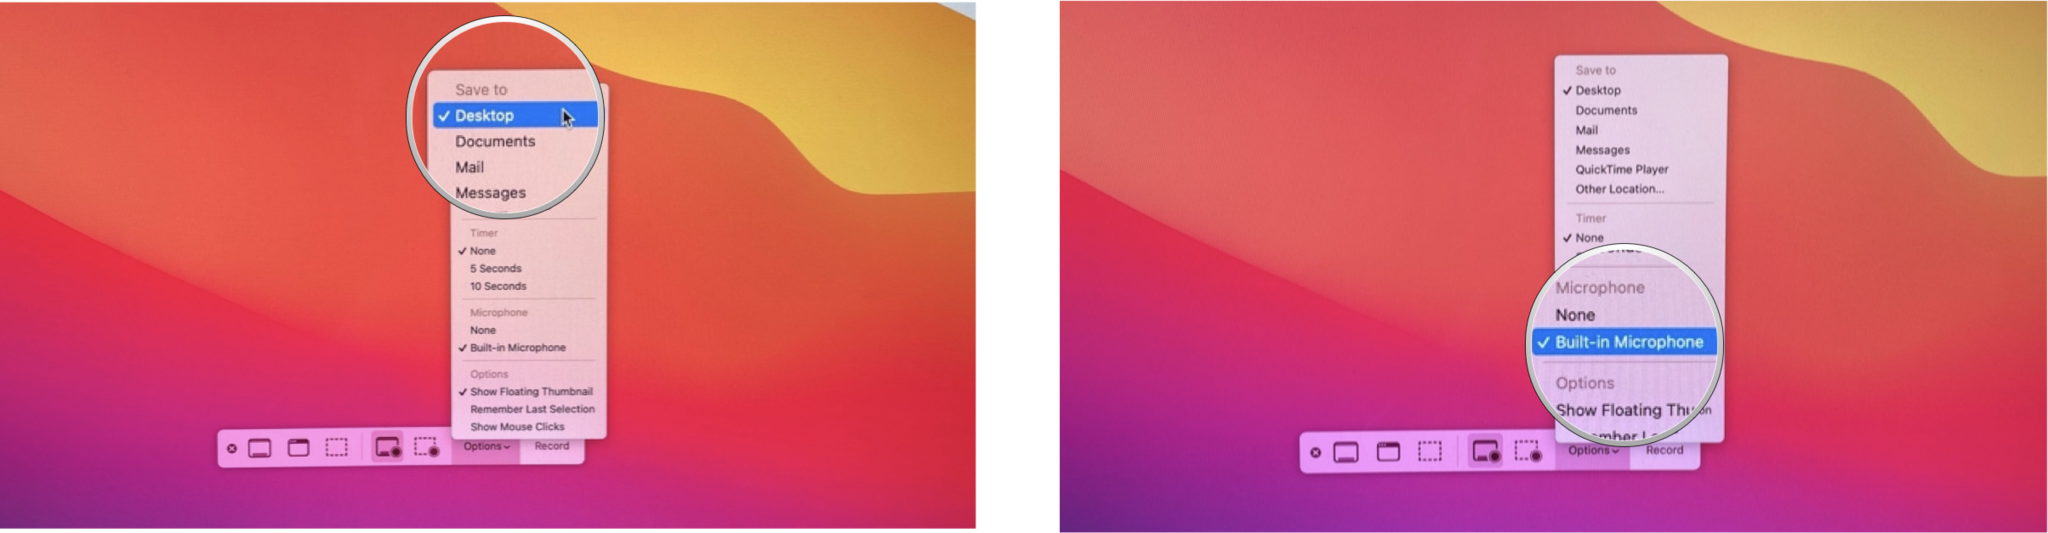
Click Options on the screen capture menu.

- Click a save location under Save to.
-
Click Built-in Microphone under Microphone.
- Click Record Entire Screen or Record Selected Portion to select your recording area.
-
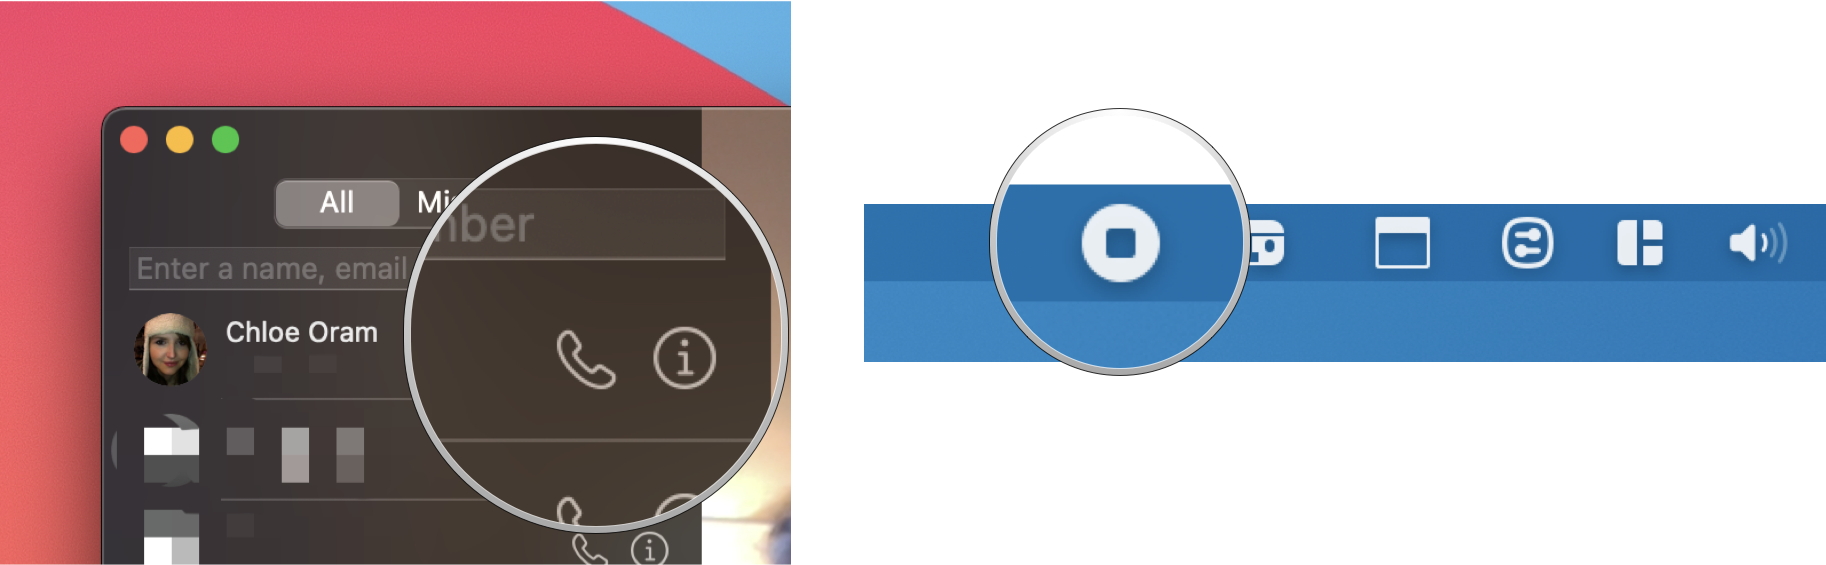
Click Record to start recording your screen.
- Begin your FaceTime call.
-
Click the Stop Recording button after you end your FaceTime call. Your recording will be saved to your chosen location.


How to record a FaceTime call on your iPhone using your Mac
First things first: don’t. Since you can’t natively record a FaceTime call’s audio using iOS screen recording on your iPhone, you need a Mac to record an iPhone FaceTime call. You can already record FaceTime calls on your Mac, as described above, so adding the phone to the mix makes little sense.
However, if you insist on recording a FaceTime call on your iPhone using your Mac, here’s how.
- Connect your iPhone or iPad to your Mac with a Lightning cable.
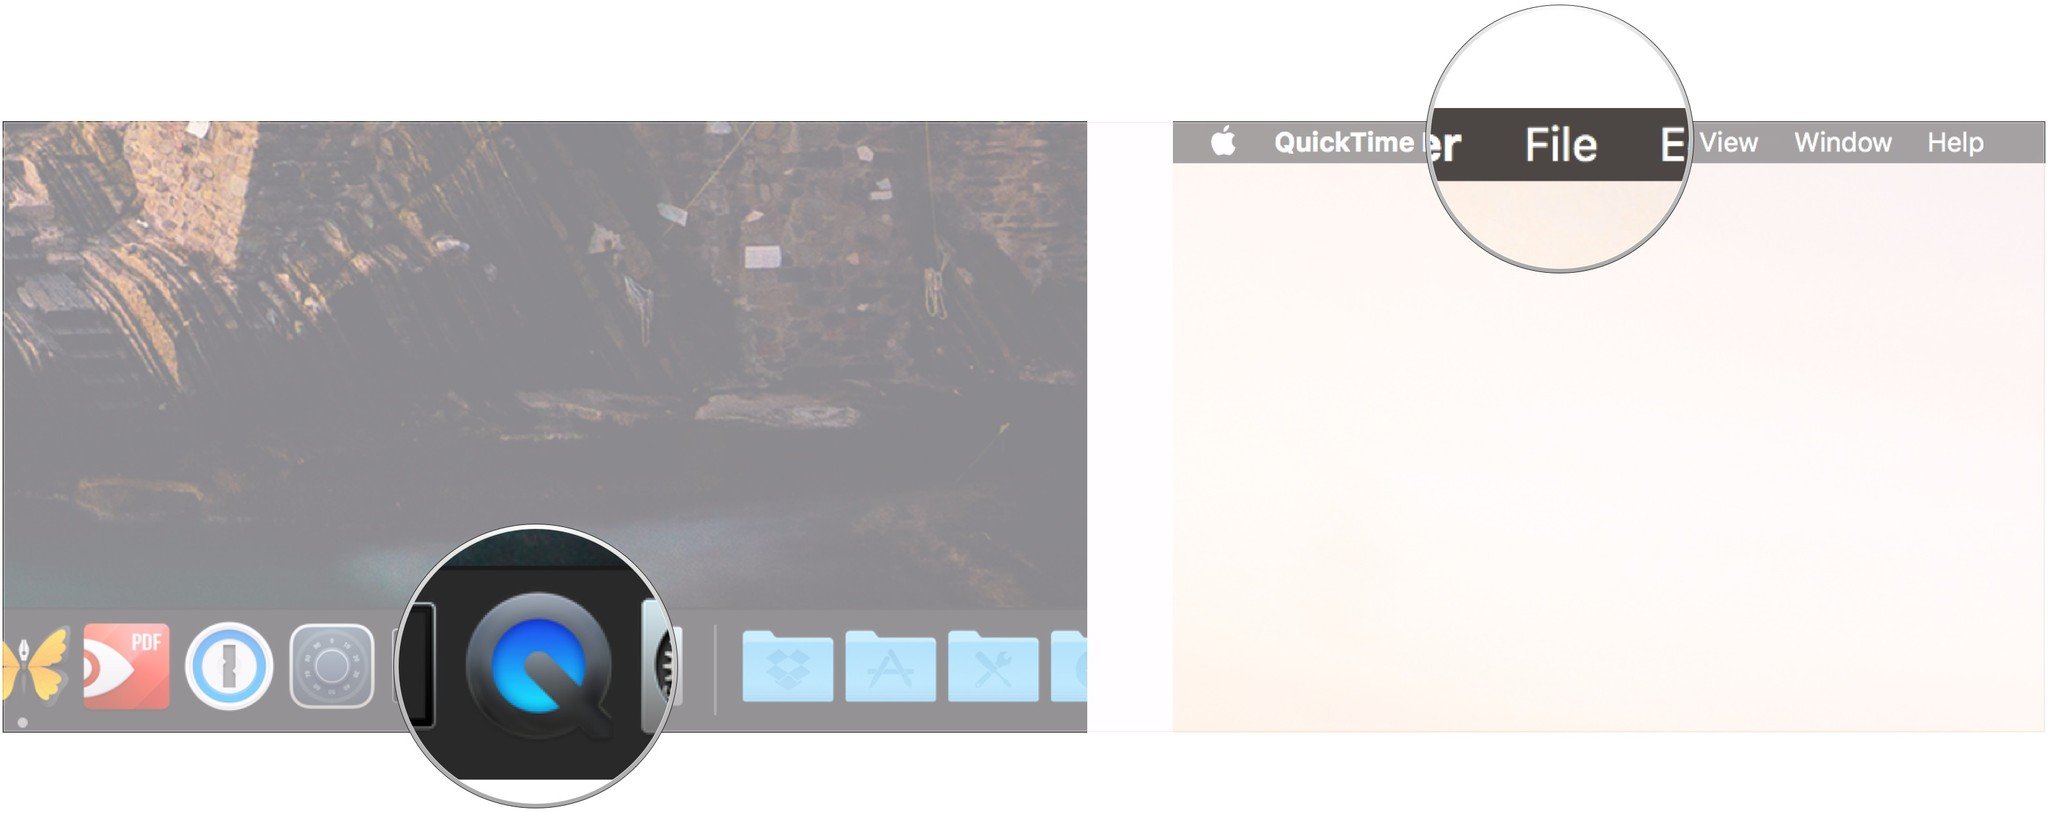
- Open QuickTime on your Mac from your dock or Applications folder.
-
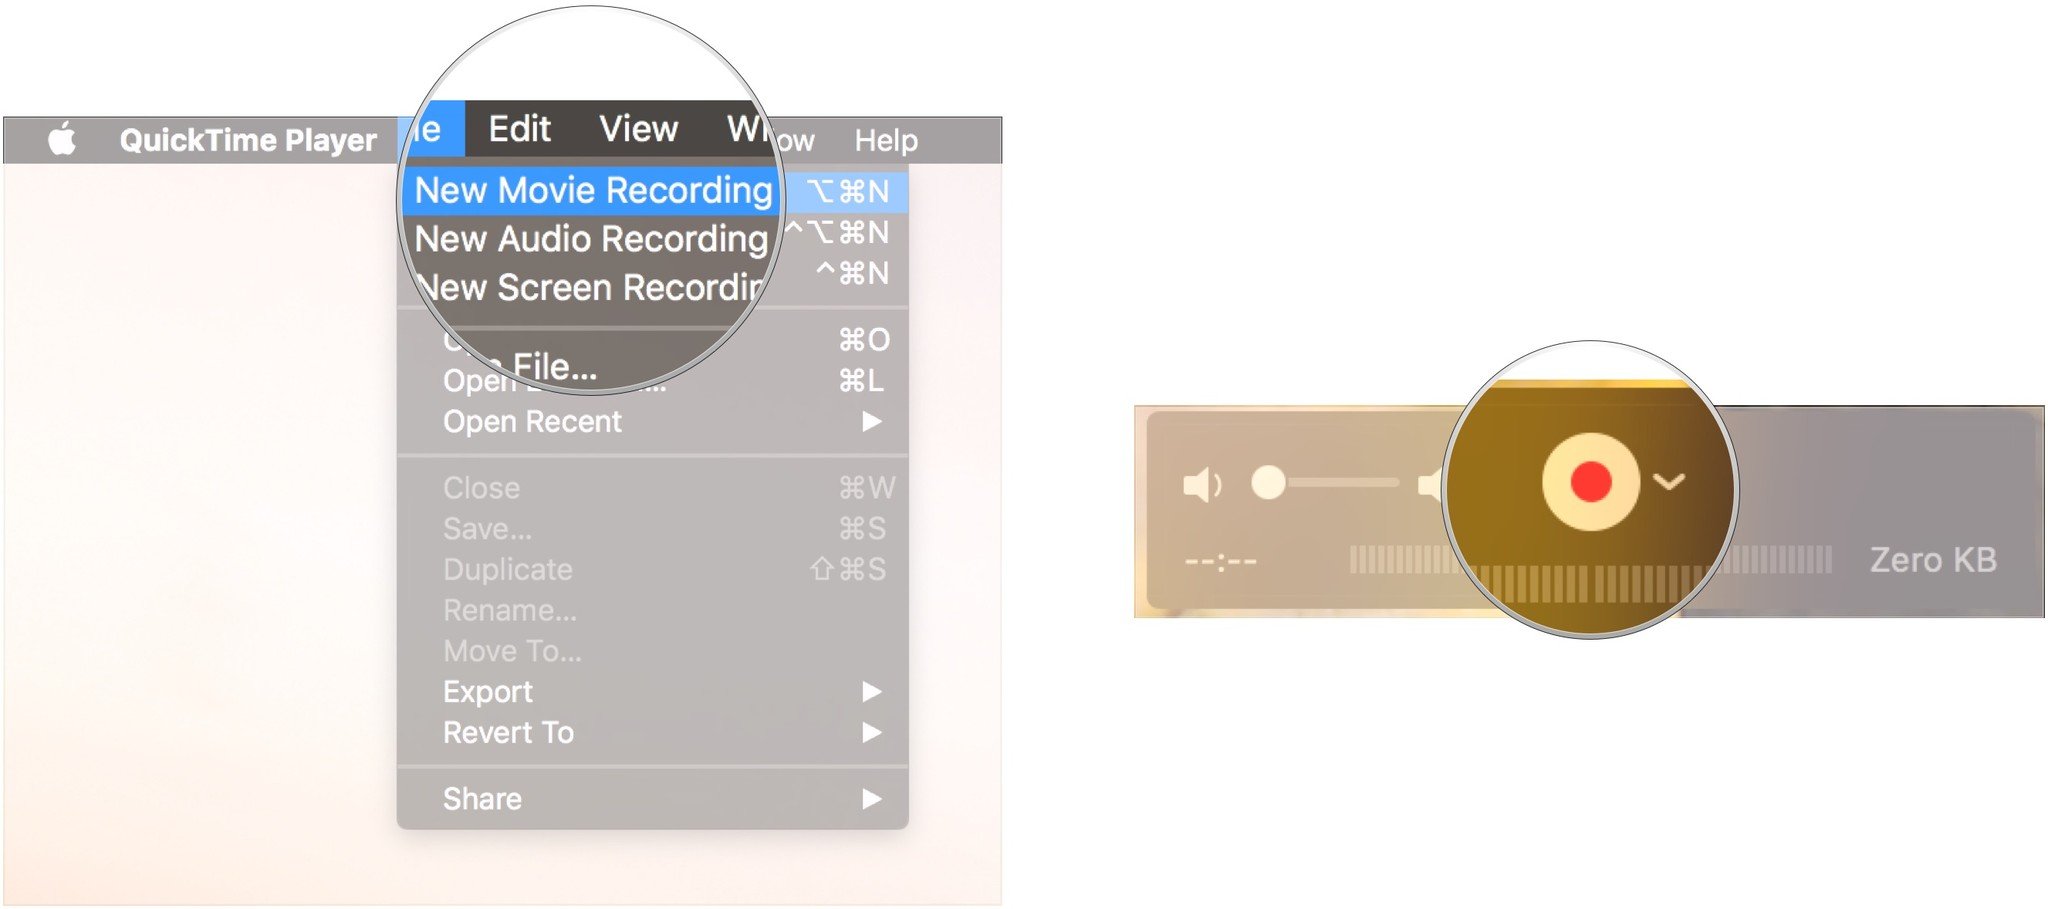
Click File in the Menu bar.
- Click New Movie Recording.
-
Click the arrow next to the record button in the QuickTime window.
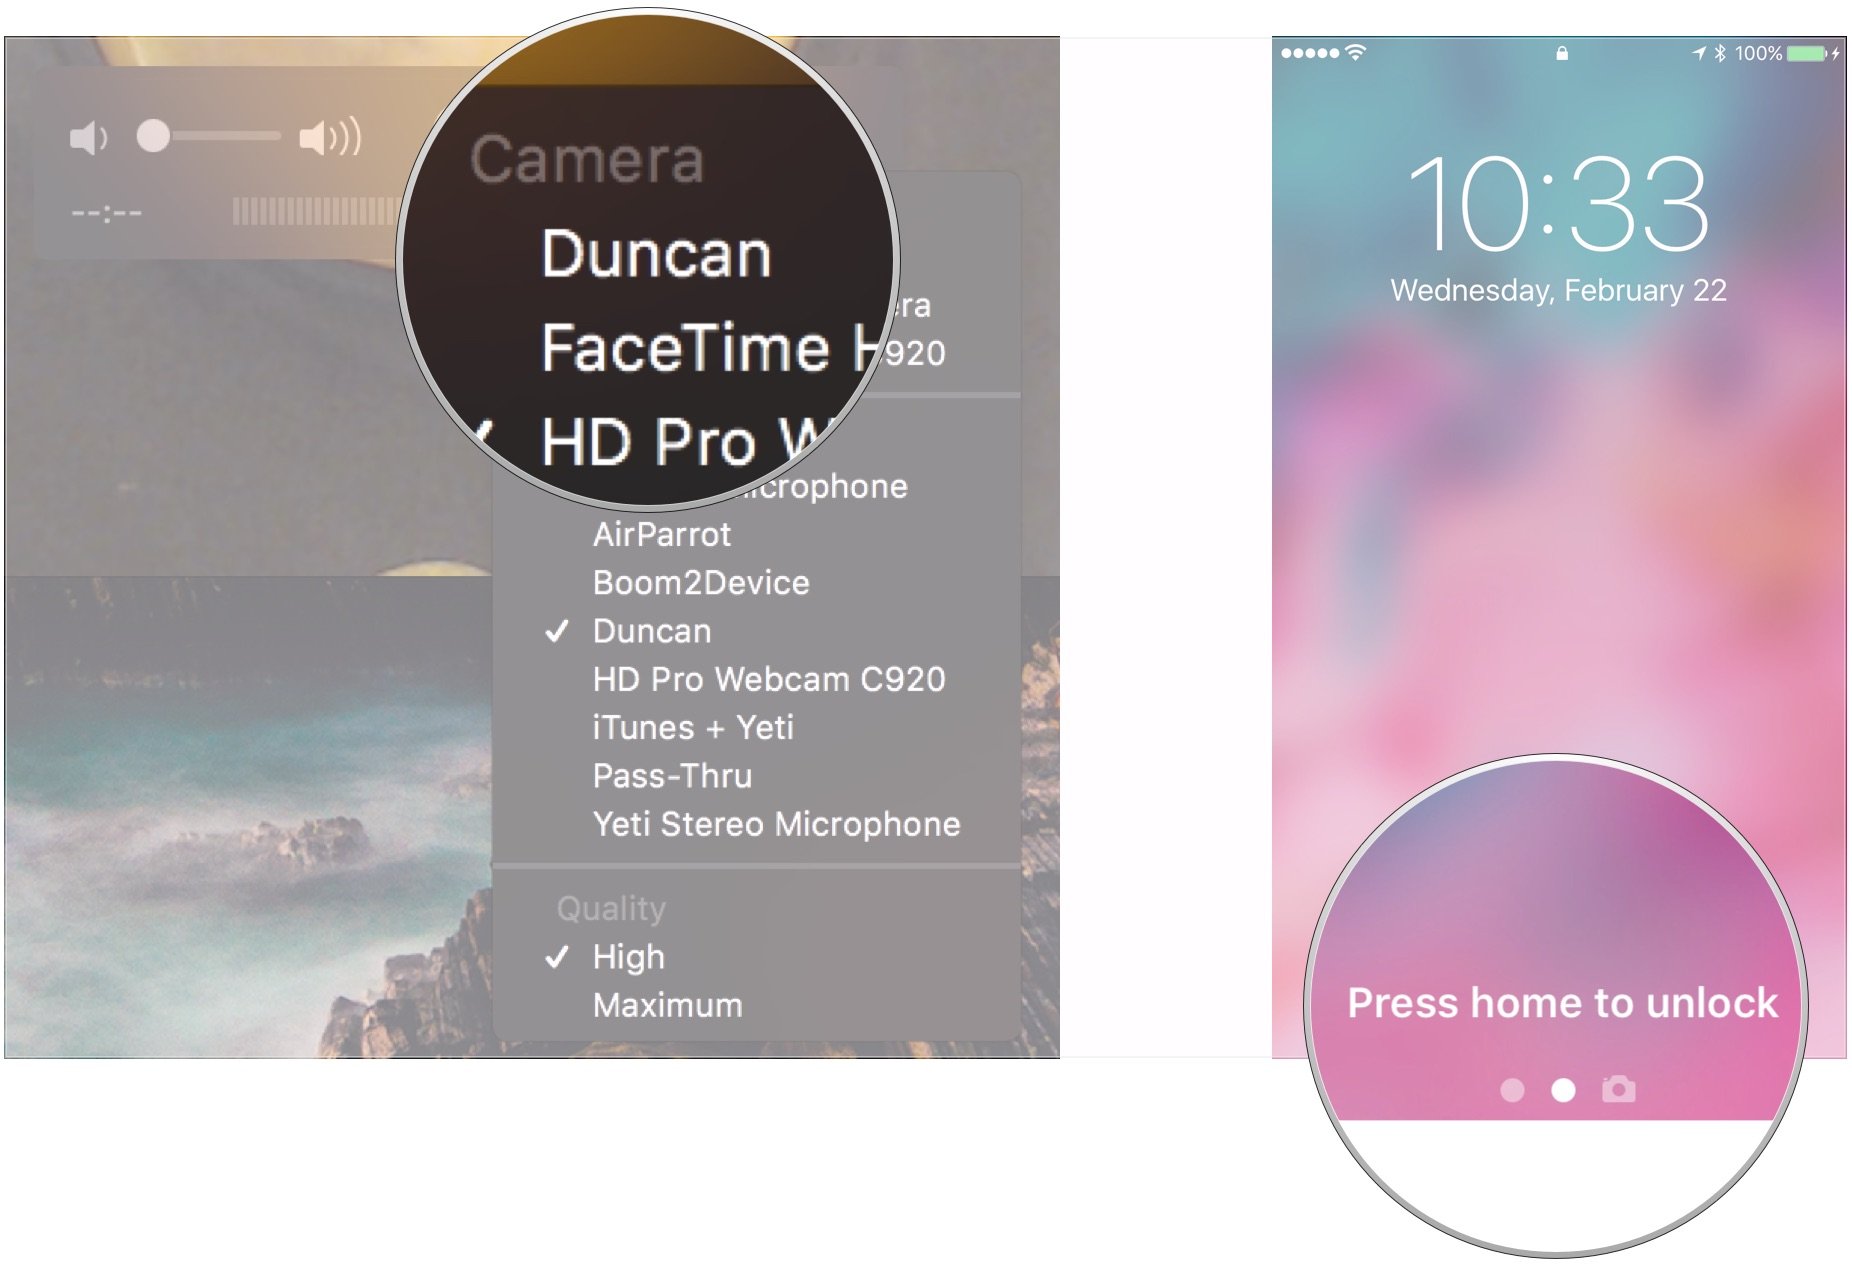
- Choose your iPhone from the list of available cameras.
-
Unlock your iPhone. Its display should now appear in QuickTime on your Mac (my iPhone is called Duncan).
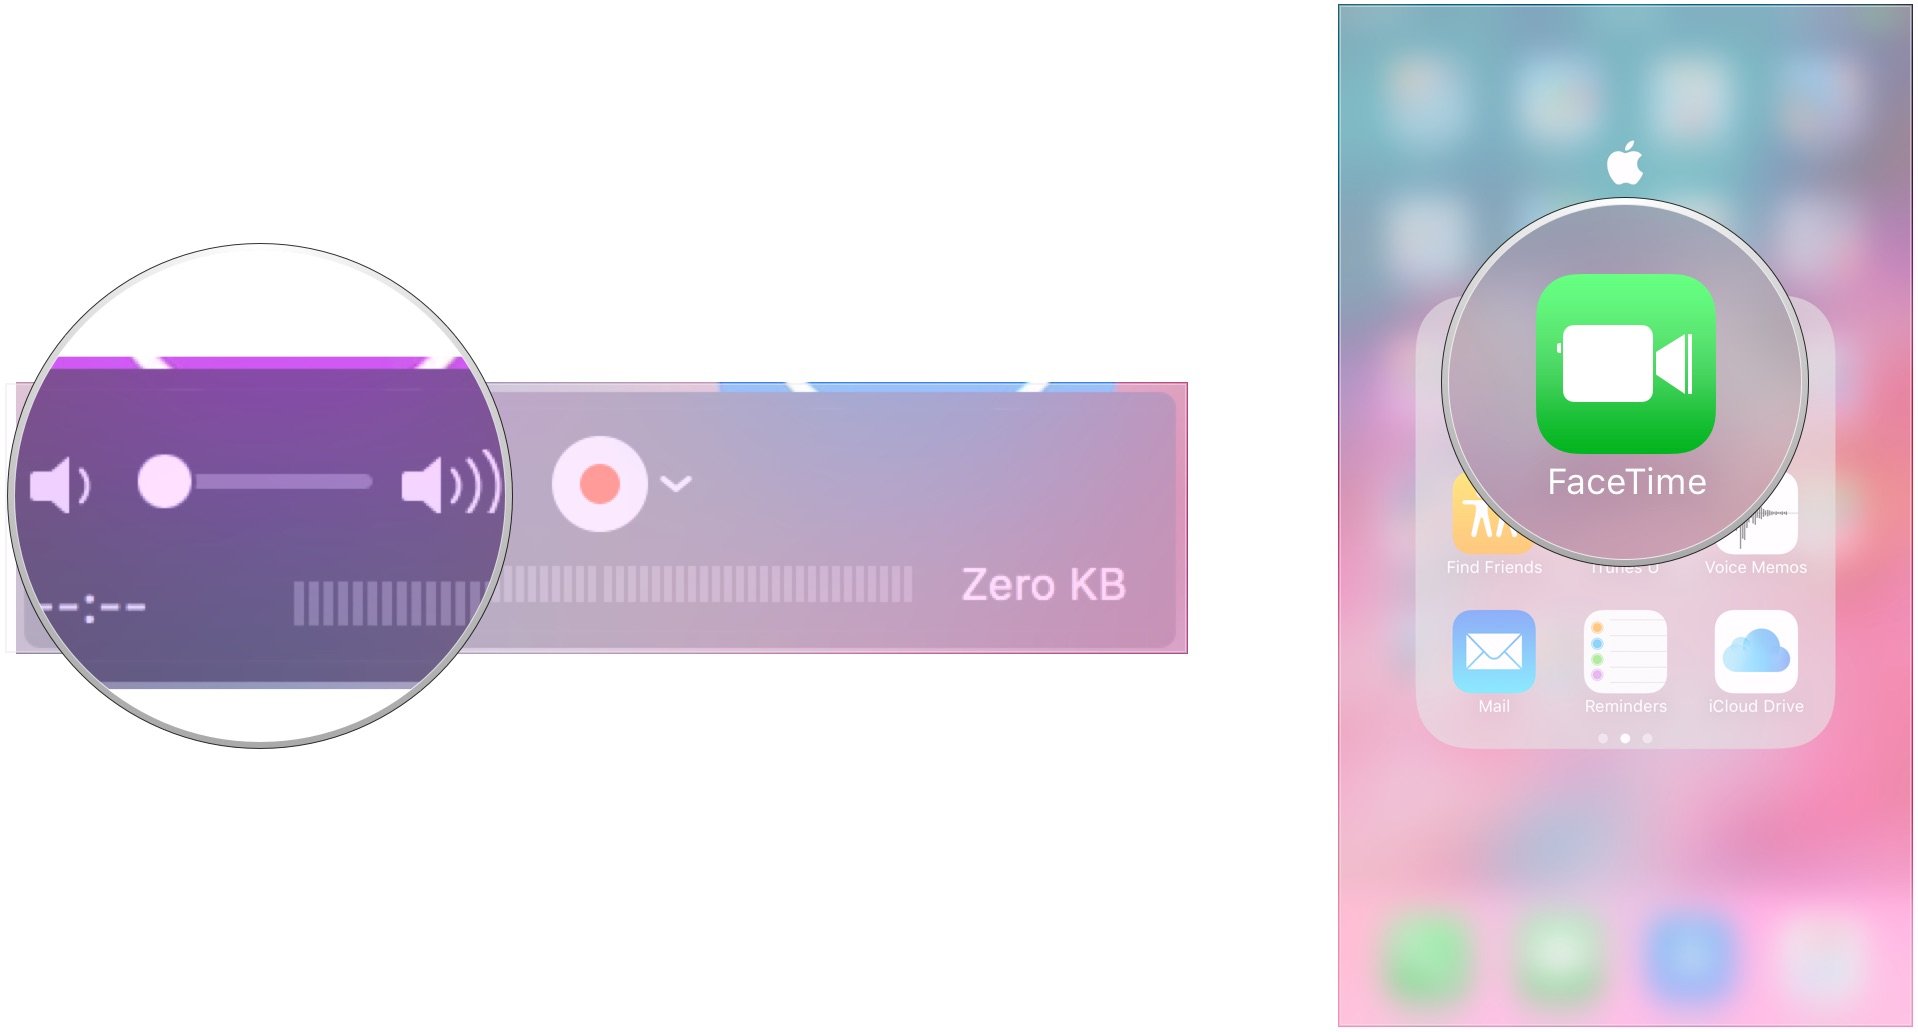
- In QuickTime for Mac, make sure the volume bar is turned up. Otherwise, you won’t be able to hear your call.
-
Open FaceTime on your iPhone.
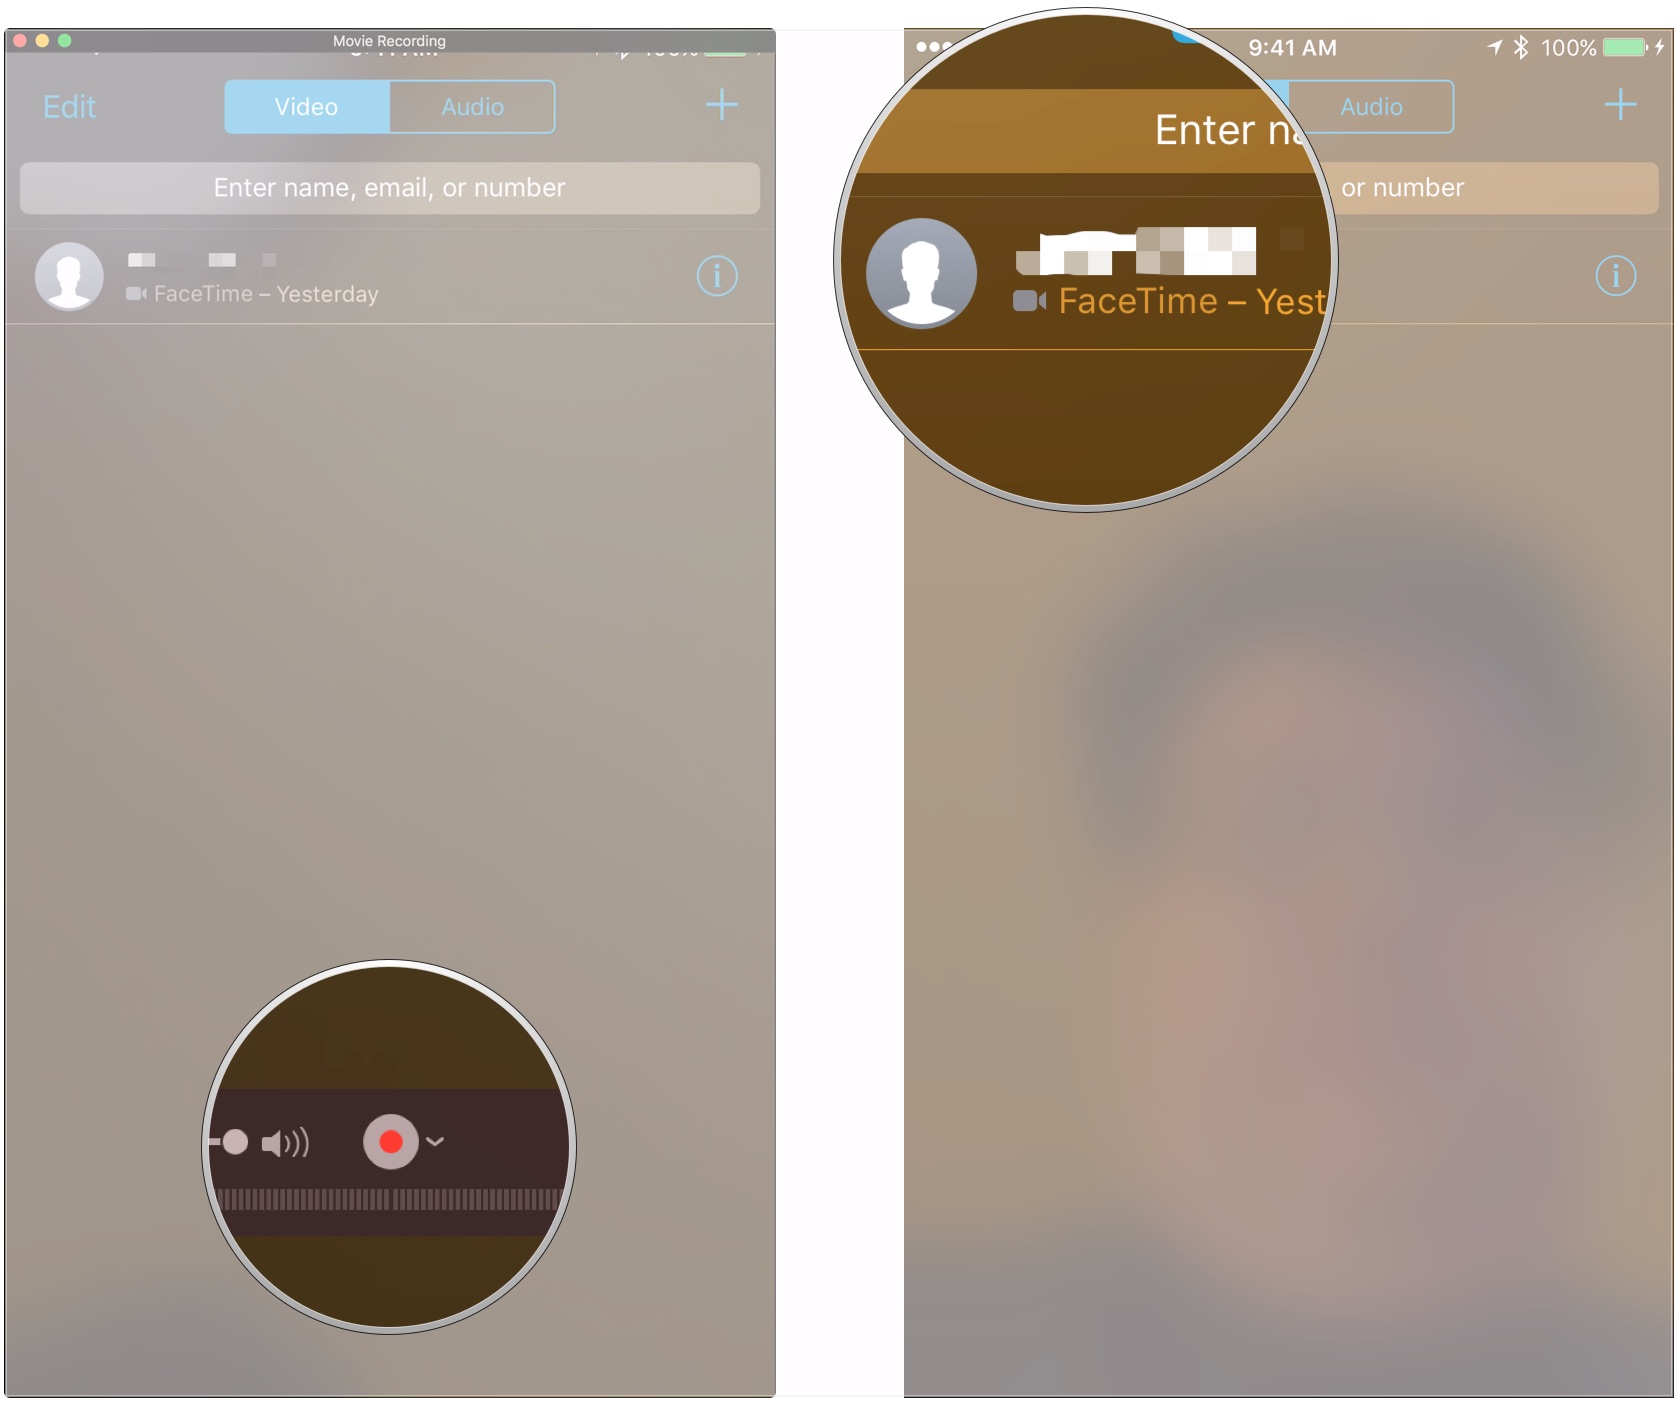
- Click the Record button in QuickTime on your Mac.
-
Place your FaceTime call on your iPhone.
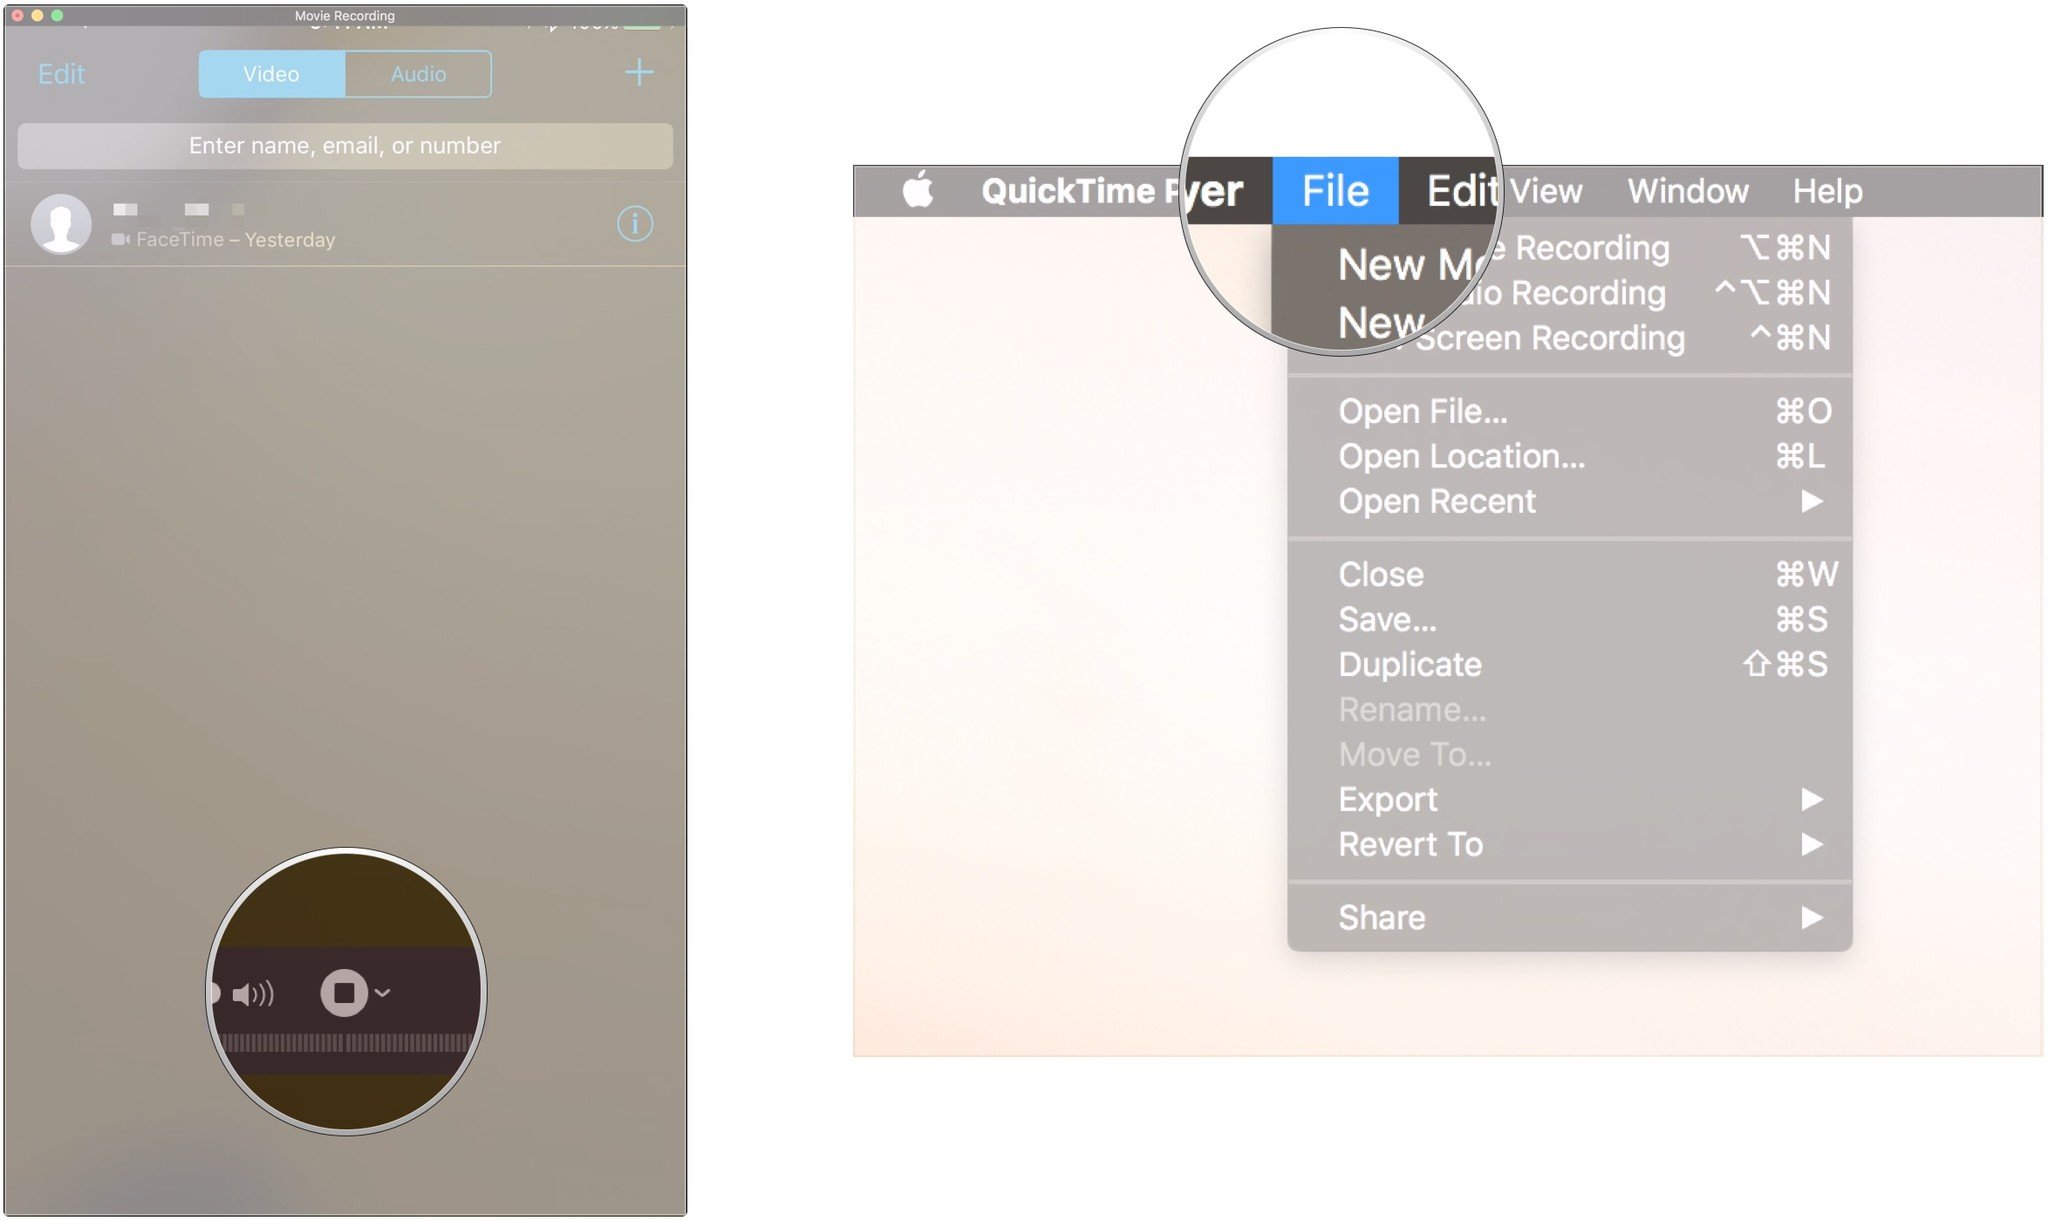
- Click the Stop button in QuickTime to stop recording when you’ve finished your call.
-
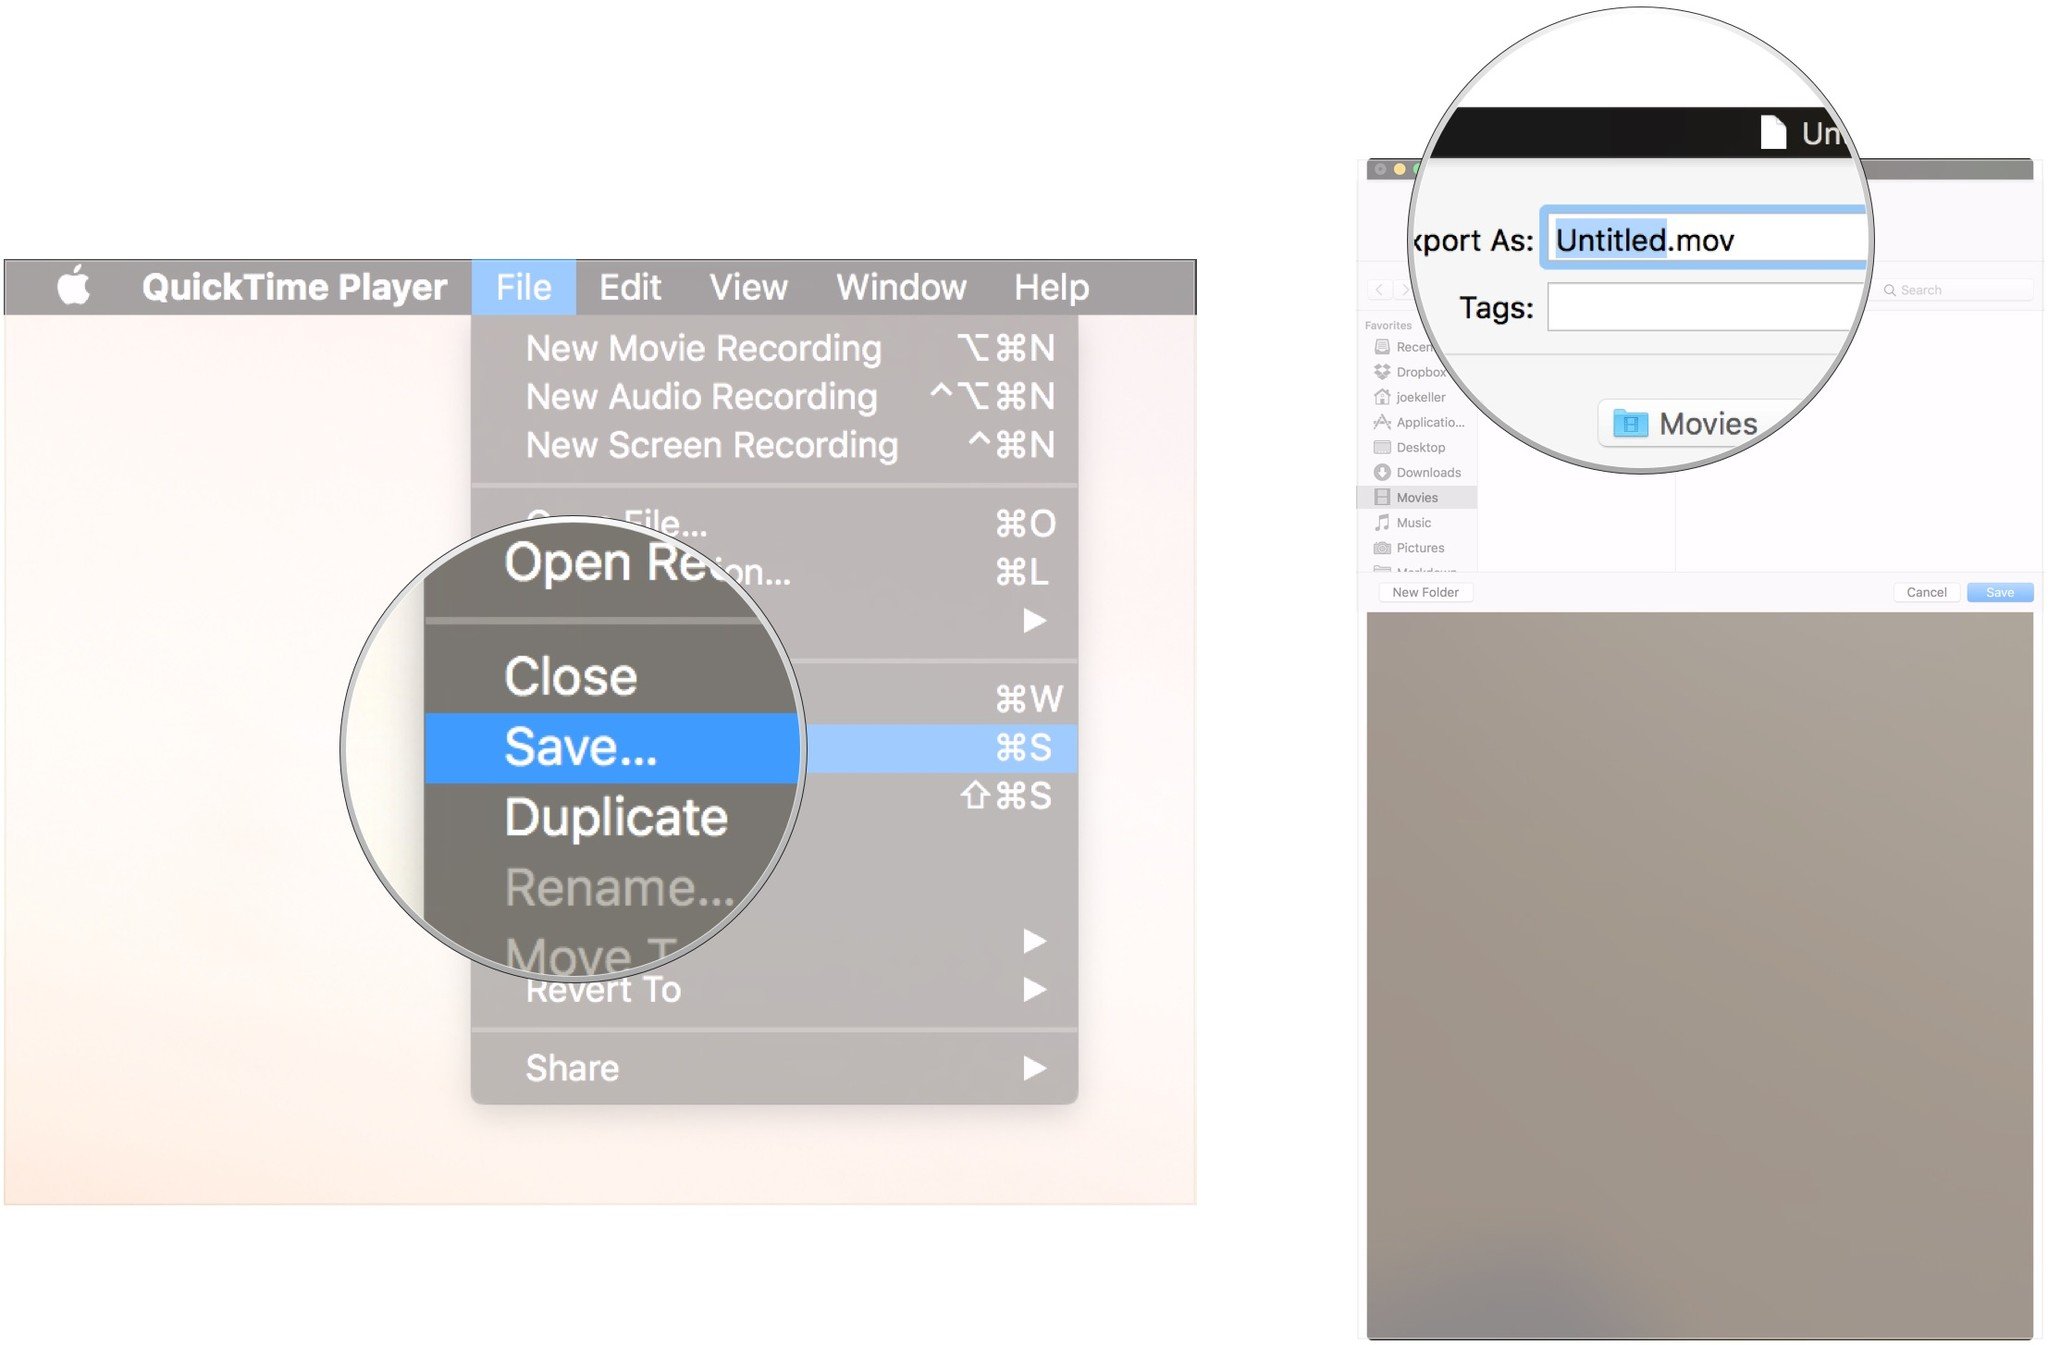
Click File in the Menu bar.
- Click Save.
-
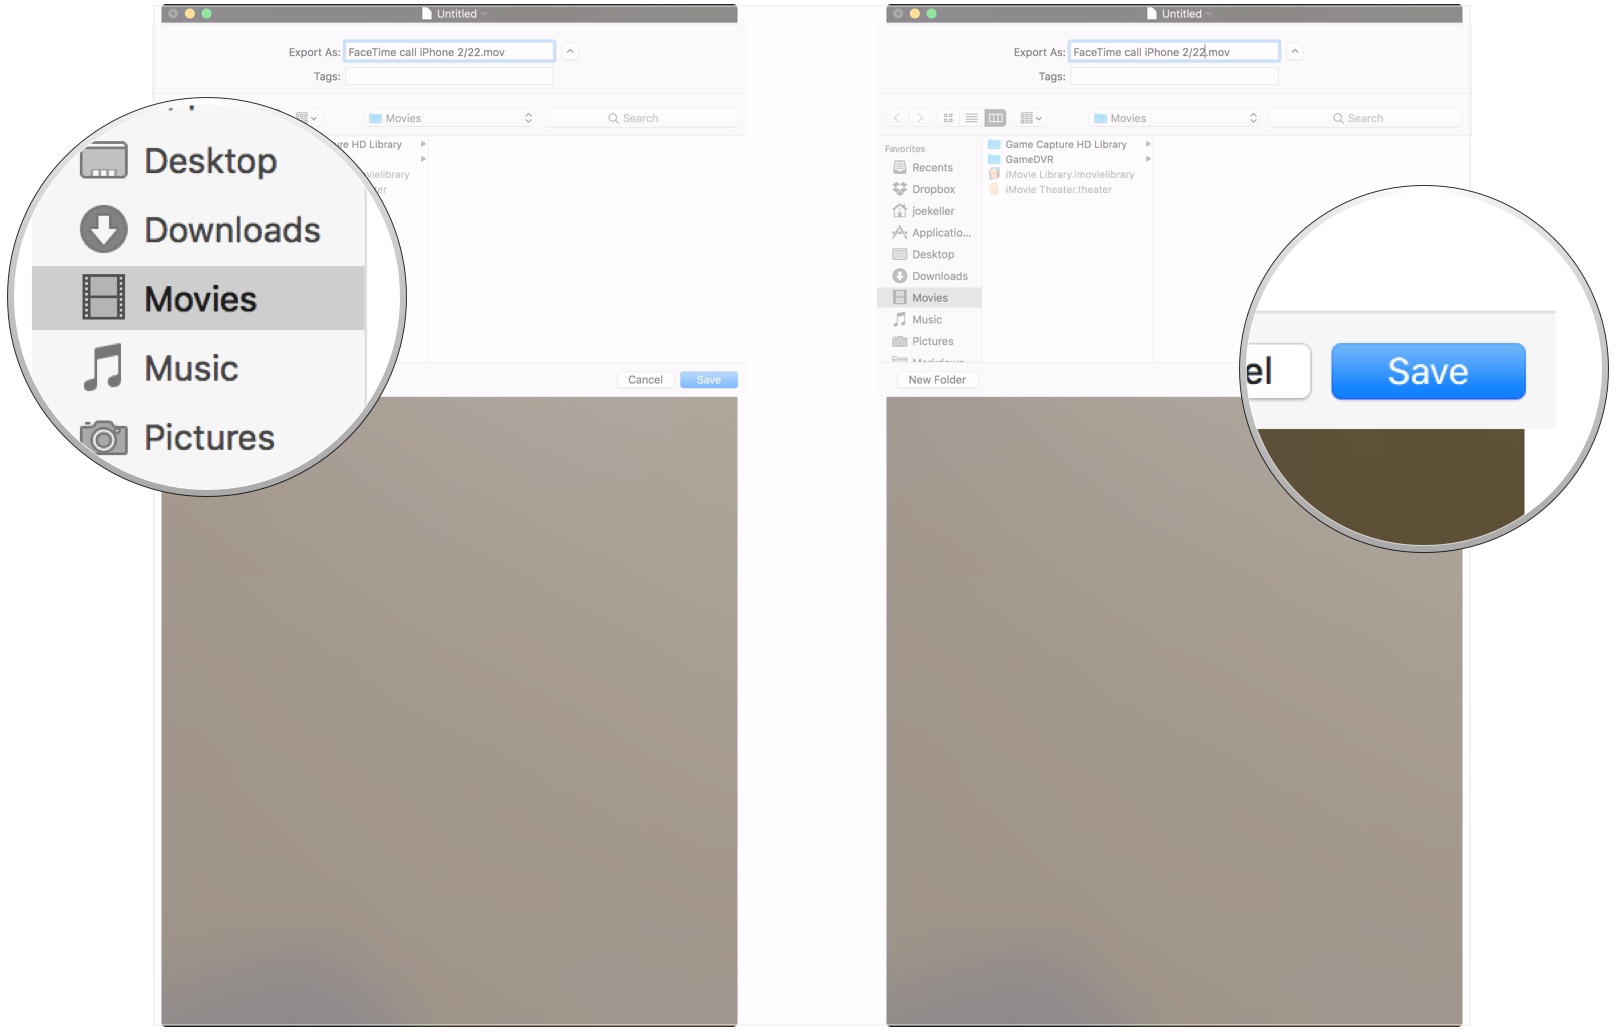
Give your recording a name.
- Choose where you want to save your recording.
- Click Save.
Record those calls
There are plenty of perfectly legitimate reasons to record your FaceTime calls, whether you’re conducting an interview or joining a special occasion remotely. You’ll need a best Mac in order to do so, but it’s fairly straightforward once you know what you’re doing.
Update April 2022: Updated for iOS 15 and macOS Monterey.


