How to get all Green Stars and Stamps in Super Mario 3D World
Some of them are pretty tricky.
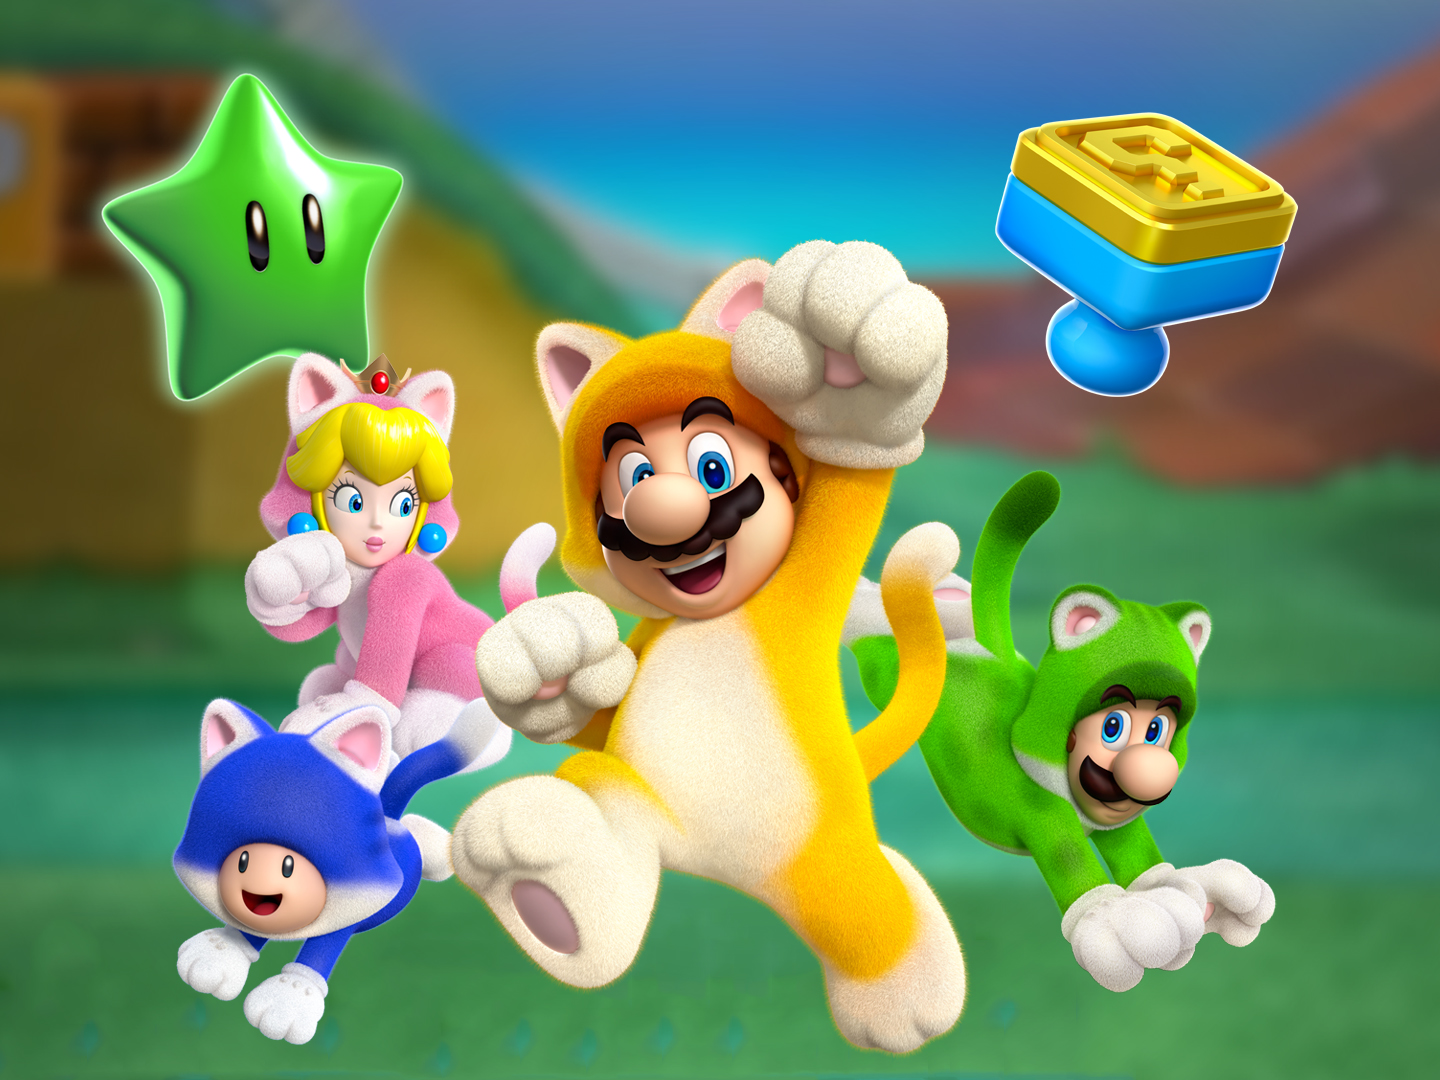
There are a total of 380 Green Stars and 85 Stamps to collect while making your way through Super Mario 3D World + Bowser’s Fury. Sometimes a specific character is needed to unlock them. Additionally, the Super Mario 3D World characters each have their own strengths and weaknesses, so you might find you like playing with one character over the others.
This was one of my favorite games on Wii U and now that it’s been ported to Switch, I’m sure Super Mario 3D World + Bowser’s Fury will be one of the best Nintendo Switch games of all time. Regardless of whether you’re playing solo or with others, several of the Green Stars and Stamps are pretty tricky to find, but we’re here to guide you to all of them. Here’s where you’ll find all Super Mario 3D World Stars and Stamps.
Super Mario 3D World Stars
- World 1
- World 2
- World 3
- World 4
- World 5
- World 6
- World Castle
- World Bowser
- World Star
- World Mushroom
- World Flower
- World Crown
World 1 — (22 Stars, 4 Stamps)
World 1 has a total of 22 Green Stars and 4 Stamps to collect. Stars and Stamps are listed in the order you find them. Here’s where you’ll find all of them:
World 1-1: Super Bell Hill (3 Stars, 1 Stamp)
Star 1: When you first come into the level, make your way to the right. When you see a clear pipe going over a gap, jump into the tube and then press up on the joystick to pop out of the skyward-facing pipe end.
Star 2: Shortly after you reach the checkpoint flag, you’ll see a small pond with a rabbit nearby. Chase down the rabbit to get another Star.
Stamp: Just after the pond with the rabbit, there’s a pipe in a cliff. Enter it and you’ll see the stamp. Jump into the clear pipe to grab it.
Star 3: You’ll need a Mega Mushroom to get this one. Run up the tree next to the Stamp pipe and you’ll see a large bunny at the top of the cliff. Chase it down to get the Mega Mushroom. Now that you’re huge, quickly drop back down to the bottom level and continue right across the bridge. When you see the giant Brick Blocks, do a ground pound to break them up. The Star is underneath.
World 1-2: Koopa Troopa Cave (3 Stars, 1 Stamp)
Star 1: Make your way right throught the cave until you come to an area where a set of cloud platforms is going up and another set right next to it is going down. Jump between the two to snatch a Green Star.
Star 2: Shortly after you’ve hit the checkpoint flag, jump up the purple blocks and enter the Mystery Box. Defeat the two Koopas within 10 seconds to win this Star.
Stamp: When you come to the area with a long question Mark Box and two clear pipes on either side, jump on top of the block to the right to reveal a hidden block. Now get on it and jump again to reveal a second hidden block. Jump into the clear pipe on the wall and it will take you to a hidden room with the Stamp.
Star 3: Just to the right of where you’ll find the stamp, there is a stack of Goombas with a Green Star in the middle of them. The best way to get rid of them is to get on the platform to the left and hit the ? Block to get a Yellow Star. Now run into them to defeat them. If you don’t want to get the Yellow Star, you can also attack them using a powerup.
Word 1-A: Chargin’ Chuck Blockade (1 Star, 0 Stamps)
Star 1: Ground pound on both Chargin’ Chuck enemies within the time limit to defeat them and get a Star.
World 1-3: Mount Beanpole (3 Stars, 1 Stamp)
Star 1: As soon as you enter, climb up the tree on your left. A Star awaits on top.
Star 2: Head up the cliffs past the piranha plants and shifting blocks. You’ll see a moving Pow Block near another Pow Block embedded in the cliff (on the left side). Hit the shifting Pow Block at the right moment to cause the other one to go off. This destroys the bricks and reveals a green pipe. Jump up into the pipe surrounded by wooden planks. Jump on the blue button and collect all of the Blue Coins before they disappear to unlock the Star. It helps to be turned into a Cat to reach the last stretch of coins.
Stamp: After getting the second star and exiting the pipe, you’ll be dropped off back on the cliff. A Stamp can be seen floating between two walls. Wall jump between these two surfaces until you touch it.
Star 3: Being a cat makes it a lot easier to get this Star. Keep heading up the cliff and then climb the tree on the left side. You’ll see a stone pillar with a Cat Wheel cog attached to it. Hit this cog to make the statue extend skyward. When it’s as tall as it can be, climb up and jump into the cloud.
You’ll be brought to a small sky track. Run to the end and grab the Green Star floating over the side. Falling will bring you back to where you were before.
World 1-4: Plessie’s Plunging Falls (3 Stars, 0 Stamps)
Star 1: Jump on Plessie’s back and start making your way through the water. The first Star is floating above the wooden ramp. Use the speed boost tiles and then jump at the right moment to reach it.
Star 2: Keep heading forward. When you see the area with holes everywhere, head to the waterfall on the far left and go through it. You’ll find the second Star here.
Star 3: The third Star is at the very end of the course floating past the cliff where you fall down into the lagoon. Aim Plessie towards it and then jump to reach it.
World 1-5: Switch Scramble Circus (3 Stars, 0 Stamps)
Star 1: Step on all of the Blue ? spaces to turn them into Yellow ! spaces to unlock the Spade door. Continue down the way and do the same for the Blue ? slots near the Diamond door. You’ll see a bunch of Stingby enemies and a Warp Block behind them. Avoid the Warp Block for now and instead use the Yellow Jump pads to jump on top of the platform to reach the first Star.
Star 2: After reaching the checkpoint, you’ll once more need to turn all of the Blue ? squares into Yellow ! slots. Continue through the heart door and then jump into the Warp Block on the left side of the cliffs. Go straight to the top left box and ground pound on it to get a Star.
Star 3: Keep going and you’ll see a Magikoopa near another section of Blue ? spaces. Use the moving platform to reach the final Star for this level.
World 1-6: Captain Toad Goes Forth (3 Stars, 0 Stamps)
You cannot jump when playing as Captain Toad, which means you can’t defeat enemies. You need to use ramps and platforms to reach higher areas.
Star 1: Make your way around the corner and under the moving yellow platform to get the first Star.
Star 2: Now, walk up the ramp and use the yellow platform to reach the second Star.
Star 3: Ride the yellow platform to the other side of the pillar and then walk off. Head through the right cave, up the ramp, and past the Biddybuds. Use the platform to reach the cliff with larger string of Biddybuds. Wait for an opening and walk into the center; then walk along the wooden plank to the final Star.
World 1-Castle: Bowser’s Highway Showdown (3 Stars, 1 Stamp)
Star 1: Shortly after starting the level, you’ll see a Green Star Ring on the left. Pass through it to make several Green Coins appear. If you collect them all within the time limit, you’ll get a Star.
Stamp: Continue past the yellow platforms until you see the cannons launching the Kick Bombs. Kick one of these into the Grey Blocks to reveal the Stamp.
Star 2: While turned into a cat, get on top of the platform where you found the Stamp and activate the Cat Wheel cog. Now climb up the walls and head right to retrieve the second Star.
Star 3: Continue along the course until you find a stack of Goombas with a Green Star. Defeat these enemies and the Star is yours.
Boss fight: Bowser chucks Kick Bombs at you; kick them back at him before they explode to hurt him. Continue chasing after him and repeating this process until he is defeated.
All Stars in Super Mario 3D World + Bowser’s Fury
- World 1
- World 2
- World 3
- World 4
- World 5
- World 6
- World Castle
- World Bowser
- World Star
- World Mushroom
- World Flower
- World Crown
World 2 — (24 Stars, 6 Stamps)
Defeating Bowser in World 1 unlocks a clear pipe that brings you to World 2. There are 24 Green Stars and six Stamps in World 2.
World 2-1: Conkdor Canyon (3 Stars, 1 Stamp)
Star 1: Run to the right until you see two shifting platforms hovering over sand with a ? Block above them. Hit this block to get a Super Bell and turn into a cat. Now, climb directly up the cliff to reach a Star at the top.
Star 2: Drop back down the cliff and continue right. You’ll need to pass several stretches of sand and shifting platforms until you see a Conkdor surrounded by four Brick Blocks. Stand next to the Brick Block to the top right until the Conkdor breaks it and you’ll get a Star.
Stamp: Jump up the cliff next to the two rows of moving platforms and you’ll find this Stamp.
Star 3: Instead of making your way down the moving platforms, head right to see a Conkdor chasing the Captain Toad. Wait until the Conkdor’s head is on the ground and jump on it to defeat him. Captain Toad will give you a Star for saving him.
World 2-2: Puffpod Peak (3 Stars, 1 Stamp)
You’ll need to have a total of 15 Stars to break the Bowser statue and unlock this level.
Stamp: Activate the glowing pink blocks and start making your way up the course. When you see two glowing platforms against a cliff near a bunch of Galoombas, activate the further platform and then fall into the hole it creates. Now, simply activate the pink blocks and grab the Stamp.
Star 1: Keep moving further into the course and activate the various blocks to create steps back and forth up the cliff face. A Green Star is on the very left side of this cliff area. Get on the platform below it and then wall jump to reach it.
Star 2: After passing the checkpoint flag, ride the platform and enter the Warp Box. Continue to move along the course using the platforms until you can jump into the Cloud Cannon. Grab the Yellow Star in the ? Block and then jump your way across all of the cloud platforms. You’ll need to grab the Green Star at the end of the course before falling back down.
Star 3: Run past the Piranha Plants and up the blocks. While on the third block, use the platform to ride to the Green Star below.
World 2-3: Shadow-Play Alley (3 Stars, 1 Stamp)
Star 1: Run right until you see the shadow of a Star on the wall. Head towards the camera and grab the Star.
Stamp: Continue right past the Piranha Plants and yellow platforms and head in the red door. Jump up to grab the Super Bellj to turn into a cat. Now, swipe at the platform below the Big Piranha Plant to destroy some Brick Blocks and make your way to the Stamp.
Star 2: Exit the red door and keep going right until you see a wall covered in pink Blurkers. Swipe at them with your cat claws and you’ll find a Warp Block hiding behind them. You have 10 seconds to press the blue button and collect the Star hiding underneath the platform and behind the stairs.
Star 3: Continue moving right. When you see a red door, ignore it and go through the crack in the wall. You’ll find Captain Toad shivering while looking at Bowser’s reflection. Head towards the camera and defeat the wooden Koopa King. Captain Toad will reward you with a Star.
World 2-4: Really Rolling Hills (3 Stars, 1 Stamp)
Stamp: You must be playing as Mario to get this Stamp. Have Mario step on the white button with an M on it located on the small island to the right of where you come in to make the Stamp appear.
Star 1: The easiest way to get this Star is to be turned into a cat. If you aren’t yet, jump on top of the three ? Blocks and jump to reveal a hidden ? Block with a Super Bell inside. Go into the clear pipe on the right. Climb up the wall and get the first Green Star.
Star 2: Enter the green pipe that’s visible after reaching the checkpoint flag. Jump over the two Spiny Skipsqueaks and break through the purple blocks. Now enter the green pipe. You’ll need to step on all of the tiles within the time limit to get the Star. Don’t forget to jump on the cliff tiles as well.
Star 3: Immediately right of the last pipe you’ll see two Spiny Skipsqueaks on a roller. Drop down into the gap just in front of them and the head right to get the last Green Star.
World 2-A: Big Galoomba Blockade (1 Star)
Star 1: You’ll need to defeat the three Big Galoombas to get this Star. The first hit knocks them over, so be sure to hit them again while they’re upside down to get rid of them.
World 2-5: Double Cherry Pass (3 Stars, 1 Stamp)
Star 1: Grab the Double Cherry just at the front of the course. Now continue right until you see a clear pipe with wooden boxes on either side. Destroy the furthest box on the right to get a Green Star.
Star 2: Head up the clear pipe and into the green pipe. Now you’ll either need to defeat or simply get past the 10 Blocksteppers in this area. There are two P Panels on the ground. You’ll need to have a character standing on both buttons at the same time to release the Star. If you’re playing solo, you’ll need to manuever your Double Cherry clone so that both you and your doppleganger are on a separate button.
Stamp: Go up the right clear pipe and activate the checkpoint flag. Make your way up the platforms and to the left. You’ll find a group of three ? Blocks. If you’re playing with a friend, one of you needs to stand on the one furthest to the left while another person hits this block from underneath. This will raise you up until you can reach the Stamp.
If you’re playing solo, you’ll either need to manuever a Double Cherry Clone so that it hits you up the block or use a Super Bell to climb up the wall and grab the Green Star as a cat.
Star 3: Defeat the Hammer Bro. at the top of the block hill to make a green pipe appear. Now enter the pipe. You’ll need to have four characters stand on the yellow platform on the left to get this Star. You might need the assistance of the Double Cherrys to make this possible if you’re playing with less than four people.
World 2-Castle: Bowser’s Bullet Bill Brigade (3 Stars, 1 Stamp, 1 Boss)
Star 1: This next area has you making your way through a procession of tanks. When you see a Cannon Block, make sure you or someone on your team jumps into it. Jump and dodge your way through the tanks until you see three Piranha plants with a Green Star in the middle. Have the cannon person or someone turned into a cat destroy them so you can grab the Star and continue on.
Star 2: You’ll get to another section of tanks and you’ll see a large wooden block on one of them. Destroy this to get the second Green Star.
Stamp: As you continue on, you’ll see an area with a gate platform. Someone needs to quickly run over to it and jump on top to grab the Stamp.
Star 3: At the end of the course, you’ll see a green pipe. Before jumping down it, use the cannon block to break the wooden panel with Bowser’s face on it to get the last Green Star.
Boss fight: You’ll need to knock Boom Boom down twice in order to defeat him. You can do this by jumping on him and avoiding his flailing arms, or shooting him with the cannon block. Just be careful; he turns invisible and can be hard to spot at times.
World 2-Mystery House: Mystery House Melee (5 Stars)
You’ll need to run through a gambit of enemies to get all five Stars here. The easiest way to do that is to fight as a cat the whole way through.
Star 1: Defeat the two Goombas within the 10 second time limit.
Star 2: Defeat the two Koopas within 10 seconds to get this Star.
Star 3: Beat the two Cat Goombas within 10 seconds to get this Star.
Star 4: Defeat the two Conkdors withing 10 seconds. This is easiest to do if you can swipe at them with cat claws.
Star 5: Beat the two Hammer Bros. within 10 seconds to get the final Green Star.
All Stars in Super Mario 3D World + Bowser’s Fury
- World 1
- World 2
- World 3
- World 3-1: Snowball Park
- World 3-2: Chain-Link Charge
- World 3-3: Shifty Boo Mansion
- World 3-4: Pretty Plaza Panic
- World 3-A: Magikoopa Blockade
- World 3-5: Pipeline Lagoon
- World 3-6: Mount Must Dash
- World 3-7: Switchboard Falls
- World 3-Train: The Bullet Bill Express
- World 3-Toad: Captain Toad Makes a Splash
- World 3-B: A Banquet with Hisstocrat
- World 4
- World 5
- World 6
- World Castle
- World Bowser
- World Star
- World Mushroom
- World Flower
- World Crown
World 3 — (31 Stars, 8 Stamps)
Try not to freeze as you make your way into the World 3 levels. There are a total of 31 Green Stars and 8 Stamps to collect. Here are tips for how to get them all.
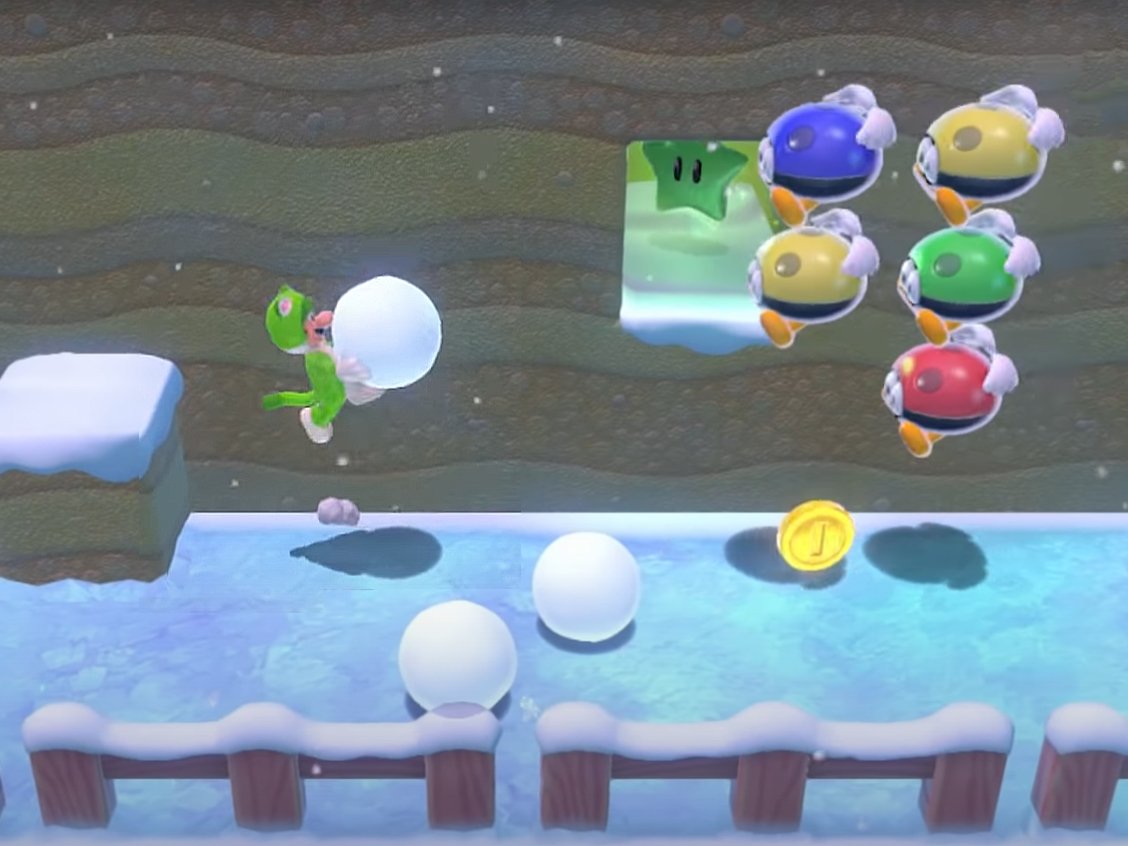
World 3-1: Snowball Park (3 Stars, 1 Stamp)
Star 1: Run to the right and go behind the two tree. Pick up the orange Propeller Box hiding back there. Whoever wears it will be able to fly straight up into the sky and then glide back down.
Use it to fly above the flying Biddybuds and then come crashing down on them until they’re gone and you can get the Green Star behind them. Players can also jump on top of the Biddybuds or throw snowballs to get rid of them.
Star 2: Continue right and past the checkpoint flag. Pass the Ice Skate Goombas and you’ll see a white rabbit running around. Chase it down to get another Green Star.
Stamp: Just past the area where you saw the rabbit, you’ll see an icy area with a hole and a Stamp on the far side. Jump or carefully walk over to it to pick it up.
Star 3: You should see a Green Star in the alcove at the end of this area. To get to it, either jump off from atop the tree, use the Propeller Box, or use a Super Bell to climb up the wall.
World 3-2: Chain-Link Charge (3 Stars, 1 Stamp)
Star 1: Head right dodging the moving platforms that try to shove you off. You’ll reach an area where two gates are moving up and down with golden Coin Rings nearby, the second set of Coin Rings has a Green Star floating at the top. Use the gate to either wall jump to get it or if you are currently turned into a cat with the Super Bell, climb up the gate to reach the Star.
Star 2: Continue on dodging through the floating gates. You’ll eventually see a warp box. Ignore it for now and wait for the camera to pan right. A Green Star is sitting on a cloud platform after a double set of moving gates. Time your jump accordingly to reach the cloud platform and grab the second Green Star before heading to the warp box.
Stamp: Pass the checkpoint and continue up the level while dodging gates and enemies. When you get to a stationary blue gate with a clear pipe beside it, someone who is turned into a cat needs to climb up the fence where the Coin Ring shadows are. A Stamp is floating just above them.
Star 3: Hit the Cat Wheel to move the two wooden blocks on the right up. Now, climb up on top of the boxes to reach the last Star.
World 3-3: Shifty Boo Mansion (3 Stars, 1 Stamp)
Star 1: Head right and jump into the large Boo picture at the top of the stairs. The room will rotate until you’re able to grab the Green Star.
Stamp: There is a red sofa just to the left of the Boo picture. Get on it and ride it to the top to get the Stamp.
Star 2: Keep going and head into the library. Make your way onto the top middle platform with a ? Block on it. This will cause it to move. Go left and touch each of the platforms to make them move away until a Green Star is revealed.
Star 3: Go past the checkpoint flag, past the Big Boo, and into the purple door on the right. Continue on passing the ghostly Peepas moving in unison to block your way to the next purple door. You’ll now be back inside. Head right as far as you can and make sure you pass the purple door at the end of the hall. Jump on the red sofa and allow it to give you a ride to the higher platform. Jump into the pipe and it will turn into a Green Star.
World 3-4: Pretty Plaza Panic (3 Stars, 1 Stamp)
You’ll want to play as Princess Peach to get all collectibles in this level.
Star 1: Immediately upon entering the level jump towards the camera and over the small arch to reach a cloud with a Green Star on it.
Star 2: Make your way across the first set of rotating platforms and you’ll see a small body of water with a rabbit nearby. Chase the rabbit down to get the next Star.
Stamp: You’ll need to play as Princess Peach to get this Stamp. After catching the rabbit, make your way onto the next set of rotating platforms. When you get to the area with a + Clock, go left and jump on the Princess Peach button to reveal the Stamp.
Star 3: Continue along the rotating platform until you see a Goomba surrounded by Mini Goombas. Jump up on the column behind them to reach the Cloud Cannon. Now make your way to the very end of these cloud platforms and snatch the final Green Star just before falling down to the ground.
World 3-A: Magikoopa Blockade (1 Star)
Star 1: You must defeat three Magikoopas to get this Star. To do this, simply dodge around their spells and jump on their heads one time each.
World 3-5: Pipeline Lagoon (3 Stars, 1 Stamp)
The Green Stars in this level are a little tricky.
Star 1: Make your way past the three Swim Ring Goombas and head down the green pipe. Now head right and go underwater until you come to an area with an entrance to a Clear Pipe Cannon with a wooden sign next to it. Instead of going in the pipe, wait for the water to rise and wall jump up to get the Green Star.
Stamp: Continue through the Clear Pipe Cannon and head past the checkpoint. Drop down and head right until you reach an area with a wooden sign pointing down to a bunch of Coin Rings. Go straight up and you’ll come into a hidden area with a Stamp clearly visible. Nab it and break the boxes on the right to hit the ? Block and grab a Cannon Box.
Star 2: With the Cannon Box in tow, drop back into the water and go through the Coin Rings. Shoot a cannonball at the purple Procupuffer to get rid of it and then shoot a cannonball at the cracks in the wall to reveal a green pipe. Entering the pipe brings you to a room with a Green Star and several Coins.
Star 3: Once you’ve left the pipe that leads to the second Star, head right and defeat the Porcupuffers blocking your way with some well timed cannonballs. Instead of heading into the pipe, head straight up where the third set of Porcupuffers were swimming and you’ll find a Clear Pipe Cannon. It will lead you to a room with wooden boxes on the right. Swim up above these boxes to get the third Green Star.
World 3-6: Mount Must Dash (3 Stars, 1 Stamp)
Star 1: Start dashing your way right. The path will split shortly after reaching a trio of Biddybuds, go down and hop along the platforms to get the first Green Star.
Star 2: After passing the checkpoint, climp up the hill until you reach a large number of Biddybuds floating around a pink Warp Box on a lower platform. You’ll now have 10 seconds to catch the rabbit in this room to earn the second Green Star. Make sure to use the Dash Panels to make this happen.
Stamp: After leaving the Warp Box area, continue heading right until you see a Jump Panel right before the colorful slide. Use the Jump Panel to hit the two angled Mushroom Trampolines and reach the Stamp floating in the air above.
Star 3: Continue down the colorful slide and when you get to the Jump Panel at the bottom, you’ll need to hit it just right so as to propel yourself onto the platform on the right with the Green Star. You can also use a Super Bell to turn yourself into a cat and climb up the wall to get the last Star.
World 3-7: Switchboard Falls (3 Stars, 1 Stamp)
Star 1: Stand on the further side of the Switchboard to make it move down the rails. Now, continue to use the next two Switchboards and Switchblocks to help navigate your character(s) further into the level. When you’re going down the rails just after being in the area next to the rolling orange and yellow Fuzzler, jump at the right moment to reach a platform with three + Clocks on it. Stand in the center Donut Block and it will fall away. Try to touch all of the Coins and Coin Rings as you fall and this will lead you to the first Green Star.
Star 2: After passing the checkpoint, make your way along the floating Switchboards and through the waterfall. Head right and drop onto the left side of a Switchboard to make it move forward. Duck and you’ll go under the wall to reach the second Green Star behind the waterfall.
Star 3: Make your way along the Switchboards until you get to the one that drops below when the Switch Block is activated. Press down on the right side of the Switch and jump over the Fuzzler that comes rolling down at you. The third Green Star awaits you at the end of the rails.
Stamp: Step on the left side of the Switchboard and jump onto the Switchboard on the left. Use it to head right and you’ll reach the Stamp.
World 3-Train: The Bullet Bill Express (3 Stars, 1 Stamp, 1 Boss)
Star 1: Quickly jump on top of the Train and get the Green Star on the tail end.
Star 2: Head right dodging enemies and Cat Bullet Bills until you see a stack of five Goombas with a Star on top. Defeat the Goombas by swiping them using cat claws or getting the Cat Bullet Bills to run into them then grab the Green Star.
Star 3: Head down the green pipe in the area where the large Cat Banzai Bills are shooting near a large group of boxes. This will take you to the other train in the distance. Right before getting to the Warp Box at the head of the red train, you’ll see a wooden box. Destroy it to rescue Captain Toad and he’ll reward you with a Green Star. Now use the Warp Box to get back to the main train.
Stamp: You’ll see two red Hammer Bros. on the Bowser Train. Drop down to the Hammer Bro. inside the train and defeat him. Now you can reach the Stamp that waits further in.
Boss: Pom Pom clones herself, but the real one only throws pink Shuriken. Dodge her throws and then jump on the real one, or swipe at her with cat claws three times to defeat her.
World 3-Toad: Captain Toad Makes a Splash (5 Stars)
Star 1: Drop down intot he water and head through the clear pipe on the backside of the level. Come out of the second clear pipe opening and grab the Green Star in the opening.
Star 2: Head into the water once more and time your movements so you dodge the purple Rammerhead Shark to grab the Green Star at the end.
Star 3: Drop back into the water and head through the clear pipe on the backside. Pop out of the first clear pipe opening. Walk down the wooden planks and into the wall. Now fall down into the water on the backside of the level. Walk along the grassy flooring to reach this Star.
Star 4: Drop into the clear pipe next to the third Star to get on the highest platform. Fall through the hole and drop on the P Switch to raise the water level. Now walk on the raised wooden plank to get the fourth Green Star.
Star 5: While next to the P Switch with the water raised, head along the wooden platform that leads just under the fifth Star. Go under it and then up the block ramp to reach the final Star.
World 3-B: A Banquet with Hisstocrat (1 Star)
Star 1: As with most things in this game, this battle is a lot easier if you are using a Super Bell and have been turned into a cat. There’s a white X on Hisstocrat’s head. You’ll need climb up the saucers on top of the lesser snake heads; then jump and hit Hisstocrat on the X three times in order to defeat him. Avoid his attacks and if you need to step on cracked plates do so quickly.
All Stars in Super Mario 3D World + Bowser’s Fury
- World 1
- World 2
- World 3
- World 4
- World 5
- World 6
- World Castle
- World Bowser
- World Star
- World Mushroom
- World Flower
- World Crown
World 4 — (30 Stars, 6 Stamps)
Things get a little trickier as we move on to World 4. Whether you’re playing co-op with friends or solo, here’s where you’ll find all 30 Green Stars and 6 Stamps in World 4.
World 4-1: Ant Trooper Hill (3 Stars, 1 Stamp)
Stamp: Make your way up the cliff and into the Ant Trooper cave. You’ll see an area where six Ant Troopers are walking around a block and a Stamp is floating above it. Time your jump to get on this block when there is an opening and grab the Stamp. It can also help to have someone who’s turned into a cat climb up the wall and grab it.
Star 1: Shortly after seeing the stamp, you’ll see a bridge with several Horned Ant Troopers crawling all over it. Instead of stepping onto the bridge, head right and use a Super Bell to climb up the cliff as a cat to get the first Green Star.
Star 2: Cross the Horned Ant Trooper bridge and use a Big Ant Trooper to reach the green pipe in the wall. This leads you to an area with several Ant Troopers walking back and forth on a wall. Either bounce on their heads to reach the Green Star or have someone who is turned into a cat make their way to the top and grab it.
Star 3: Leave that pipe and head right. You’ll need to bounce on a Big Ant Trooper as it walks across spikes. Jump at the proper moment to grab a floating Green Star.
World 4-2: Piranha Creeper Creek (3 Stars, 1 Stamp)
Star 1: Make your way past the various Piranha Creepers until you find a blue one that is sleeping. Jump on its head to make it recede and then jump on its head to defeat it before entering the pipe. Just after dropping into the cave, you’ll see another sleeping Piranha Creeper. Jump on it tounblock the pathway and then jump into the Warp Box. You’ll now have 10 seconds to jump across four Piranha Creepers’ heads and reach the Green Star.
Star 2: Pass the checkpoint flag and drop into the middle square hole with water in it. Go to the very bottom to retrieve the second Green Star.
Stamp: Just after the second Star, you’ll see a Piranha Creeper hanging out over a larger body of water. Jump on its head and continue right instead of dropping into the water. This will lead you to the Stamp. Now enter the pipe and continue to the next area.
Star 3: Hop across the platforms on the poison river until you reach the Green Star Ring. You’ll need to collect all eight Green Coins that appear on the two wooden platforms to get the Green Star.
World 4-A: Brolder Blockade (1 Star)
Star 1: Ground pound on the Brolder’s head and then throw it into the lava. This will make three more appear. Do the same to these three to get the Green Star. You can also throw them at each other to get rid of them.
World 4-3: Beep Block Skyway (3 Stars, 1 Stamp)
Star 1: Make your way over the switching Beep Blocks and hit every ? Block along the way to acquire as many Double Cherries as possible. When you get to the area with the two blue Hammer Bros., time your jumps correctly to grab the Green Star.
Stamp: When you get to the checkpoint flag, you’ll see an elevator with a 4 on it. Four characters need to step on it whether they are individual players or Double Cherry clones. It will raise you up so you can get the Stamp.
Star 2: After coming out the otherside of a Warp Box, you’ll see two blue Hammer Bros. and a green pipe on the platform behind them. Enter the pipe and jump on the P Switch to make several Blue Coins appear. You’ll need to touch all of the coins within the time limit to make the Green Star appear. This is a lot easier if you have several Double Cherry clones.
Star 3: Leave the pipe and slide your way down the Beep Block slide. Make sure to jump when necessary to switch to a different color. When you get on the bottom you’ll see two P Panels. One character needs to stand on either panel at the same time to unlock a Green Star.
World 4-4: Big Bounce Byway (3 Stars, 1 Stamp)
Star 1: Make your way through the level and up the Mushroom Trampolines until you get to an area with three green Hop-Chop enemies. Jump on one’s head to turn it into a springboard to get the Green Star in the cliff behind you.
Star 2: Grab the green springboard and continue with it to the right. If it turns back into a Hop-Chop, you’ll need to defeat it again to make it turn back into a springboard. Just past the checkpoint flag, you’ll see two angeled Mushroom Trampolines going up and down the cliff face. Use the springboard to jump onto one of the Mushroom Trampolines and then ride it upwards. Bounce between the two pads to grab the second Green Star.
Star 3: Continue on and enter the pink Warp Box next to the wooden sign. Defeat the three Hop-Chops to turn one into a springboard. Now jump on it and grab the Star.
Stamp: Bounce your way along the large Mushroom Trampoline while avoiding Biddybuds. There’s an area where several of these bugs are flying around a Stamp. You’ll need to defeat them to grab it safely. It helps if you have a Fire Flower or Super Bell so you can attack them and get them out of your way.
World 4-Mystery House: Mystery House Mad Dash (10 Stars)
This is a gauntlet of Stars. You’ll need to complete these tasks in order if you want to get all 10 Stars.
Star 1: You have 10 seconds to bounce along the Jump Panels and reach the Green Star near the highest cliff.
Star 2: Within 10 seconds, you need to make it past the Horned Ant Troopers and grab the Star.
Star 3: In less than 10 seconds, run towards the camera and jump over any wooden boxes that get in your way until you reach the Star.
Star 4: You’ve got 10 seconds to run past the two rows of Spikes and avoid their spiked rollers to reach the Green Star at the end.
Star 5: In 10 seconds or less, you need to wind your way along the wooden path and reach the Green Star.
Star 6: With the help of the Dash Panel, run underneath the row of Thwomps and grab the Green Star within 10 seconds.
Star 7: Jump across the swinging platforms and use the third one to jump and grab the Green Star within 10 seconds.
Star 8: Within a 10 second time limit, run past the horde of Goombas and Mini Goombas and reach the Green Star at the end. It helps to have a Super Bell and attack them with cat swipes.
Star 9: You have 10 seconds to run along the wooden planks avoiding Cat Bonzai Bills until reaching a Green Star.
Star 10: In 10 seconds or less, you need to run across the disappearing Donut Blocks and avoid being hit by spiked rollers and then reach the Star at the end.
World 4-B: Fire Bros. Hideout #1 (1 Star)
Star 1: Defeat the three red Fire Bros. to earn this Star. To do that, dodge their fireballs and then jump on their heads or cat claw them when there’s an opening.
World 4-5: Spike’s Lost City (3 Stars, 1 Stamp)
Stamp: As you’re making your way past all of the Spike enemies, you’ll notice a stone platform coming out from the ramp. Run along this towards the camera to find the Stamp.
Star 1: Enter the pipe on the top right of the level and then step on all of the blue ? Panels to turn them into yellow ! Panels. This will unlock a Green Star.
Star 2: Head past the checkpoint flag and jump your way along the swinging platforms with spike rollers. Next, you’ll see a ramp with spike rollers coming down it. Make your way to the top of this ramp and then use a Super Bell to climb up the cliff near the camera view as a cat. A Green Star is hiding up there.
Star 3: Jump past the next set of swinging platforms with spike rollers. The platform on the far left has a Green Star.
World 4-Castle: Lava Rock Lair (3 Stars, 1 Stamp, 1 Boss)
Star 1: If you’re playing with friends, at least one of you needs to stand on either P Panel to make a bridge drop down so you can get the first Green Star. If you’re playing soloe, you’ll need to ground pound a Brolder near the start of the level and then pick it up and carry it to the P Panel. Throw the Brolder on one P Panel and then step on the other one to lower the bridge.
Star 2: Go through the Clear Pipe Cannon and then jump into the Warp Box. Two Brolders will appear and you’ll have 10 seconds to step on all three P Panels at the same time to get a Star. If you are playing with two people or less, you’ll need to quickly ground pound the boulders and then throw them on two of the P Panels before stepping on the third one yourself.
Stamp: Someone in your party must be turned into a cat to get this Stamp. On the opposite side of the bridge from the Warp Box, climb up the stone until you reach a platform with the Stamp on it.
Star 3: You’ll now need to cross a bridge over lava. You’ll see a Green Star floating off to the left. Ground pound a Brolder and then throw it at the Star to claim it.
Boss: Boss Brolder: Grab one of the smaller Brolders and then throw it at Boss Brolder three times to defeat him. You’ll need to avoid his attack and projectiles between each hit.
All Stars in Super Mario 3D World + Bowser’s Fury
- World 1
- World 2
- World 3
- World 4
- World 5
- World 5-1: Sunshine Seaside
- World 5-2: Tricky Trapeze Theater
- World 5-3: Backstreet Bustle
- World 5-4: Sprawling Savanna
- World 5-5: Bob-ombs Below
- World 5-6: Cakewalk Flip
- World 5-7: Searchlight Sneak
- World 5-Castle: King Ka-thunk’s Castle
- World 5-A: Chargin’ Chuck Blockade is Back
- World 5-B: Fire Bros. Hideout #2
- World 5-Toad: Captain Toad Plays Peek-a-boo
- World 6
- World Castle
- World Bowser
- World Star
- World Mushroom
- World Flower
- World Crown
World 5 — (31 Stars, 8 Stamps)
There are so many fun locations to discover as you make your way through World 5. Here’s what you need to know to be able to pick up all 31 Stars and 8 Stamps in this location.
World 5-1: Sunshine Seaside (3 Stars, 1 Stamp)
Star 1: Jump on one of the green Koopa’s backs and then steal its shell. Throw the shell at the third sand Goomba to unearth your first Green Star.
Star 2: On the right side of the beach, there’s a small hill with two green Koopas on it. Head into the water from this location and you’ll find a pipe underwater. Enter it. You’ll need to touch all of the Color Panels in the room to unlock the second Green Star.
Star 3: Go to the far right of the beach and you’ll see an opening in the wall. Either jump on a friend’s head or on an enemy’s head to get in there. Captain Toad is being chased by Biddybuds. Destroy them all and Captain Toad will give you a Green Star.
Stamp: To get this Star, you’ll need to collect all five of the Key Coins scattered around the area to unlock the Warp Box. Here’s where you’ll find them all:
- Key Coin 1: You’ll find this first one on the far side of the pier where the eight Biddybuds are moving back and forth.
- Key Coin 2: Head right and you’ll see two palm trees with a clear pipe in the center. Jump in the clear pipe and shoot yourself skyward. A Key Coin is waiting for you up here.
- Key Coin 3: Go right and climb to the top of the second palm tree you see. A Key Coin is in the canopy.
- Key Coin 4: On the right side of the beach, there’s a small hill with two green Koopas on it. Drop into the ocean and then come towards the hill. There’s a cave under the hill that hides a Key Coin at the end of it.
- Key Coin 5: See the Red Ring near the clear pipes? Go through it and then collect all of the Red Coins to earn a Boomerang Flower. Now use your Boomerang to easily get rid of the Chargin’ Chucks huddle together in front of the Bowser sand sculpture.
Now that the Warp Box is unlocked, jump into it and get on Plessie’s back. Ride along the waterway until near the very end where you see three raised wooden platforms on the right. Bounce along these instead of riding in the water and you’ll grab the Stamp on the last platform before reaching the end.
World 5-2: Tricky Trapeze Theater (3 Stars, 1 Stamp)
Star 1: Make your way along the course, dodging enemies and swinging on trapezes, until you reach the colorful platform with the spiked roller on it. Jump up on the left side and you’ll find a hidden cloud platform that allows you to reach an area with a Green Star. If you have a Super Bell, use it to climb up the wall and get the Star.
Star 2: Continue right until you see the Piranha Plant roulette wheel. Go to the right of the wheel and enter the green pipe. Now jump on the P Switch and collect all of the Blue Coins before they disappear to unlock a Star.
Stamp: Bounce your way to the ledge above the Piranha Plany roulette wheel and head left on the steps to get a Stamp.
Star 3: Continue through the Clear Pipe Cannon and you’ll be brought to a place with a Green Star Ring. Jump through it and then use the glowing trapeze swings to collect 8 Stars and unlock a Green Star.
World 5-3: Backstreet Bustle (3 Stars, 1 Stamp)
You’ll need to have gathered 80 Green Stars in order to unlock this course.
Star 1: Immediately when you arrive in the level, head left and you’ll see an area on the floor where the tile is broken. Ground pound on it to get this Star.
Stamp: You’ll need to play as Toad to get this Stamp. Make your way to the back right corner of the room where the Fire Piranha plant is and have Toad jump on the blue button to get this Stamp.
Star 2: This level is pretty easy if you’ve got four players. However, if you have less than that, you’ll need to get help with Double Cherries. Go back to the starting area and hit the ? Block to get a Double Cherry. Use the 2 Platform to ride to the next area. Head right and hit the three ? Blocks to get another Double Cherry. Now hit the three ? Blocks on the left to get another. Stand on the 4 platform and ride up to get the second Green Star.
Star 3: Simply fall down on the platform below to get the last Green Star before heading to the flagpole.
World 5-4: Sprawling Savanna (3 Stars, 1 Stamp)
Star 1: When you first arrive, you’ll see an Ant Trooper carrying a Super Bell behind. Use it if someone on your team isn’t already a cat, then hit the ? Block right when the Ant Trooper walks over it to obtain the power-up. Now head right and up the cliff. Instead of entering the Clear Pipe Cannon, someone who’s turned into a cat needs to climb up into the alcove on the left to snag the Green Star. You can also try jumping on someone’s head to try and reach it.
Star 2: Once you reach the checkpoint flag, you’ll find yourself on a large open plane or savanna with a group of rabbits to your left. Chase down the one that’s glowing green to get your second Star.
Stamp: Head towards the raised cliffs in the distance and you’ll eventually notice a line of ants falling into a hole. Wait for the right moments and drop into the hole. Grab the Stamp on the Big Ant Trooper’s back.
Star 3: Continue up the distant cliff using the Clear Pipe Cannons and you’ll see two rotating platforms with a Green Star Ring. Jump through the ring and then collect the coins to get your last Star.
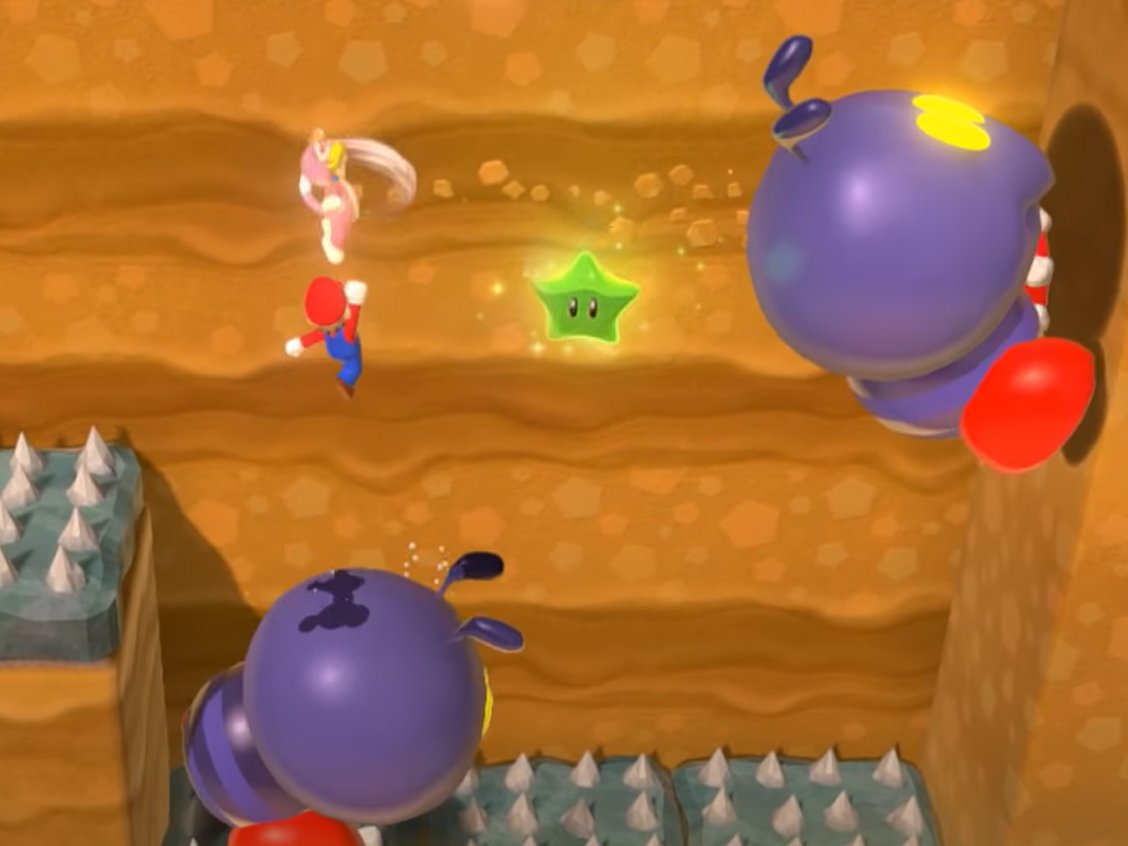
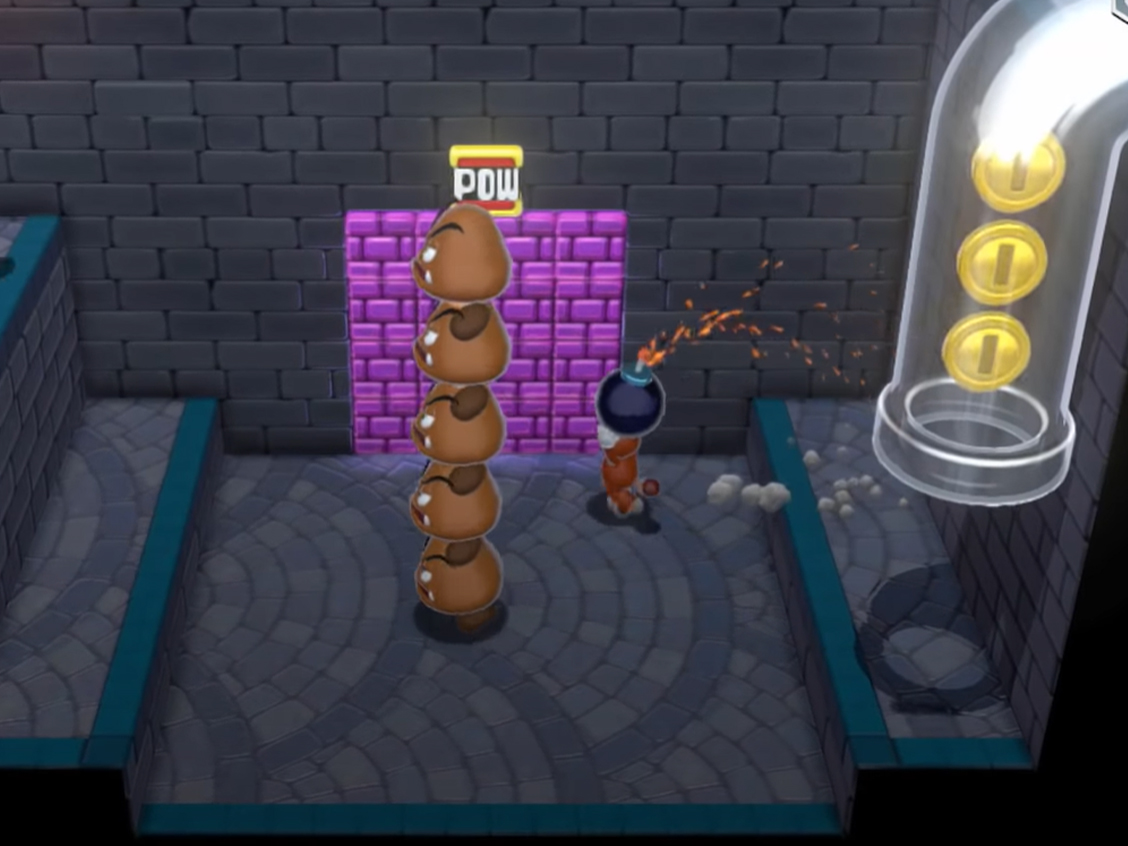
World 5-5: Bob-ombs Below (3 Stars, 1 Stamp)
Star 1: Move right until you see that stack of Goombas with a bunch of purple brick blocks behind them. Grab a Bob-omb and throw it at the wall to reveal a Green Star. You can also cat slash at these bricks with the help of a Super Bell.
Star 2: Move down the course until your reach a ring-shaped platform with a rabbit on it. Chase the rabbit down to get your second Green Star.
Stamp: Just after the area with the rabbit, you’ll see another area that’s been walled off with purple brick blocks. Grab a Bob-omb and throw it at the wall. Then go behind the wall a ways to grab your Stamp.
Star 3: As you continue alone the course, you’ll eventually see a Clear Pipe that moves past a Cloud Cannon. Ride the pipe and then press down to enter the middle pipe area. This will launch you into the clouds and onto an 8-bit Mario. Step on all of the Color Tiles to unlock your Green Star.
World 5-6: Cakewalk Flip (3 Stars, 1 Stamp)
Star 1: This course is filled with Red-Blue Panels which flip to the other side whenever a player jumps. If you’re playing with others, you and your friends will need to coordinate when to jump in order to safely make it across. When getting a Star on a Red-Blue Panel, I suggest assigning one person to the task while everyone else stays still on a secure platform. The first Green Star is on the top right of the second set of Red-Blue Panels.
Star 2: When you get to the area where to Ring Burners are producing an overlapping set of plasma waves, use a power-up of some sort to kill the Piranha Plant and then jump down into its green pipe. Step on the P Switch to release a green ball and then jump accordingly to make the Red-Blue Panels rotate and guide the ball to the P Panel on the bottom left. You’ll get a Green Star for successfully doing this.
Stamp: Above the area where you got the second Green Star, you’ll see a 2 Platform. Have to players stand on it to get the Stamp. If you’re playing solo, you must grab the Double Cherry that’s in the ? Block above the level’s first Ring Burner and then maintained your clone for most of the course to get this Stamp.
Star 3: Jump your way over to the Green Star Ring past the next Ring Burner and then carefully collect the Green Coins to get a Star. Once more, this is trickier to do if more people are playing and jumping around. Note that Green Coins can only be found on the blue side of the Red-Blue Panels.
World 5-7: Searchlight Sneak (3 Stars, 1 Stamp)
Star 1: Defeat the Hop-Chops you encounter until you find one that turns into a Springboard. Now pick it up and carry it with you. Put it down in front of the middle cannon on the third level with a spotlight and then jump on it to reach the Green Star.
Stamp: Head past the check point and then jump on top of the next set of blocks to grab the Stamp.
Star 2: Make your way along the wall until you reach an area with cracks and pink light coming through. Get the Cat Bonzai Bills to crash into this area and then enter the Warp Box. Carefully make your way up the steps and grab the Green Star.
Star 3: Keep moving up the wall until you reach the area with the Green Star surrounded by blocks. Get the Cat Bonzai Bills to crash into the blocks until there’s an opening for you to reach the Star.
World 5-Castle: King Ka-thunk’s Castle (3 Stars, 1 Stamp)
Star 1: Make your way along the course until you get to the Green Star Ring. Activate it and then collect the eight Green Coins to get your first Star.
Stamp: Pass the checkpoint flag and then run through the Ka-thunk gauntlet without getting hurt. Grab a power-up from the ? Blocks on the right and then continue past the first rolling Ka-thunk. Now climb up the wall as a cat and grab your Stamp.
Star 2: A Green Star can be found floating in the center of on of the third rolling Ka-Thunk’s squares. Wait for it to roll in front of you and then snag it.
Star 3: Near the end of this first area, you’ll see a Warp Box. Before entering it, use a Super Bell to climb up the wall on the left and grab the third Green Star.
Boss: Whenever you run in front of the King Ka-thunk, he will try to flatten you. Make him fall on his face and then jump on the white X on his backside. Do this three times to defeat him.
World 5-A: Chargin’ Chuck Blockade is Back (1 Star)
Star 1: Defeat all five Chargin’ Chucks to get this Star. It can be easier to do if you have a Super Bell or Fire Flower. Otherwise, groundpound on their heads to dispose of them quickly.
World 5-B: Fire Bros. Hideout #2 (1 Star)
Star 1: You’ll see a stack of Goombas with a Fire Bros. on top. You’ll need to defeat them to get the Green Star. You can either do this by riding up the stone pillar and jumping on them or by using a Fire Flower, Super Bell, Boomerang Flower, or Super Leaf power-up to attack them from ground level.
World 5-Toad: Captain Toad Plays Peek-a-boo (5 Stars)
Star 1: Enter the purple door and walk onto the Touchstone and then activate it to raise Captain Toad up. Quickly walk along the falling Donut Blocks and grab the Star.
Star 2: Continue around the corner and enter the second purple door to the left. Now walk right and get the Star.
Star 3: Move right and enter the purple door. This will drop you off on the ledge above. Move left and drop off the small ledge. Go around the corner and activate the Touchstone. Walk past it and make your way onto the next Touchstone. Activate them to make your way up. Now head left along the planks. When you’re on the next Touchstone, activate it and it will bring you to the third Green Star.
Star 4: Go back on the nearby Touchstone and ride it back to where it was before. Now walk straight in and head towards the circle of Peepas. Wait for the proper opening to get in the center and grab the Star.
Star 5: Now wait for the proper opening and leave the Peepa circle by heading up the purple ramp. Move along the Donut Blocks. When you’re on the last one, stay on it and let it drop you down on the platform beneath to get the last Green Star.
All Stars in Super Mario 3D World + Bowser’s Fury
- World 1
- World 2
- World 3
- World 4
- World 5
- World 6
- World 6-1: Clear Pipe Cruise
- World 6-2: Spooky Seasick Wreck
- World 6-3: Hands-On Hall
- World 6-4: Deep Jungle Drift
- World 6-5: Ty-Foo Flurries
- World 6-6: Bullet Bill Base
- World 6-7: Fuzzy Time Mine
- World 6-Castle: Bowser’s Bob-omb Brigade
- World 6-A: Prince Bully Blockade
- World 6-B: Fire Bros. Hideout #2
- World 6-Mystery House: Mystery House Throwdown
- World 6-C: Motley Bossblob’s Big Battle
- World Castle
- World Bowser
- World Star
- World Mushroom
- World Flower
- World Crown
World 6 — (34 Stars, 9 Stamps)
With a total of 34 Green Stars and 9 Stamps, you’re going to be plenty busy as you make your way through World 6’s various levels. But don’t worry. We’re here to help you through it.
World 6-1: Clear Pipe Cruise (3 Stars, 1 Stamp)
Star 1: Head along the course until you get to the area with the long Clear Pipe. Head back to the Yellow Star and then make your way to the Spike Balls and Green Star. This will allow you to obtain your prize without getting hurt.
Star 2: Keep going until you get to the area where the Green Star is clearly visible in the tubes with Fuzzys in it. Time your self appropriately and then enter the pipe and snatch up the Green Star. If you’re playing with multiple people, it might be safer to have one of you go for the Star while the other stand safely to the side.
Stamp: Pass the checkpoint and enter the Clear Pipe Cannon. Upon making it to the other side, get on top of the cannon you just rode through and walk along it until you can jump up and get the Stamp.
Star 3: After entering the Warp Box, you’ll see a Fire Piranha Plant in front of a Clear Pipe on your left. Shoot fireballs into the pipe to clear it of spikes and then enter the pipe to get shot into the clouds. Run right and either throw Fireballs or dodge accordingly to miss running into a Piranha Plant. The Green Star is waiting at the end of the clouds. Just jump and snatch it before falling down.
World 6-2: Spooky Seasick Wreck (3 Stars, 1 Stamp)
Star 1: Move along the haunted ships until you reach a section with two blue Bullys. Knock both of them into the crack on the left to get your first Green Star.
Stamp: After entering the ship, you’ll see an open circle of floating Peepas surrounding a Stamp. Time your jump accordingly to get in and out of there with your prize.
Star 2: After passing that first set of Peepas, you’ll see another. Ground pound the ? Block on the right to get a Yellow Star and then run into the Peepas to get rid of them. There’s a hole in the ground underneath where they once circled. Enter it to get your second Green Star.
Star 3: In the next area, make your way along the teetering planks until you can grab the Green Star. Hint: You’ll then need to defeat the Bullys at the end of the path to make a Warp Box to the flagpole appear.
World 6-3: Hands-On Hall (3 Stars, 1 Stamp)
You will need to have 100 Green Stars to unlock this level.
Star 1: Move through the building and until you’ve passed the Bowser Gong. You’ll see some doors after this, move them aside and you’ll see an empty space. Activate these empty space panels and you’ll unveil a Green Star, some Coins, and two Galoombas.
Star 2: Once your on top of the building with all of the Thwomps, make your way right and hit the second ? Block to get a Propeller Block. Use this to dive into the open expanse in the middle and grab the Green Star before safely shooting back up to safety. Now hold onto the Propeller Block. You’re still gonna need it.
Key Coins: You’ll need to acquire all five Key Coins in order to unlock the Warp Block and move forward. Here’s where you’ll find them:
- Key Coin 1: Behind the two Thwomps at the bottom center of the area.
- Key Coin 2: In the center of the area above the three cloud platforms, but beneath the highest cloud platform.
- Key Coin 3: Floating over a gap in the tiles on the left side of the building.
- Key Coin 4: Floating above the ? Blocks and below the unopened Warp Box near the top of the area.
- Key Coin 5: On the right of the building above a cloud platform.
Stamp: In this next area, you’ll pass two Bowser Gongs and then will see a Spike throwing spike rollers. Follow the spike rollers out onto the balcony and then jump up onto the building using the Propeller Block to get your Stamp.
Star 3: Drop back inside the building and run to the far end, but don’t jump in the Warp Box just yet. Hit the Bowser gong and you’ll be brought to a room with a Spike. Defeat it to earn the last Star.
World 6-4: Deep Jungle Drift (3 Stars, 1 Stamp)
These Stars and Stamp will be much easier to get if you can maintain Super Bell cat powers throughout the course.
Stamp: After you’ve passed the area with the Piranha Creepers, climb up the Blue gate and grab the Stamp the waits up top.
Star 1: In the same area as the Stamp, you’ll see a clear pipe on your right. Wait until the wooden raft is at both openings and then glide through to grab the first Green Star.
Star 2: Pass the checkpoint flag and then use the wooden raft until you see the red shifting gate. Climb up this gate and activate the Green Star Ring. Collect all of the Green Rings to get the Star.
Star 3: After getting the second Star, wait until wooden raft is below you and then jump on top of it. Move passed the Piranha Creepers and then get on the raft again. Instead of immediately entering the Warp Block, climb up the wall and grab your Green Star first.
World 6-5: Ty-Foo Flurries (3 Stars, 1 Stamp)
Stamp: When you get to the area with the Ice Skate Goomba, defeat the enemy and then jump into the skate. Now guide it over the spikes and get your Stamp.
Star 1: Keep going until you see two Ty-Foo clouds separated by a tree. While being careful not to get blown onto the spikes below, jump onto the ? Block in front of the first Ty-Foo. Now jump to reveal a hidden ? Block. Jump on top of that block to get the Green Star.
Star 2: After you’ve passed the checkpoint flag, defeat one of the Ice Skate Goombas and steal its shoe. Drive it over the spikes on the left and into the Warp Box. You’ll have 10 seconds to jump into a new Ice Skate and grab the Green Star at the end of the course. Don’t bother with any enemies, just go straight for the prize.
Star 3: As you keep going, you’ll eventually notice a Green Star in a gap where a whirlwind picks up every few seconds. Time your jump so that when you go for the Star the wind brings you back up to safety.
World 6-6: Bullet Bill Base (3 Stars, 1 Stamp)
The easiest way to get all of the collectibles in this level is by using a Super Bell and running up walls like a cat.
Star 1: Keep running up the course until you can’t go up any more on the far left. Climb up the escalators with slight uppward-pointing arrows on it and get your first Star.
Star 2: Enter the Warp Box and when you’re next to the checkpoint flag, climb up the cliff, and enter the pink Warp Box. As a cat, cling to the rotating wheel on the wall until you reach the Green Star.
Star 3: Continue along the course until you’ve reached the area with the moving escalators just beyond the Big Bonzai Bill. Now, as a cat, ride the escalators up and then to the right to get the last Green Star.
Stamp: After getting the third Star, go as high up as you can and to the left. You’ll find a Stamp waiting for you above some Brick Blocks.
World 6-7: Fuzzy Time Mine (3 Stars, 1 Stamp)
This is one of those levels where the camera keeps going even if you don’t, so you need to stay ahead of it.
Stamp: Make your way up the cloud platforms until you see a sliding platform that hides a Stamp behind it. Jump in at the proper time to safely grab the Stamp and keep going.
Star 1: You’ll eventually see a Green Star on the right of the screen. Get on top of the cloud just above it and then ground pound to retrieve it.
Star 2: As you keep going right, you’ll soon see a yellow teeter totter. Weigh down the platform so it’s going up to the left and then jump up on the high end to reach the Star.
Star 3: Keep going until you see an area where yellow blocks are coming out of the wall on either side. When they part, you’ll need to quickly jump up and grab the Green Star they’re hiding. Wait in this safe space until the blocks move away and then continue on to the end of the level.
World 6 Castle: Bowser’s Bob-omb Brigade (3 Stars, 1 Stamp)
Star 1: You’ll once more find yourself along a parade of tanks. Make your way along until you reach a long ? Block on the left that produces Bob-ombs. Throw it at the ? Blocks in front of you to make them rise so you can get the first Green Star.
Star 2: On the very next tank platform, you’ll find a Bob-omb walking around. Hit him and then pick him up. Throw him at the grey Brick Block on the next tank on the right to unearth a Star. If you miss the first time, don’t worry. Another Bob-omb will jump out of a box. Repeat until you get it.
Star 3: When you see a chain-link fence with a stack of coins on it, you’ll notice that there’s a ? Block just a little further. Ground pound this block and it will extend to the right so you can reach the final Green Star.
Stamp: Just after the area with the last Green Star, you’ll see a Bob-omb. Pick it up and carry it to the end of the procession. Now throw it at the Bowser icon to get your Stamp.
Boss: Run away from this guy while he spins until he gets dizzy and falls over. Now jump on his head while he’s down. He’ll repeat the process and will try to hit you with shells. Continue to dodge his attacks and hit him two more times to defeat him.
World 6-A: Prince Bully Blockade (1 Star)
Star 1: Shove Prince Bully into one of the clear pipes and he’ll come out another end. Jump on him or use a power-up on him while he’s down and then repeat two more times to get the Star. A Boomerang Flower is the best way to defeat him quickly.
World 6-B: Fire Bros. Hideout #3 (1 Star)
Star 1: You’ll find yourself in a room with one Fire Bro., two Boomberang Bros., and two Hammer Bros. You’ll need to dodge around and defeat each of them before time runs out. The easiest way to do this is for every player to wield Fire Flower powers and shoot fireballs.
World 6 Mystery House: Mystery House Throwdown (5 Stars)
This is a gauntlet of Stars. You’ll need to complete these tasks in order if you want to get all 5 Stars.
Star 1: You’ll need to grab a baseball, throw it, and hit the Star within 10 seconds to win your prize.
Star 2: Once more grab a baseball and throw it at the Star within 10 seconds. Time yourself appropriately as the Red-Blue Panel will move whenever you jump.
Star 3: Grab one of the baseballs and use the Jump Panel to shoot it at the P Switch on the wall within 10 seconds.
Star 4: Yet again, get your hands on a baseball and chuck it at the Pow Block to the right. When hit properly, it will defeat all of the Biddybuds and release a Green Star.
Star 5: Grab baseballs and throw them at the three Blue ? Switch Panels behind the three Thwomps. Once all three are activated within the 10-second time limit you’ll get your Star.
World 6-C: Motley Bossblob’s Big Battle (3 Stars, 1 Stamp)
Star 1: Upon entering the level, run to the left and hit the ? Block to get a Double Cherry. Now ride the lift down to the boss area below. The Bossblob will bounce around before slamming hard on the ground and losing its…blobs. Run away from him until the real villain is exposed. Then jump on his head and grab another Double Cherry. Repeat the process two more times to beat him.
All Stars in Super Mario 3D World + Bowser’s Fury
- World 1
- World 2
- World 3
- World 4
- World 5
- World 6
- World Castle
- World Castle-1: Fort Fire Bros.
- World Castle-2: Switchblack Ruins
- World Castle-3: Red-Hot Run
- World Castle-4: Boiling Blue Bully Bell
- World Castle-5: Trick Trap Tower
- World Castle-6: Rammerhead Reef
- World Castle-7: Simmering Lava Lake
- World Castle-Castle: Bowser’s Lava Lake Keep
- World Castle-A: Brolder Blockade is Back
- World Castle-B: Prince Bully Blockade is back
- World Castle-C: Fire Bros. Hideout #4
- World Castle-Toad: Captain Toad Gets Thwomped
- World Bowser
- World Star
- World Mushroom
- World Flower
- World Crown
World Castle — (32 Stars, 8 Stamps)
Things start to heat up once we reach World Castle. Within the 12 courses located here you’ll find a total of 32 Green Stars and eight Stamps. Here’s how to get them all.
World Castle-1: Fort Fire Bros (3 Stars, 1 Stamp)
Star 1: Move along until you come to the area where a Fire Bro is throwing fireballs through the clear pipe. Wait for them to jump and then immediately enter the pipe and zag into the middle area to grab the Star. If you want, you can walk along the top of the pipe first and defeat the Hammer Bro before getting the Star.
Stamp: After the area with the first Star, you’ll see two rotating fireball obstacles stemming from ? Blocks. Ground Pound the second block and it will rise up, bringing you to the Stamp.
Star 2: In the next section just after the checkpoint flag, get on top of the clear pipe and then jump on to the first Thwomp. Then, jump up to the top of the wall and head left and through a green pipe. When you step on the blue P Switch in this room, a green ball will begin rolling down the platforms on the wall in front of you. Jump at the right times to swing the Red-Blue Panels in such a way that they lead the ball to the P Panel in the bottom left. Then the Star will be yours.
Star 3: Now get back to where you were before and run right past the Thwomps. You’ll see a Green Star Ring on a round platform. Quickly gather up the eight Green Coins to get your Star.
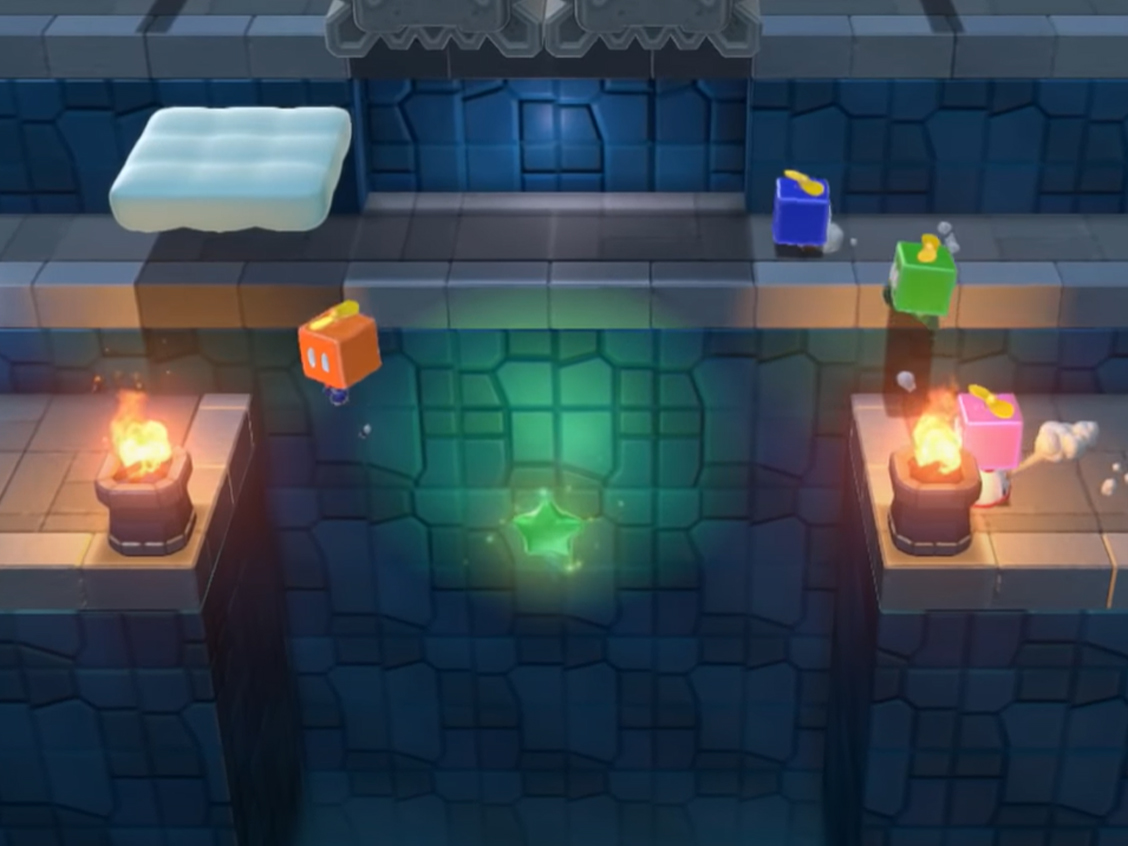
World Castle-2: Switchblack Ruins (3 Stars, 1 Stamp)
Pro Tip: To collect the Stars and Stamp, you will need the assistance of a Fire Flower power-up.
Star 1: Run around the caves grabbing power-ups from ? Blocks and stepping on ? Switches until you get to the dark area with three Spike enemies. There are four torches to light in this room. Hurl fireballs at the Spikes to get rid of them and light the fires to make a Star appear in the center of the room.
Star 2: Shortly after reaching the checkpoint flag, continue right and duck under the hidden passage way to a room with the next Green Star.
Stamp: Continue along until you’re standing on a yellow platform over lava. The platform will bring you to the right. Instead of going through the opening in front of you jump right and grab the Stamp first.
Star 3: Just after the room with the four separate sections of ? Switches, you’ll see a green pipe. Instead of jumping into it, go behind it and jump to reveal a hidden ? Block. Now get on top of it and jump on the ledge above to get the last Star.
World Castle-3: Red-Hot Run (3 Stars, 1 Stamp)
This level can be tough to get through. If you’re having difficulty, I suggest playing as Peach since she can float longer in the air and it’s easier to correct where she lands.
Star 1: Dash forward following the right side of the available pathways. You’ll need to jump right after a Dash Panel to reach the first Green Star.
Star 2: In the next area, run through the Green Star Ring and then run around the next square to grab all of the Green Coins. Once you collect them all, the Star will appear.
Stamp: Continue forward and immediately jump on the far left path. Jump right after a Dash Panel to fling yourself over a gap and grab the Stamp.
Star 3: After grabbing the Stamp, you’re going to need to make your way to the center pathway. Time your jumps accordingly to get past the rotating spike rollers and grab the last Star.
World Castle-4: Boiling Blue Bully Bell (3 Stars, 1 Stamp)
Star 1: Follow the rising and falling arrow platforms until you reach the area with the Green Star Ring. Wait until the platforms near you are raised and then pass through the ring. Run around the platforms to collect all eight Green Coins to get your Star.
Stamp: The Stamp is located in the next section of rising and falling arrow platforms. Run along these blocks and then jump to the left to land on an island with the Stamp. To leave, wait for the platforms near you to rise again and then continue running along them.
Star 2: As you dodge over the spike rollers on your way over the arrow platforms, you’ll see a pink Warp Box on your left. Jump into it. Push the Bully off the ledge within 10 seconds to earn a Star. If you want to do it really quickly, I suggest powering up with a Fire Flower and throwing fireballs at the Bully the moment you arrive.
Star 3: Pass the checkpoint flag and continue right. You’ll see three cylindrical stone platforms with spike rollers orbiting them. The third cylinder has a smaller cylinder attached to it with a Green Star floating above it. Grab it to get your prize.
To get to the flagpole and end the level, you’ll first need to defeat the three Bullies. If you have Fire Flowers, chuck fireballs until they fall into the blue lava. If not, jump on them repeatedly until they fall. A path will then appear leading you to the flagpole.
World Castle-5: Trick Trap Tower (3 Stars, 1 Stamp)
Star 1: Make your way through the obstacle course and get to the top of the structure. You’ll need to defeat the Magikoopas to make a Star appear. If you have a Fire Flower, this will make it a lot easier to defeat them.
Stamp: While standing on top of the first structure where you beat the Magikoopas, drop down on the left side to reach the Stamp.
Star 2: Ground pound while standing on the cloud platforms where you found the Stamp to reach the Star.
Star 3: Once more, get on top of the structure and ride the lift to the next section. You’ll need to collect the five Key Coins to unlock the Warp Box at the bottom. They’ll be right along the ramps and pathways as you make your way through the structure. When you’re facing the fourth Key Coin, you’ll notice that there are some Brick Blocks along the wall. Use your cat claws to scratch away at them and go through the opening to find the last Star.
When you’ve snagged the last Key Coin the Warp Box will unlock, but you’ll need to hurry up and dash out of the structure before the Fuzzy Horde touches you or else you’ll die.
World Castle-6: Rammerhead Reef (3 Stars, 1 Stamp)
Pro Tip: It’s a lot easier to get these collectibles if you have Fire Flower powers.
Star 1: Head right until you see a row of four boxes. Destroy them to reveal a hidden Green Star.
Star 2: Go through the pipe on the far end and you’ll come to an area where Rammerheads are rotating around a wall of stone. One of them has a Green Star trailing after it in a bubble. To make things easy, stand on the platform next to where they pass by and then hurl a fireball at the Green Star bubble to free it. Now snag the Star and safely swim out of there.
Star 3: After passing the checkpoint, cross the land and enter the pipe at the end. You’ll find yourself once more underwater. You’ll find two circular rooms with Rammerheads swimming around them like a propeller. In the second room, swim into the opening in the wall with the clear pipe. Throw fireballs at the spikes to clear them. All that’s left is to go through the pipe to grab your Star.
Stamp: When you get to the room with three rows of Rammerheads swimming up and down, use the first opening to go up a little ways and grab the Stamp. Wait for a good moment and continue right.
World Castle-7: Simmering Lava Lake (3 Stars, 1 Stamp)
Pro Tip: Boomerang Flowers will help you keep rolling Splorch enemies away while you run through the level.
Star 1: Move along to the right but make sure to always be on a higher green platform whenever the lava rises. Hit ? Blocks along the way and get a Boomerang Flower. When you get to the area with two rolling Splorchs, jump onto the green platform that goes away from the camera and throw a Boomerang to get the Star floating over lava on the right.
Star 2: Continue along until you see a Green Star Ring on the left. Quickly run around dodging rolling Splorch enemies and collect all eight Green Coins to unlock your Green Star.
Stamp: Pass the checkpoint and get to the green platform that has a ? Block on either side. Wait for the lava to go down and then jump down under the grate to grab your Stamp. Hot foot it out of there so you don’t get burned.
Star 3: Instead of continuing on to the green pipe, jump onto the grated platform on your left that leads to the center of the area. A Green Star is floating above a green platform in the center. Once you’ve claimed it, head through the pipe.
World Castle-A: Brolder Blockade is Back (1 Star)
Star 1: This battle ought to look a little familiar since it’s a beefed up boss fight from World 4. To defeat Boss Brolder, dodge around the fiery Splorch enemies and ground pound on a small Brolder. Now throw the smaller Brolder at the Boss Brolder to hurt the big lug. Repeat two more times to defeat him and get your Star. If you have Fire Flower powers, you can also throw fireballs at the smaller Brolders and they will be ready to pick up.
World Castle-B: Prince Bully Blockade is back (1 Star)
Star 1: Just like before, you need to pound Prince Bully into a clear pipe and then jump on him when he shoots out in cylindrical shape. Do this three times to beat him and get the Green Star. But be wary: He’ll try to blow blue fireballs at you in between thrashings.
World Castle-C: Fire Bros. Hideout #4 (1 Star)
Star 1: Getting this Green Star requires that you defeat seven Fire Bros. enemies. To make things easier, it’s best to enter the pipe while powered-up with a Fire Flower. Hurl fireballs at your enemies and dodge their attacks to defeat them all.
World Castle-Toad: Captain Toad Gets Thwomped (5 Stars)
Star 1: Walk along the arrow escalator and grab the Star behind the Thwomp.
Star 2: Continue around the next two corners and head into the middle opening. Get on top of the Thwomp and ride up. Head left and grab the next Star.
Star 3: Without dropping down, make your way under the solo Thwomp and onto the heads of the two Thwomps moving up and down next to each other. Walk over their heads on onto the next platform. Walk along the arrow escalator being careful not to get hit by Bullet Bills and snag the Star on Toad’s left.
Star 4: Carefully time you movements and pass the cannons. When the nearby Thwomp rises up, grab the Star from his head.
Star 5: Pass through the small cave nearby and get on top of the Thwomp’s head. Ride up and get on the highest level. Just after the Bullet Bill launches, quickly walk after it and fall into the hole at the end to get the last Star.
World Castle-Castle: Bowser’s Lava Lake Keep (3 Stars, 1 Stamp)
Star 1: Move along defeating enemies until you get to the area with a brick block with rotating flames. On the left just above the lava you’ll see a Green Star. Jump so that you’re sliding down the wall on the left and then wall jump back up to safety right before touching the lava.
Stamp: In the next area, you’ll see a cannon that is shooting out Kick Bombs. Hit it into the tall stack of brick blocks in the back to reveal a P Switch. DO NOT PRESS IT YET. First, wall jump up to the top of this gap to grab the Stamp. Do not press the P Switch when you come back down.
Star 2: You’ll need to have cat powers with the help of a Super Bell to reach this one. Just above the Kick Bomb cannon, there’s a grate that stands straight up. Climb up to the top to grab a Star.
Star 3: Now jump on the P Switch to lower the grate and walk across. Keep going and pass the checkpoint flag. Shortly after that, you’ll see a Green Star floating over lava in the distance. Use a Boomerang Flower power-up to hurl a Boomerang at it before continuing on.
Bowser Boss battle: He’s easier to beat if you have cat or boomerang powers. Follow after Bowser, dodging his fireballs and the spikes along the way. Launch any soccerball-shaped Kick Bombs he releases back at him. If a Kick Bomb is flashing red, stay away and let it explode. You’ll need to make him fall on his back three times to beat him.
All Stars in Super Mario 3D World + Bowser’s Fury
- World 1
- World 2
- World 3
- World 4
- World 5
- World 6
- World Castle
- World Bowser
- World Bowser-1: Spiky Spike Bridge
- World Bowser-2: Plessies’ Dune Downhill
- World Bowser-3: Cookie Cogworks
- World Bowser-Train: The Bowser Express
- World Bowser-4: Footlight Lane
- World Bowser-5: Deepwater Dungeon
- World Bowser-6: A Beam in the Dark
- World Bowser-7: Grumblump Inferno
- World Bowser-A: Motley Bossblob’s Encore
- World Bowser-B: Hisstocrat Returns
- World Bowser-Mystery House: Mystery House Claw Climb
- World Bowser-Castle: The Great Tower of Bowser Land
- World Star
- World Mushroom
- World Flower
- World Crown
World Bowser — (39 Stars, 9 Stamps)
Despite all the work you’ve done up to this point, Bowser has managed to swoop in and capture all of the Sprixies again. It’s time to chase after him in World Bowser. There’s a total of 39 Green Stars and nine Stamps hidden throughout these courses. Here’s what you need to know to collect them.
World Bowser-1: Spiky Spike Bridge (3 Stars, 1 Stamp)
Star 1: Being turned into a cat will make this first Star much easier to grab. Move through the rainy course until you get to the area with multiple spike platforms and a Fire Bro. There’s a Green Star on the raised platform to the far left. Defeat the Fire Bro to make things easier and then head left being careful not to touch the spikes. Climb up the wall as a cat and grab your Star.
Stamp: Pass the checkpoint flag and jump into the Warp Box. Head to your bottom left following the spikes to get a Stamp at the end. Be careful to jump over the wave of spikes on your way back.
Star 2: See the Fire Bro on the left? Defeat him and hit the ? Block to get a power-up. Now climb up the wall using your cat powers and enter the pink Warp Box. Within 10 seconds you need to climb up the wall on the left, press in the P Switch, climb back up the wall to the right. and jump over to the Green Star.
Star 3: This next one is pretty tricky. You’ll come to a large platform with several Dry Bones enemies walking around. Head straight for the ? Block to the far upper right and get the Yellow Star. Now run into all of the Dry Bones to get rid of them. Wait for the large moving spike platform to come close and then run along it to grab the Green Star floating to the left. The Yellow Star will quickly run out so keep an eye on those spikes as you continue forward.
World Bowser-2: Plessies’ Dune Downhill (3 Stars, 1 Stamp)
Star 1: Right before coming to the two Goomba-shaped sand sculptures there’s a Green Star floating in the air surrounded by Coin Rings. Jump on the pink Splounder right in front of the rings and then angle Plessie at your Star.
Star 2: In the next section, there’s a string of Biddybudds with a Green Star in the center. Angle Plessie at them to defeat them and grab the Star.
Stamp: Shortly after that, you’ll see two Bowser-shaped sand sculptures on the left. Drive through them and you’ll ride along a row of hidden clowd platforms to get your Stamp.
Star 3: When the sand dunes begin angling downward, make sure to hit the Bowser sand sculpture and then a Green Star will appear over the Dash Panel on the next dune between two Goomba sculptures.
World Bowser-3: Cookie Cogworks (3 Stars, 1 Stamp)
Pro Tip: Playing as Peach will make it easier to reach all of these items.
Star 1: When you’re at the area where you see a Big Piranha Plant, jump up the ice cream sandwhich cog and head up to get your first Green Star. If you’re turned into a cat, you can just run up the wall and grab it.
Stamp: Keep moving through the level until you reach the area with a line of Horned Ant Troopers coming out of a hole. One of these ants is towing a Boomerang Flower. Run through the gap at the right moment to get the power-up and then throw Boomerangs at the ants until they’re all gone. Drop through the hold and grab the Stamp.
Star 2: Move right and you’ll see two more rows of Horned Ant Troopers coming through holes. Defeat the first row and fall through the hole. Now enter the pink Warp Box. You’ll have 10 seconds to run around the cookie and grab the Star. Keep to the right and just throw your Boomerang to defeat any Piranha Plants in your path. It can also help you grab the Star faster.
Star 3: Keep going but do not touch the Flagpole when you see it. Instead, run and long jump to the floating cookie platform in the distance. We suggest using Peach since she can float further than the other characters. Now chase the rabbit down to get your Green Star. You can return to the flagpole using the green pipe.
World Bowser-Train: The Bowser Express (3 Stars, 1 Stamp)
Star 1: You’ll see the first Green Star right away on top of the first traincart. Quickly jump onto the long ? Block and then jump in the center of it to reveal a hidden block. Jump on top of it and get on top of the train to grab the Star.
Star 2: Keep going until you come across a Green Star Ring. Activiate it and then quickly grab the Green Coins on the left of the cart before getting the ones on the right. Your Star will appear once they’re all collected.
Stamp: Head through the cart with the red door. Quickly pass the Mini Goombas and ground pound on the right ? Block. It will raise you to the top of the cart so you can grab the Stamp. Be careful not to touch the Horned Ant Troopers along the way.
Star 3: When you get to the head of the train, drop down inside and destroy the Hammer Bro. A Green Star is waiting for you further in.
Boss Battle: Pom Pom uses clones and shuriken to try and defeat you. Attack the Pom Pom that carries a pink shuriken three times to defeat her. Beating her can be made easier with Boomerangs or Fire Flowers.
World Bowser-4: Footlight Lane (3 Stars, 1 Stamp)
Pro Tip: If you ever want to check and see the pathway for the hidden platforms, ground pound and you’ll temporarily see more of it.
Star 1: When you get to the circular platform where you can see several flying Dry Bones, run to the suspicious wall on the right and jump to reveal a hidden ? Block with a Yellow Star inside. Grab the Yellow Star and continue towards the Dry Bones. You’ll need to jump to the upper right in order to get the Green Star before continuing left.
Star 2: Keep going along the hidden platforms until you see a Green Star Ring. After activating it, quickly run around the circle following the direction of the spike rollers and collect Green Coins to get the Green Star.
Stamp: Zig zag your way long the Cat Bullet Bill pathway until you see a circular platform with a glowing center. If you jump to the right from here you’ll find a hidden platform that leads to the Stamp.
Star 3: Dodge around the Cat Bullet Bills and head to the pink Warp Box on the left of the screen. Now quickly walk right onto the hidden platform, ride the Thwomp up, and jump to the Green Star on the left.
World Bowser-5: Deepwater Dungeon (3 Stars, 1 Stamp)
Pro Tip: You’ll need to use cat powers to reach all of the Stars in this level.
Stamp: After passing through the narrow area with the rising and falling column of water, swim straight up until you’re above the spike block on your left. Grab the Stamp while the water is high and keep going.
Star 1: Shortly after that, you’ll need to use another column of water to reach the next area. Instead of going right like the game wants you to, use your cat powers to climb up the wall on the left to discover a hidden area with a Green Star.
Star 2: Jump on Plessie’s back and get to the next area. Once you’ve jumped off this sea creature’s back, immediately use your cat powers to climb up the wall and get the Green Star in the center.
Star 3: Keep going and you’ll see blocks of floating water moving back and forth. Use these to make your way to the right. Instead of entering the green pipe, climb up the wall with your cat powers and jump into the Cloud Cannon. Run right along the various cloud platforms and use your cat claws to attack the Biddybuds in your way. You’ll be able to grab a Green Star at the very end.
World Bowser-6: A Beam in the Dark (3 Stars, 1 Stamp)
Pro Tip: This level is very tricky. You’ll need to play as Luigi to get everything.
Stamp: Only Luigi can get this Stamp. As soon as you enter the level, run to the left and grab a Light Box. If you shine it at a Boo enemies long enough, the ghostly specters will disappear for good. Ride along the circular purple platform dodging Boos and grabbing coins. You’ll eventually see a L Switch on your left. Have Luigi jump on it to get the Stamp.
Star 1: Fall down to the ground below and look in the mirror to see the next Green Star. Move towards the camera to unblock the view of the platform leading to your prize.
Star 2: There are a few winged Dry Bones in your path, but they can’t be defeated with the spotlight. Jump on them to make them go away. Alternately, you can use Boomerangs or cat claws. Continue past the checkpoint flag and up the elevator. You should see a glowing pink Warp Box on your right. Jump at the right moment to land on the platform and enter the box. Now you’ll need to use the lightbox to defeat all of the ghosts in the room within 10 seconds to get your Green Star.
Star 3: When you get to the seven doors, enter the one on the far right and then enter the next door to your right. Use the spotlight to defeat any ghosts in your path. Evenutally, the platform will turn and you’ll need to dodge a bunch of Winged Dry Bones. If you have a Boomerang Flower or cat claws, you might want to use them now. At the end of the hall, a Giant Boo will appear. Lead it to the right and then dodge around it and double back to the Green Star. Be careful, some Dry Bones might be on your tail. Now head right and through the door.
World Bowser-7: Grumblump Inferno (3 Stars, 1 Stamp)
Star 1: Run along the rotating block to keep from falling in the lava. The block will eventually fall down into another lava area. When it gets close to the platform with the Green Star on it, jump off and snag your prize.
Stamp: Hit ? Blocks along the way to grab a Super Leaf and turn yourself into a Tanooki. Ride the next Grumblump block down the slide and you’ll see a pillar at the bottom with a Hammer Bro with a Stamp floating above his head. Use your floating powers grab the Stamp and jump on the Hammer Bro’s head before jumping back on the Grumblump block.
Star 2: As you continue on, you’ll eventually see a Green Star Ring in an area where fiery Splorch balls come rolling around. Activate the ring and collect the Green Coins while avoiding the enemies to get your Green Star.
Star 3: Move along the next long Grumblump and anticipate it’s movements by moving to the next safe area. The second time it stands upright, jump up to grab a Green Star. Be careful to land back on it and ride the block to the end.
World Bowser-A: Motley Bossblob’s Encore (1 Star)
Star 1: Run to the far right and hit the ? Block to get a Double Cherry. Now jump in the lift and enter the boss area. You’ve seen this guy before, but now he’s a little more difficult. Bossblob will bounce around and create shockwaves before slamming hard on the ground and losing its… blobs. Run away from him and dodge the rings until the real villain is exposed. Then, jump on his head and grab another Double Cherry. Repeat the process two more times to beat him and grab a Star.
World Bowser-B: Hisstocrat Returns (1 Star)
Star 1: Being turned into a cat will make it much easier to defeat this boss. Dodge the fireballs it spews and then climb up on top of one of the snakes holding a saucer before jumping on Hisstrocrat’s head. Avoid climbing up snakes with no plates on their heads as they can bite you. Repeat this process two more times to defeat the boss and get a Green Star.
World Bowser-Mystery House: Mystery House Claw Climb (10 Stars)
This is a gauntlet of Stars. You’ll need to complete these tasks in order and maintain your Super Bell cat powers if you want to get all 10 Stars.
Star 1: Hit the first ? Block to get a Super Bell and then climb up the wall to the Green Star as a cat within 10 seconds.
Star 2: Within 10 seconds, run under the platform on your right and climb up the wall as a cat. Now run left and grab the Green Star.
Star 3: Carefully time your climb up the alternating Beep Blocks as cat to reach the Green Star within 10 seconds.
Star 4: In 10 seconds or less, run across the bridge and then climb up the wall on the right with your cat powers to nab the Green Star.
Star 5: In this next area, climb up the walls as a cat following the directions from the signs. A Green Star is on the top-most block in the back left.
Star 6: Dive at the purple brick blocks as a cat to break through them and then climb up the wall. Now, break dive at the next set of purple brick blocks to reach the Green Star.
Star 7: Once more, you’ll need to carefully time your climb up the alternating Beep Blocks as cat to reach the Green Star within 10 seconds.
Star 8: Run straight and up the wall to the right to grab the Green Star in 10 seconds or less. Just make sure you don’t fall in the lava afterwards.
Star 9: Run right and break through the first set of purple blocks. Now jump up and hit the Pow Block to make the remaining blocks disappear before running to the Star. As always, you only have 10 seconds to do this.
Star 10: As a cat, run up the moving yellow and red platforms until you reach the top and grab the final Green Star.
World Bowser-Castle: The Great Tower of Bowser Land (3 Stars, 1 Stamp)
Star 1: Move along the rooftops until you get to the area with the clear pipe. Instead of going in the pipe, first drop down on the far bottom right of the building to reach a Green Star.
Star 2: After passing through the clear pipe, hit the ? Blocks to get a power-up. You’ll soon see a Ferris wheel with Bully enemies on each platform. Use your cat claws to push them all of the various ledges and a Star will appear. Carefully grab it without falling and continue on.
Star 3: Now Cat Bowser will try to hit you as you climb up a skyscraper. Dodge his attacks and follow the cloud platforms until you can activate the Green Star Ring. Collect all of the Green Coins to get a Green Star. After reaching the top of this first stretch, hit the Pow Block that Cat Bowser is sitting on. Then, you can move on to the next area.
Boss: Cat Bowser — Now that Bowser has used a Double Cherry, there are two Cat Bowsers to avoid. Watch for suspicious areas that Bowser might pop out of and keep an eye out for signs that he’s coming from a specific direction as you continue upwards. You’ll need to move fast to avoid getting hit. When you get to the very very top, hit the Pow Block multiple times to defeat him.
Stamp: After beating Cat Bowser, make your way up the clear pipe and climb up the tree on your left to get the Stamp. Now you’re good to head to the flagpole.
All Stars in Super Mario 3D World + Bowser’s Fury
- World 1
- World 2
- World 3
- World 4
- World 5
- World 6
- World Castle
- World Bowser
- World Star
- World Star-1: Rainbow Run
- World Star-2: Super Galaxy
- World Star-3: Rolling Ride Run
- World Star-4: The Great Goal Pole
- World Star-5: Super Block Land
- World Star-6: Honeycomb Starway
- World Star-7: Gargantuan Grotto
- World Star-8: Peepa’s Fog Bog
- World Star-9: Cosmic Cannon Cluster
- World Star-Toad: Captain Toad Takes a Spin
- World Mushroom
- World Flower
- World Crown
World Star — (32 Stars, 9 Stamps)
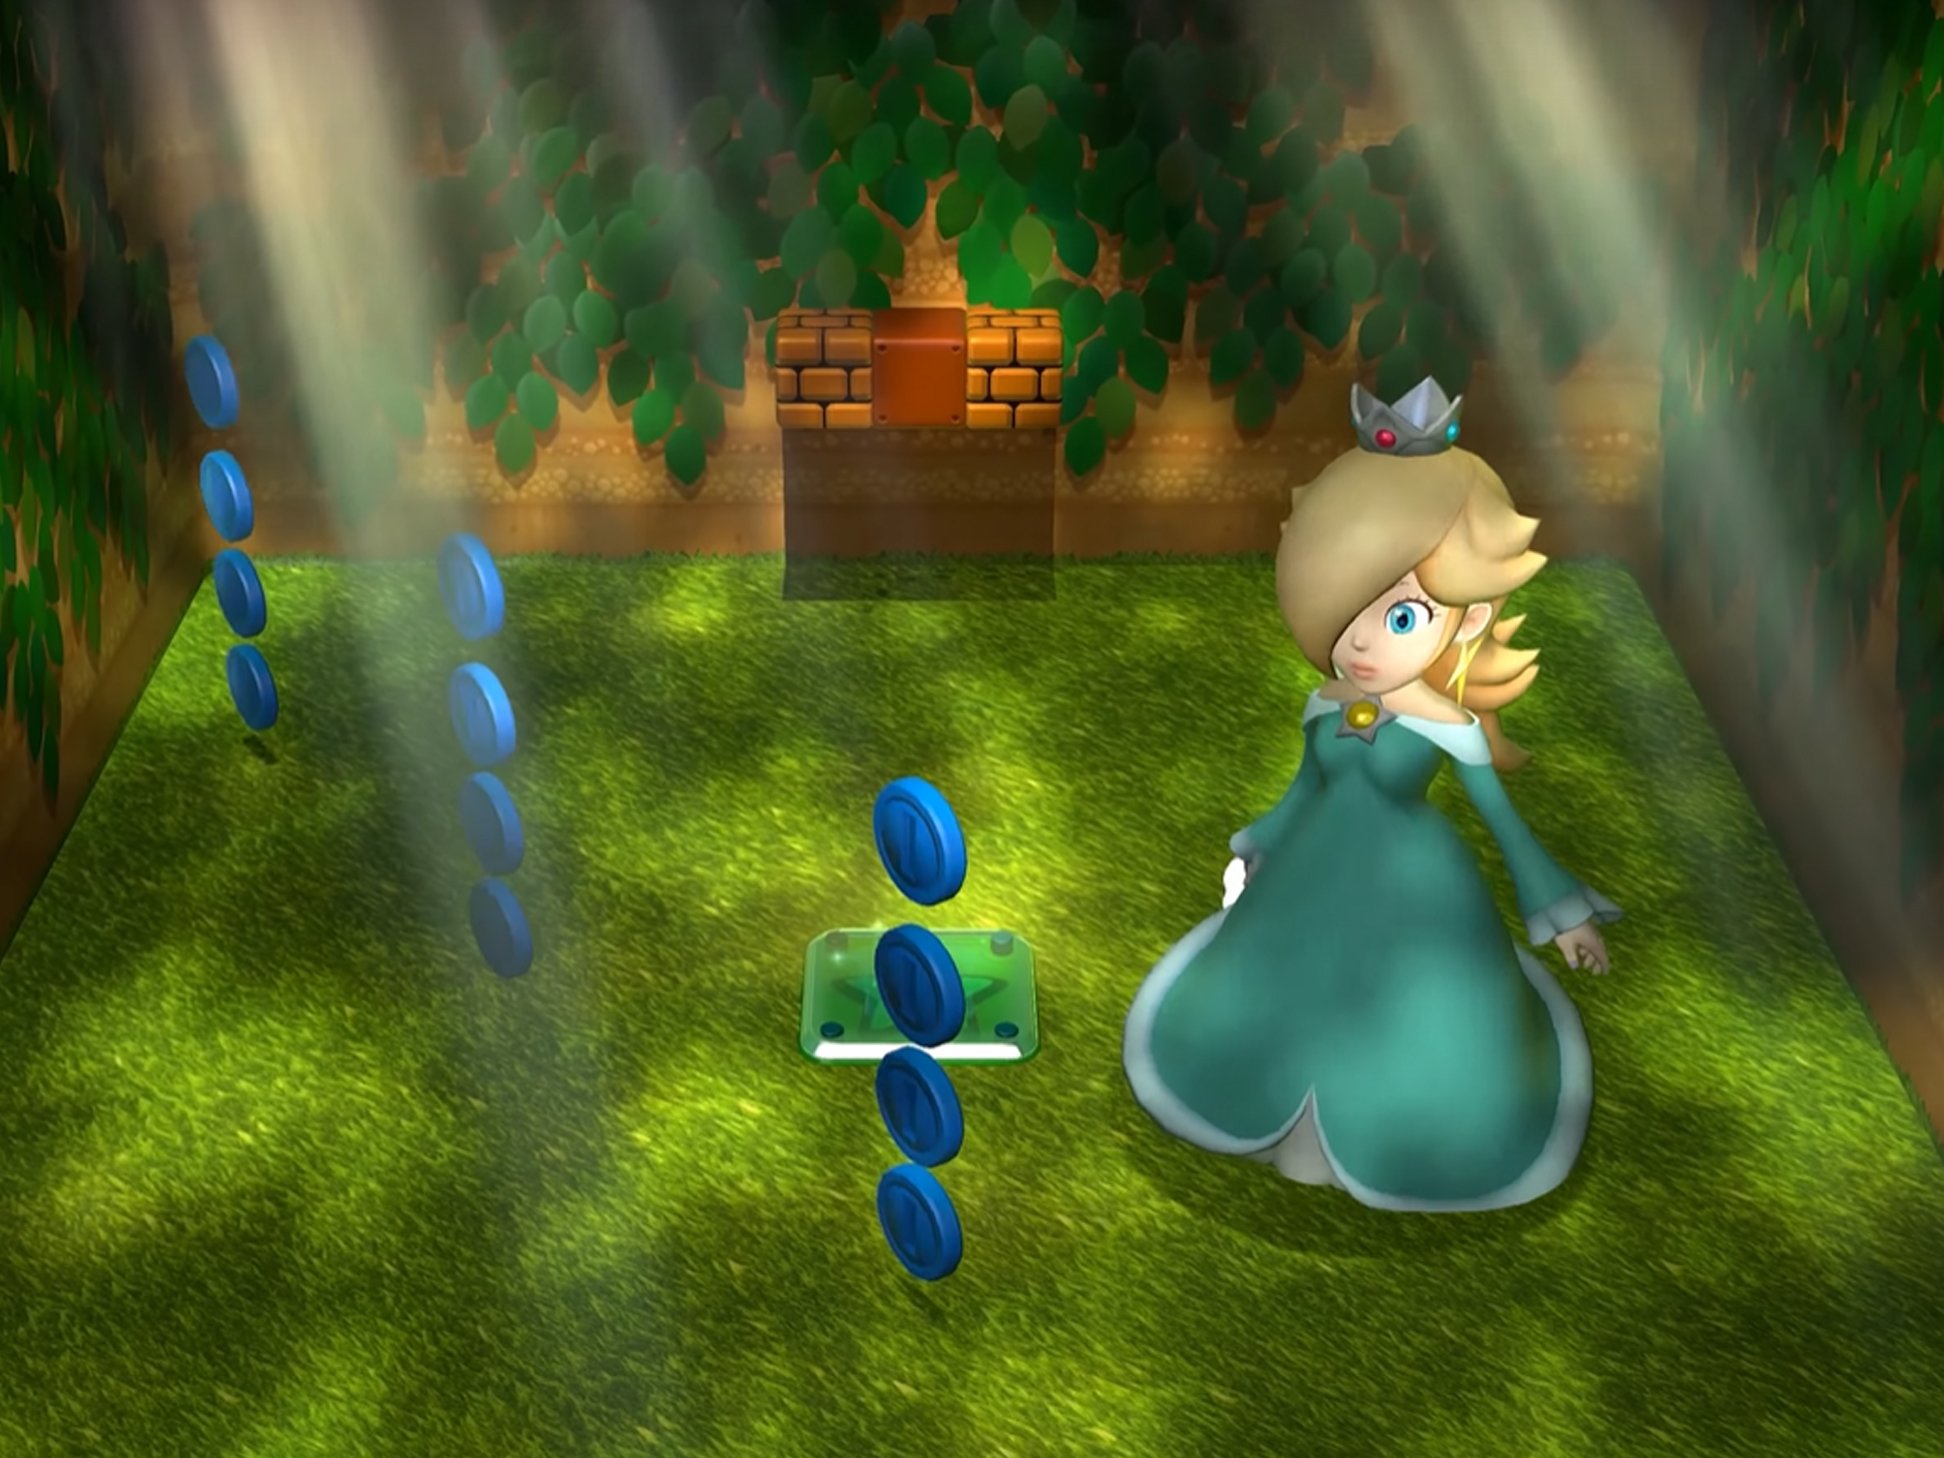
You might have thought you’d completed the game, but there are still four more worlds to explore, each one more difficult than the last. The exciting news is that by beating Cat Bowser at World Bowser, you have now unlocked the ability to play as Rosalina. She can perform a spin attack, which is pretty handy when going up against enemies. To add her to the roster, simply talk to the Sprixies in the overworld.
Unfortunately, collecting Stars and Stamps is about to get a whole lot more tricky. In my opinion, it’s easier to play solo from here on out, but you can do as you wish. Here’s how to get all 32 Green Stars and nine Stamps at World Star.
World Star-1: Rainbow Run (3 Stars, 1 Stamp)
Star 1: Hit ? Blocks along the way and turn yourself into a cat. After passing the section with the Biddybuds, you’ll soon see two Brick Blocks on the left. Climb the wall above the blocks and enter the green pipe. Stepping on the P Switches will make a green ball fall down on either side. Jump at the right moments to guide them to both of the P Panels and a Green Star will appear. You might want to do them one at a time to make sure you do it properly.
Stamp: Pass the checkpoint flag and jump on Plessie’s back. A Stamp will be floating on the right side of the water surrounded by Coin Rings. Swim through it to pick it up.
Star 2: After jumping off Plessie’s back, hit the long ? Block on the left of the path and use the Fire Flower to throw fireballs at the two torches. Now jump into the unveiled Cloud Cannon. You’ll find yourself on a floating island of Color Tiles. Run around and activate them all to reveal an 8-bit Link. Grab the Green Star that appears on Link’s head. Jump down on the side to return to the main level.
Star 3: When you land, you’ll see a Green Star Ring. Activate it and then collect the eight Green Coins to make the Star appear. Be careful not to let a shockwave or any enemies hit you on the way to the flagpole.
World Star-2: Super Galaxy (3 Stars, 1 Stamp)
Star 1: Make your way across the rotating blue and red platforms until you see a blue platform on the right with a Brick Block floating over it. Carefully jump on the brick block and jump once more to reach the first Green Star.
Stamp: You’ll eventually come to an area with a long stretch of rotating red and blue platforms. The blue platform on the very end has a Warp Box you’ll need to enter to keep going, but it’s only on one side. Jump into it when it’s facing up.
Now that you’re in the next area, jump up the three rotating blue platforms and then jump against the wall to reveal a hidden ? Block. Jump in the center of the long block to reveal another hidden block. Now get on top of the platform and go left. You’ll see three rotating blue panels. Use a Super Bell to transform into a cat (if you aren’t one already) and then climb up the blue platforms to get a Stamp.
Star 2: Run up the red and blue ramps on the right and you’ll come to a checkerboard area. The second Green Star is rotating on the red platform on the top left. Wait for the Star to be accessible and then quickly snatch it before hopping away.
Star 3: The next area has a rotating red ramp above a rotating blue ramp. Instead of jumping up to the red ramp, go along the bottom and you’ll find the last Green Star. You’ll need to carefully defeat the enemies and dodge their cannon balls to reach it. Continue through the Warp Box on the red ramp to get to the flagpole.
World Star-3: Rolling Ride Run (3 Stars, 1 Stamp)
Pro Tip: You must play as Rosalina to get all of the collectibles in this course.
Star 1: Jump onto the cylinder and make it roll to the right by running on it. When you get to the area where two cylinders are next to each other, jump on the one closest to the camera and roll it to the right. Then, jump into the pink Warp Box on the ledge. Once inside, you’ll have 10 seconds to get the Green Star. Immediately, run and jump to the right and you’ll be able to grab your prize.
Star 2: You’ll now see a bunch of Conkdor enemies poised to hit you while moving along a cylinder. Move away from their hits and continue to move the cylinder to the right. Once you reach the next area, jump into the Warp Box.
Move along the course and pass the checkpoint flag. You’ll see three Conkdors on a cylinder, either defeat them using a power-up or jump past them. Jump up the three small cylinders and then when you get on the large one, step down towards the camera onto the smaller part of it and rotate it until the Green Star appears on the tip.
Stamp: Only Rosalina can get this Stamp. Grab the Boomerang Flower from the long ? Block and hit all of the enemies that block your way as you maneuver the large cylinder to the right. Be careful not to let it get away from you as this will make you fall.
Instead of passing through the row of pink Blurkers blocking your way, first move right and then jump down to the platform nearest the camera. There’s a button in here that Rosalina needs to press in order to unlock the Stamp.
Star 3: Get back on the large cylinder and continue to move it to the right, dodging enemies and throwing Boomerangs as you go. You’ll see a row of coins going away from the camera. Follow these and defeat the Stingby enemies you see along the way.
You’ll eventually see a 2 Platform. If there’s more than one person playing, you’ll need to have two players stand on the platform so it can raise to the Green Star. If you’re playing solo and didn’t manage to maintain a Double Cherry to this point, you can also use a Super Bell and then climb up the wall as a cat to grab it.
World Star-4: The Great Goal Pole (3 Stars, 1 Stamp)
Star 1: Follow the flagpole and never let it get too far away from you. The first Green Star will be right along the path it takes.
Stamp: When you come to the area with a Walleye blocking your way to the Stamp, trick it into running one way and then dodge around it from the other way to grab your prize. Now, quickly chase after that flagpole.
Star 2: When you see two more Walleye enemies crab walking back and forth on Cloud platforms, make sure you continue as far right as you can on the falling yellow and orange Donut Blocks to reach the seconds Green Star. But be quick and jump on the cloud platforms afterwards.
Star 3: Continue chasing after the flagpole. When you see the Donut Blocks on the left creating stepping stones upwards jump on them and you’ll be brought to a single row of Donut Blocks. Run along it and chase after the flagpole. The third Green Star will be right in your path.
But this level hasn’t ended yet. You need to jump down ahead of the flagpole and then touch it to end the course.
World Star-Toad: Captain Toad Takes a Spin (5 Stars)
Star 1: Step on the P Panel in front of you to rotate the block. Now head to the Coins and fall off. Wait for the Fizzlit to pull into a purple blob and then move past him on the right to get the first Green Star.
Star 2: Pass this first Fizzlit enemy and head left and up until Toad is held up against a small wall. Have him fall below. Have him fall once again to get the Green Star surrounding by three blocks.
Star 3: Go up the ramp and head to the area with the four Fizzlits. Press the P button to rotate the block. Carefully make your way along the narrow blocks on the wall and drop down to where the Green Star is. Go up the ramp and claim your prize.
Star 4: Walk along your current set of blocks and hit the P Button. You should see two Fizzlits next to each other on the bottom level. Make your way towards them and carefully pass them when they are purple blobs to collect the Star hiding behind them.
Star 5: Go back to the other side of the two Fizzlit enemies and head up the ramp to the P Button. Press it to rotate the block once more. This will cause Toad to fall down onto a platform with the last Green Star.
World Star-5 Super Block Land (3 Stars, 1 Stamp)
Star 1: Make your way right past several Chargin’ Chuck enemies until you see a row of large ? Blocks near the yellow Warp Box. Ground Pound the one on the far left to have it raise you to the pink Warp Box above.
After entering the pink Warp Box, you’ll have 10 seconds to get the Star. Get on the blocks and Ground Pound the largest one on the right to have it bring you to the Green Star.
Stamp: Instead of entering the yellow Warp Box, come towards the camera and you’ll see a large Brick Block that’s lower than the rest. Ground Pound it repeatedly until it breaks to unearth the Stamp. Now use the Jump Panel to get back up and enter the yellow Warp Box.
Star 2: Grab a dormant Bob-omb on the left and then throw it at the gray Brick Block in the upper left corner. A Green Star is hiding inside. Run over to it to add it to your collection.
Star 3: Use a Super Bell to turn yourself into a cat and crawl up the large red, orange, yellow blocks. Run as far as you can to the right and you’ll see the Green Star. Jump towards it to grab it. If you’re not sure how far to jump, look at your shadow and make it line up with the Green Star’s shadow.
Key Coins: You’ll need to collect five Key Coins in order to unlock the Warp Box and get to the flagpole. Here’s where they are.
- Key Coin 1: Just right of the sign near the giant Brick Blocks.
- Key Coin 2: In the corner of the green blocks near the three Chargin’ Chucks.
- Key Coin 3: Floating above the 12 Brick Blocks near the locked Warp Box.
- Key Coin 4: Ground Pound the center of 12 Brick Blocks near the left Bob-omb Box to get it.
- Key Coin 5: Hit the large ? Blocks near the Warp Box to make them raise up to the last Key Coin.
World Star-6 Honeycomb Starway (3 Stars, 1 Stamp)
Star 1: Hit the ? Block to get a Boomerang Flower. Repeatedly thow Boomerangs at any enemies coming your way as the camera shifts. Throw your Boomerang at the red ! Block and then head right along the newly opened path to get the first Green Star.
Star 2: Move along the various platforms avoiding lava tiles and spike rollers. Make sure to grab the Double Cherry in the left ? Block along the way. Throw Boomerangs as the Biddybuds that cross your path. Once they’re all defeated, a Green Star will appear in the middle of the large honeycomb tile area.
Star 3: Continue moving upward and follow the path of tiles as they attach to the current platform. Be careful to dodge Fire Piranha Plant fireballs and don’t step on any lava tiles along the way. Hurl the Boomerang at the farthest lava tile on the left to grab the third Green Star.
Stamp: Use the Boomerang to defeat enemies you encounter. Eventually, you’ll see a Stamp floating on the right side. Throw the Boomerang to reach it.
World Star-7 Gargantuan Grotto (3 Stars, 1 Stamp)
Stamp: Run right until you see the two huge Galoombas. Jump up on the grassy ledge and hit the ? Block to get a Mega Mushroom. You’ll be invincible as long as the Mega Mushroom lasts. Quickly run right and jump into the gray blocks hanging from above to get the Stamp. Quickly Ground Pound into blocks below to drop into the next area.
Star 1: While you’re still huge, continue right and you’ll see a wall of pink Blurker enemies. Run into them and you’ll grab the first Green Star in the middle of the wall behind them.
Star 2: Continue on until you fall into some water. Move along the backside of the course near the kelp to prevent yourself from being forced into the spikes. When there’s a gap, swim up and hit the ? Block to get another Mega Mushroom. Then, quickly drop back down and continue right. You’re once more invincible while huge so just keep charging through any enemies or obstacles.
When you get to the area with orange Mushroom Trampolines on the ground, Ground Pound and you’ll be launched through some gray Brick Blocks above you. Grab the second Green Star up here.
Star 3: Before passing through the next green pipe, wait for your character to shrink and then swim up straight above the green pipe. You’ll enter a secret area with another green pipe. Hit the ? Block to get yet another Mega Mushroom and then step on the P Switch. Quickly collect all of the blue coins in the room before they disapper to get the last Green Star. You won’t be able to reach them all if you aren’t huge.
World Star-8 Peepa’s Fog Bog (3 Stars, 1 Stamp)
Star 1: Head up the right side of the area until you see a glowing spot of ground near the back. Ground Pound on it to reveal a Yellow Star. Now run to the top left of the area and defeat the Peepas circling Captain Toad to earn a Green Star.
Key Coins: You’ll need to collect five Key Coins in order to go any further in the level. Here’s where they are.
- Key Coin 1: On the circular platform immediately in front of you when you enter the level. Be careful not to touch the Peepas circling it.
- Key Coin 2: Head up and to the left until you see a tree with a snowball next to it. There’s a hidden platform to the bottom left of the tree. Jump on it and it will bring you to another Key Coin.
- Key Coin 3: Head up the middle of the area and you’ll see the Warp Box and a Pow Block on either side. Hit the right Pow Block to make steps appear up to a Key Coin.
- Key Coin 4: Grab a snowball and take it to the back right side of this snowy location. Throw it at the Pow Block in the wall to reveal another Key Coin.
- Key Coin 5: In the middle of this area, you’ll see the locked Warp Box. Down to the bottom right of it, you’ll see a purple door. Enter it and you’ll be brought to the last Key Coin.
Star 2: Ride along the raft and walk through the foggy planks until you see a pink Warp Box on the right of some Snow Pokeys. Jump into it. You’ll now have 10 seconds to get the Star. To do that, grab a snowball from the center of the room and then quickly return to the stone. A Green Star will appear, chuck the snowball at it add it to your collection.
Star 3: When you come out of the pink Warp Box, you should see two Snow Pokey’s with red pails on their heads. Jump on top of the small one to steal a snowball from it. Now carry that with you up and then to the left on the planks above. Throw the snowball at the Star floating on the left.
Stamp: Continue forward along the wooden path. Just after the last Dash Panel go right and jump to the platform with the Stamp.
World Star-9 Cosmic Cannon Cluster (3 Stars, 1 Stamp)
You’ll need to have collected 210 Green Stars to unlock this level.
Star 1: Jump onto the Switchboard and go on the far end to make it move forward. When you get to the area with the ? Block hovering over the island, jump off real quick and hit it. You’ll now be wearing a Cannon Box. Jump back onto the Switchboard and continue to move forward, hitting enemies and dodging cannonballs.
Stamp: As you keep going, you’ll soon see a Stamp floating over an island on the left. Shoot a cannonball at the ? Block to make a bridge, then cross over and grab the Stamp. Now get back on the Switchboard and keep going.
Star 2: If you lost your Cannon Box, there are more to grab in the next area and you’ll need one to get the next Star. If you aren’t currently turned into a cat, use a Super Bell and climb up the wall with the Cannon Box on your head. On the right side of this higher area, you’ll see a crack in the wall. Shoot it to reveal the second Green Star. Now head through the pipe that’s to the left of here.
Star 3: This one’s tricky. You’ll find yourself underwater. Continue to use the cannonballs to blast enemies and obstacles out of your way until you can get into the pipe on the end. You’ll find yourself once more on a Switchboard. Use your Cannon Box to hit the first two ! Switch Blocks that you see and grab the Green Star. But then turn the Switchboard around before it falls off and hit the ! Switch Block again to change the rails. Now continue forward to the end hitting ! Switch Blocks as necessary.
All Stars in Super Mario 3D World + Bowser’s Fury
- World 1
- World 2
- World 3
- World 4
- World 5
- World 6
- World Castle
- World Bowser
- World Star
- World Mushroom
- World Mushroom-1: Night Falls on Really Rolling Hills
- World Mushroom-2: Spiky Mount Beanpole
- World Mushroom-3: Deep-Black Jungle Drift
- World Mushroom-4: Trouble in Shadow-Play Alley
- World Mushroom-5: Back to Hands-on Hall
- World Mushroom-6: Gigantic Seasick Wreck
- World Mushroom-7: Broken Blue Bully Belt
- World Mushroom-Mystery House: Mystery House Brawl
- World Flower
- World Crown
World Mushroom — (31 Stars)
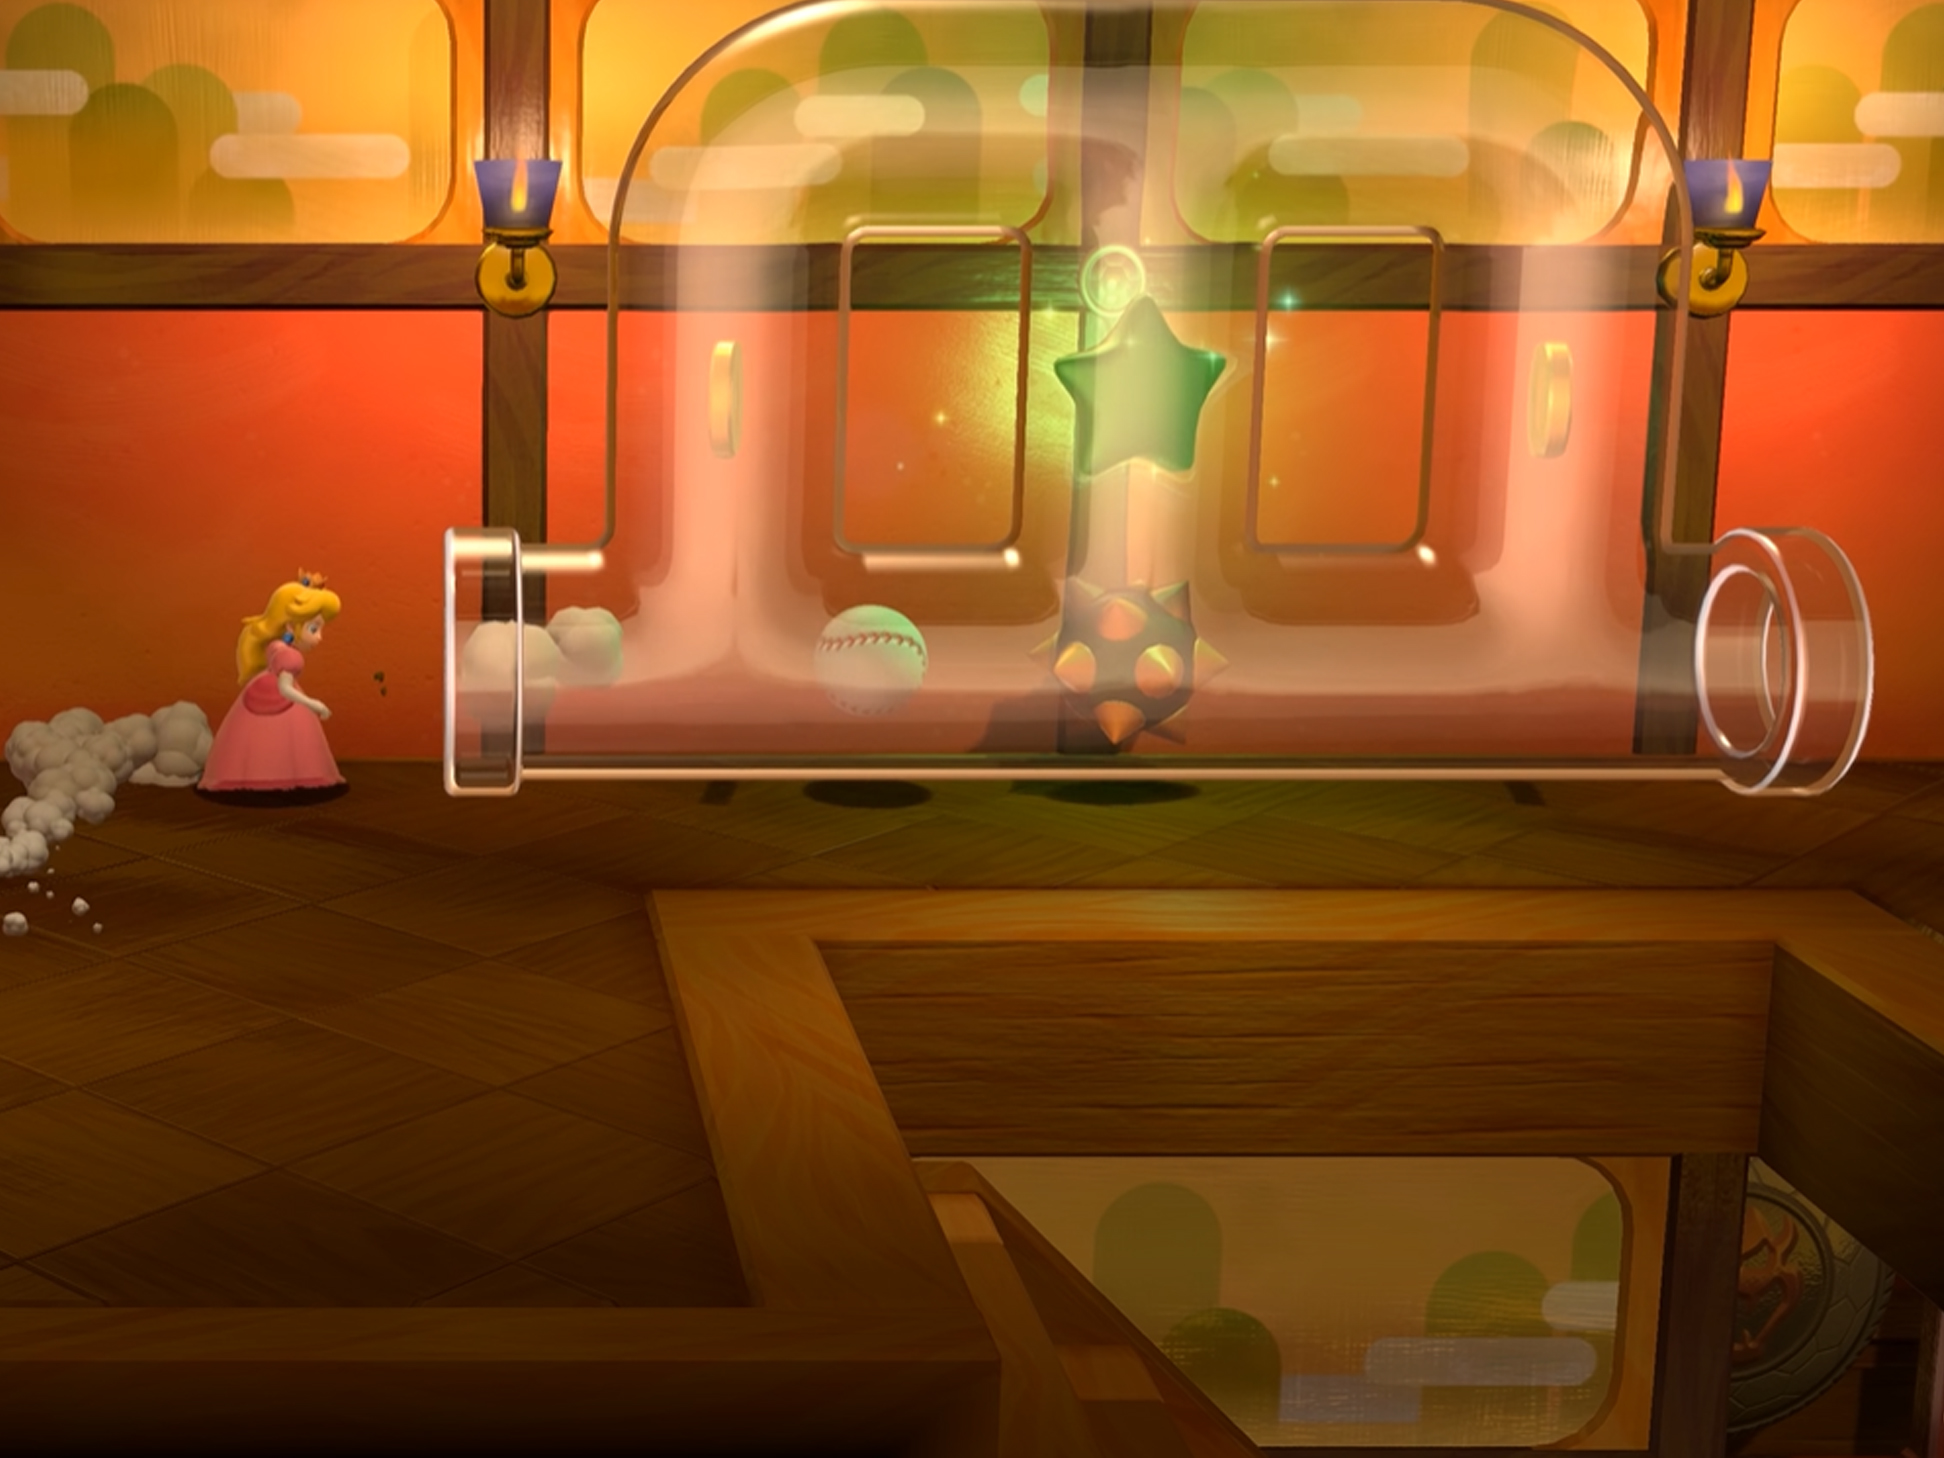
World Mushroom is the first world you’ll encounter that doesn’t have any Stamps for your to collect, so be prepared to simply focus on those 31 Green Stars. Here’s how to get them.
World Mushroom-1: Night Falls on Really Rolling Hills (3 Stars)
When you start this course, you will only have 30 seconds on the clock. To make it through to the end, you’ll need to collect as many Clocks as you can to increase your overall time.
Star 1: Pick up every clock you see along the way while heading to the right. Eventually you’ll see a bunch of red Spiny enemies with a Green Star Ring nearby. Break open the wooden boxes on the right to get a Yellow Star and turn invincible. With this safety buffer, activate the Green Star Ring and then collect all of the Green Coins on the rolling hills to get your Green Star.
Star 2: Continue nabbing as many Clocks as you continue through the level. Once you get to the underground section, make sure to stay on the higher area instead of falling down. When you get as far as you can before dropping down jump up to discover a hidden cloud platform. Jump on it and then jump right to get your second Green Star.
Star 3: Immediately after getting the second Green Star, drop down and enter the green pipe on your left. Now quickly step on all of the Color Tiles and a Green Star will appear. If you are turned into a cat or have fireballs or Boomerangs, you can you can defeat the Spiny enemies in here really easily.
World Mushroom-2: Spiky Mount Beanpole (3 Stars)
Key Coins: You’ll need to collect five Key Coins to unlock the Warp Box at the start of the level. Here’s where you’ll find them. – Key Coin 1: Turn around and go to the back left corner of the screen to find the first Key Coin. – Key Coin 2: When you get to the area with the two red Spiny enemies, look behind the tree on the left. – Key Coin 3: When you see the two squares of Brick Blocks on the left with a blue ramp to the right, get on the bricks and jump to the left to get the second Key Coin. If you’re turned into a cat, you can simply climb up the wall underneath it. – Key Coin 4: As you continue up the mountain, you’ll eventually see two Spiky enemies back to back throwing spike rollers down their respective ramps. Use cat claws or jump on their heads at the right time to get rid of them. The third Key Coin is on the far end of the blue ramp. – Key Coin 5: After you’ve grabbed the last Green Star, climb up the highest tree at the top of the mountain to get the last Key Coin.
Star 1: Pass the locked Warp Box and head up the cliffs. Once you pass the first green Spike enemy throwing the spike rollers you’ll see the first Green Star.
Star 2: You will need to be turned into a cat to get this Green Star. Just above and to the left of the first Star, you’ll see a square section of Brick Blocks in the cliff wall. Use your cat claws to break the blocks and enter the green pipe behind it. Step on the P Switch and then collect all of the Blue Coins that show up to get the second Green Star.
Star 3: Continue up the mountain past the back to back green Spike enemies and up the trees. You’ll need to jump from one of the trees to grab the last Green Star.
World Mushroom-3: Deep-Black Jungle Drift (3 Stars)
Star 1: You’ll need to be turned into a cat to get this first Green Star. Jump into a spotlight box and then get on the wooden raft. Shine your light at any Boos or Peepas that come your way to defeat them. When the first sliding grate is on the left side, climb up it and grab your first Green Star.
Star 2: Continue along and jump down onto the raft below defeating any ghosts that come along your path. Jump onto the next raft and stand on the far left side and you should see a Green Star. When you see a cloud platform on the left, jump on it and grab you second Green Star.
Star 3: Jump back onto the raft and ride it down the waterfall. But don’t enter the Warp Box right away. Instead, someone with a Super Bell needs to climb up the wall as a cat and get the last Green Star. Now you can jump in the Warp Box and head to the flagpole.
World Mushroom-4: Trouble in Shadow-Play Alley (3 Stars)
Star 1: Enter the door and you’ll come to a silhouette area. Jump up on the blocks while dodging cannonballs and grab the Boomerang flower. Now jump to the left and throw your Boomerang at the first Green Star to add it to your inventory.
Star 2: Now continue right jumping back on the platform where you found the Boomerang Flower. Jump down the platforms to get the next Green Star.
Star 3: Use your Boomerang, cat claws, or bombs to take out the stack of Goombas, but don’t jump into the Warp Box when it appears. Now, jump up on the set of brick blocks on the far right and go against the wall. Jump to reveal a hidden block. Jump on this new block and then jump to your left to get the last Green Star. When you have all of the Green Stars, continue through the Warp Box.
World Mushroom-5: Back to Hands-on Hall (3 Stars)
You’ll need to collect five Key Coins in order to unlock the Warp Box and leave the level.
- Key Coin 1: Defeat the Fire Bros. and interact with the door in the background. This will reveal a Bowser Gong. Activate it to make a green pipe appear. Pass through the pipe and continue to the right dodging or defeating enemies as you go. You’ll see another door; interact with it to slide it open. There are a bunch of pink Blurker enemies in front of you. Defeat them or jump over them and continue right. This will take you to a hidden area behind the stairs with the first Key Coin.
- Key Coin 2: Run up the stairs and you’ll see the second Key Coin.
- Key Coin 3: Grab a baseball from the ? Blocks and then when you come upon then next door, interact with it to slide it open. Interact with the Gong to make the wall next to you rotate. Pass through the rotating wall and open the next set of double doors. Throw the baseball at the Goomba stack topped with a Fire Bro to get rid of them. Now ring the gong to make hidden panels rotate. Jump on the revealed Goombas to get your second Key Coin. (The first Green Star is just after this.)
- Key Coin 4: After grabbing the first Green Star, continue right and open the double doors. You’ll see a Hammer Bro and spiked floor panels. Either use a powerup or throw the baseball at the Hammer Bro to defeat him. Now throw a ball at the Key Coin to claim it.
- Key Coin 5: Head right and you’ll see a another set of doors just past the two Boomerang Bros. Defeat them using a powerup or by throwing baseballs. Now open the doors and throw a baseball directly into the center of the Blurker blockade and you’ll hit the Gong behind them. This will reveal the last Key Coin. Now you’re good to enter the Warp Box.
Star 1: Just after getting the third Key Coin, grab the baseball and head up the stairs. Now throw the baseball into the clear pipe to get ride of the spike ball. With it gone, you can safely enter the pipe and grab the first Green Star.
Star 2: After passing through the Warp Box, you’ll see a Green Star Ring on the rooftop. Before activating it, go to the right and hit a ? Block to get a Propeller Box. Defeating all of the Flopter enemies in the area before activating the coins will make this process easier. Pass through the Green Star Ring and quickly collect the eight Green Coins that appear to get your second Green Star.
Star 3: Head up the right side of the rooftop and hit the Bowser gong just below the cloud platforms. Now use the Propeller box to fly onto the cloud platforms and enter the Warp Box. This will take you to a room with the last Green Star. Jump in the Warp Box once again and head to the tip top of the roof. Jump on the flying Flagpole when you see it. The Propeller Box can help you reach the very top of it.
World Mushroom-6: Gigantic Seasick Wreck (3 Stars)
Star 1: Activate the Green Star Ring and collect the eight Green Coins before time runs out to unlock your first Green Star. You’ll need to dodge the gusts of wind and the spike rollers in order to make this happen.
Star 2: Head into the Warp Box and continue on through the next section. Carefully make your way past the first Ty-Foo enemy and its gusts and then hit the ? Blocks to get a Mega Mushroom. Now that you’re huge, you can’t be blown away. Head to the back of the ship, but instead of entering the Warp Box, take a right onto the back platform and grab the second Green Star. Now you’re good to enter the Warp Box.
Star 3: Hit the ? Block and grab another Mega Mushroom. Now quickly and carefully make your way along the wooden platforms. When you get to the last Ty-Foo, go as far right as you can on the plank and then jump up to get the third Green Star. If the Mega Mushroom runs out, you’ll once more be susceptible to being blown off the path and you won’t be able to grab this Star.
To beat the level, you’ll need to defeat all of the Bully enemies at the end of the boat. To do this easily, hit the ? Block on the left side of the ship to get a Mega Mushroom and push them all off the ledge. If you run out, there’s another Mega Mushroom in the ? Block near the end. Head into the Warp Box once they’ve all been defeated.
World Mushroom-7: Broken Blue Bully Belt (3 Stars)
Star 1: Jump along the rising and falling platforms while dodging any enemies that come your way. Grab a Super Leaf from the first ? Block so you can float in the air and more easily land on platforms. When you get to the section with the Fly Dry Bones, wait for the platform to appear on the right and then jump on it to get the Green Star.
Star 2: Continue running through the course until you get to the area with the rotating spike rollers. A Green Star is hovering on top of one of them. Jump over to it to snatch it.
Star 3: Keep going while dodging enemies and collecting powerups along the way. Things will definitely be easier if you can keep the Super Leaf powerup as you go. You’ll eventually see a green pipe. Go past it and you’ll find a cloud platform. Jump on it to get the last Green Star. Now you’re good to enter the pipe.
World Mushroom-Mystery House: Mystery House Brawl (10 Stars)
Star 1: Take out the three Chargin’ Chucks within 10 seconds to get your first Green Star. It’s easier if you have a powerup like the Super Bell, a Boomerang Flower, or a Fire Flower.
Star 2: The easiest way to get this one is if you’re a cat. Jump on the lower level of bricks to the left and swipe at the Snow Pokey enemies to defeat them within 10 seconds.
Star 3: Beat the two Flopters within 10 seconds to get your Green Star. One of the best ways is to use the cat dive while you have a Super Bell powerup.
Star 4: You’ll now need to defeat three Boomerang Bros. within 10 seconds to get the Star. This is best achieved while using a powerup like the Super Bell, Fire Flower, or Boomerang Flower.
Star 5: There’s a hidden Coin Coffer near the grass on the left. Use a powerup to defeat it quickly and grab the Green Star within 10 seconds.
Star 6: Get on the blocks and jump on the Goombas to defeat them within 10 seconds to get your Star. Alternatively, you can use powerups to get rid of them.
Star 7: You’re now in a room with three Fizzlit enemies. Attack them while they are purple to defeat them. You’ll need to beat all three and grab the Green Star within 10 seconds.
Star 8: Three Magikoopas will appear before you. Jump on their heads and avoid their spells to defeat them. As always, powerups can make it a lot easier to beat enemies. Be sure to grab the Green Star before your 10 seconds are up.
Star 9: Beat the three Piranha Creepers within the 10 second time limit to make a Green Star appear. Using cat claws, Boomerangs, or fireballs can make this go faster.
Star 10: Now you need to beat three Hammer Bros. within 10 seconds in order to get the last Green Star. Jump on their heads and avoid their attacks to defeat them. As always, powerups can make it a whole lot easier.
All Stars in Super Mario 3D World + Bowser’s Fury
- World 1
- World 2
- World 3
- World 4
- World 5
- World 6
- World Castle
- World Bowser
- World Star
- World Mushroom
- World Flower
- World Flower-1: Switch Shock Circus
- World Flower-2: Floating Fuzzy Time Mine
- World Flower-3: Piranha Creeper Creek After Dark
- World Flower-4: Faster Fort Fire Bros.
- World Flower-5: Sprawling Savannah Rabbit Run
- World Flower-6: Shiftier Boo Mansion
- World Flower-7: Pipeline Boom Lagoon
- World Flower-8: Blast Block Skyway
- World Flower-9: Towering Sunshine Seaside
- World Flower-10: Honeycomb Skyway
- World Flower-11: Spiky Spike Bridge Sneak
- World Flower-12: Boss Blitz
- World Crown
World Flower — (36 Stars)
Once again, we encounter a world without any Stamps. However, you’ll still be busy as there are 36 Green Stars hidden throughout the various levels. Not to mention that the levels are about to get a whole lot more challenging. Here’s how to collect all those Green Stars and make it to the flagpole.
World Flower-1: Switch Shock Circus (3 Stars)
Star 1: Instead of running forward, immediately turn around and head through the pink Warp Box. Ground Pound on the Mushroom Trampolines to go as high up as you can then slide down against the buttons to activate them. Do this for both sides and collect your Green Star before the 10 second timer runs out.
Star 2: Now head forward and activate all of the blue ? Panels. The purple Fizzlet enemies can easily be defeated by hitting them when they are purple. Continue on and grab a Lucky Bell from the ? Blocks on the right. Continue until you find a Green Star Ring. Activate it and collect all of the Green Coins within the time limit to get the second Green Star.
Star 3: Continue on until you’re at the place with the club icon on the wall. Activate all of the ? Panels to open the door and continue on. Now head through the Clear Pipe Cannon. When the flagpole is in view, head right and destroy the wooden blocks. Now turn around and head left, destroy the wooden blocks, and grab the baseball they were hiding. Carefully throw the baseball at the floating Green Star on the right to add it to your collection.
World Flower-2: Floating Fuzzy Time Mine (3 Stars)
Star 1: This is another one of those levels where the camera continues to move at a steady pace. To start, run to the ? Blocks on the right and grab a Lucky Bell. Climb up directly above the ? Blocks to get the first Green Star.
Star 2: Now head up the wall using the platforms and water blocks being careful not to hit spikes. When you get to an area where a water block is moving back and forth beneath a cloud platform, swim up repeatedly to hit the Block until it breaks. This will reveal the first Green Star. Jump up onto the next platform and keep going right.
Star 3: Carefully dodge the waves of spikes coming out from the ground as you make your way right. Eventually you’ll swim up a water block and find a Green Star Ring. Activate it and then collect all eight Green Coins before they go away to get the third Green Star.
World Flower-3: Piranha Creeper Creek After Dark (3 Stars)
Star 1: Hit the first ? Block to get a Fire Flower. Now dodge or defeat enemies while making sure to light all seven torches (including the one with a Fire Piranha Plant in it) along the way with your fireballs. Once all of the torches are lit, a Green Star will appear.
Star 2: Head through the pipe and continue to light all 12 of the torches along the way as you jump from island to island. As before, this includes the torch with the Fire Piranha Plant in it. Once they’re all lit, another Green Star will appear. If you get hurt and lose your Fire Flower, check the other ? Blocks in the area to get another one.
Star 3: Defeat the Piranha Creeper at the end and enter its pipe. Light the three torches in this next area to make the last Green Star appear. Grab it and then head to the flagpole.
World Flower-4: Faster Fort Fire Bros. (3 Stars)
Star 1: You’ll only start off with 30 seconds on the count down. Either jump on the first stack of Goombas you see or use a powerup to defeat them and grab the first Green Star. Then, quickly continue on to the right.
Star 2: Grab any clocks that you see along the way to add valuable time to your total. Hitting the ? Blocks above the first Clock will give you a Fire Flower. Throw a fireball through the Clear Pipe to hit the Fire Bro on the other side. You’ll need to defeat the third Fire Bro and his Goomba stack to make a Warp Box appear that will take you to the next section
Star 3: As soon as you come out of the Warp Box, use a Lucky Bell or a Super Bell to climb up the wall as a cat and grab the last Green Star. Quickly head right grabbing any clocks you see along the way.
When you see two stacks of Goombas with a Fire Bro jumping between them, you’ll need to defeat all of the enemies in this area to unlock a Warp Box to the flagpole. Being turned into a cat or using fireballs will make this faster.
World Flower-5: Sprawling Savannah Rabbit Run (3 Stars)
Pro Tip: We suggest using Toad for this level since he’s the fastest of the bunch and is required for unlocking the third Green Star.
Star 1: You’re gonna need to chase down the large bunny in order to get this Green Star. Use all of the dash panels along the way to keep up with the rabbit until you catch him and get your Green Star.
Star 2: Now head to the far back right corner of this section and jump up the cloud platforms to the Clear Pipe Cannon. This will shoot you out into a cloud platform with the second Green Star.
Star 3: Head to the far back left corner and enter the clear pipe near the center of the back wall. When you’re on top near the Conkdors, step on the blue Toad button to make a Green Star appear. Move across the cloud platforms to get the Green Star. Now head to the flagpole on the right.
World Flower-6: Shiftier Boo Mansion (3 Stars)
Star 1: The first Green Star is tricky. This level starts off with a Big Boo chasing you. Lead it a little ways to the right and then dodge around it and go behind it to get the first Green Star. Carefully dodge around it again and continue right. Remember, you can always stop it in its tracks by looking its way.
Star 2: Continue right and up the stairs (ignore the Warp Box down the stairs since it’s a fake). When you see the sofa, ride it up to where a 1-Up Mushroom is waiting for you and then head right on the platform to get the second Green Star.
Star 3: When you head through the door on the right you’ll see a flagpole surrounded by Big Boos. Dodge around them and head through the door in the back as the flagpole is a fake. Now dodge around all of the Big Boo enemies in this next section while heading left. When you get to the end where the ground keeps dropping off you’ll be able to grab the last Green Star. Now quickly head through the door in the back.
The next flagpole you see will also be a fake. When you’re near it, head to the bottom left of the screen and you’ll see a hidden cloud platform. Jump on it and follow the trail to the Warp Box. This will take you to the path with the true flagpole.
World Flower-7: Pipeline Boom Lagoon (3 Stars)
Star 1: You’ll need to have cat powers to get this first Green Star. Hit one of the ? Block to get a Cannon Box and then head into the green pipe. Keep heading right defeating or dodging enemies until you are forced to go underwater. You’ll see gray Brick Blocks on the far right of this area. Shoot a cannon at them to reach your first Green Star. Now head straight up and go through the Warp Box.
Star 2: Pass the flagpole and continue down in to the water. If you lost a Cannon Box along the way, you’ll be able to grab a new one at the first ? Blocks you see. When you’ve passed the first to spike blocks but still have one in front of you, swim straight up and defeat the Bloopers along the way. You’ll eventually see the second Green Star on the right.
Star 3: Drop back down from where you got the second Star and head right careful not to touch any spikes. You’ll soon see a group of gray Brick Blocks. Shoot the cannon at them to reveal a Green Star Ring. Pass through it and then collect the eight Green Coins to get the last Green Star. Shooting cannonballs can help you collect them faster.
World Flower-8: Blast Block Skyway (3 Stars)
Pro tip: The beep blocks in this area alternate a lot faster than they ever did before. For that reason, you’re going to want to hang onto a Super Leaf powerup as long as you can so you can float when necessary. Princess Peach automatically floats more than other characters, so she’s also a great character to use here.
Star 1: Jump along the alternating blocks until you see a Green Star floating over a ? Block in the distance. Carefully jump on top of the block and grab the first Star. Now head through the Warp Box.
Star 2: Time your jump so that you can make it up the alternating steps and dodge the spike rollers floating down. Once you get past the Spike enemy, you’ll see a Green Star Ring. Activate it and collect all of the Green Coins with the help of the platform to get the second Star.
Star 3: After passing through the next Warp Box, head to the super long alternating red and blue slide and carefully slide or jump from side to side. The third Green Star is near the bottom, so you’ll need to nab it before reaching the end. Now continue to the flagpole.
World Flower-9: Towering Sunshine Seaside (3 Stars)
Pro tip: You’ll need to defeat all of the Fire Bros. in the area to make a Warp Box appear to the flagpole. To make things easier, you’ll want to have a Fire Flower when you start.
Star 1: You’ll only have 100 seconds on the clock when the level begins so you’re going to want to move quickly. Immeditately head as far right as you can and defeat the stack of Goombas to get the Green Star on their heads.
Star 2: Next, head left until you get to the sand hill and see the huge stack of Goombas in the water. Using a powerup or Rosalina’s spin attack, defeat the set of Goombas and the Fire Bro on top. Now go to the bottom left of the hill and enter the clear pipe to get the second Green Star.
Star 3: Head as far left as you can until you see a pier with four torches. Using a Fire Flower, light all of the torches to make the third Green Star appear. If you’ve lost your powerup, you can also get the Fire Bro to light the torches if you stand next to them and then dodge at the right moment.
World Flower-10: Honeycomb Skyway (3 Stars)
Star 1: Immediately go to the ? Block and hit it to get a Boomerang Flower. Throw it out in front of you as you move forward to defeat any nearby enemies. You’ll eventually get to an area with a slightly lighter hexagon. Wait for a block to come by with a Green Star floating over it and then hurl your Boomerang at it to add it to your collection. Watch out, a Fire Piranha Plant is also moving around just behind it.
Star 2: When you see the Big Piranha Plant, throw your Boomerang at it twice to defeat it and keep going. Now you’ll need to dodge several enemies and fireballs as you move forward. When you see a clear pipe on the right enter it and it will take you to the second Green Star. Quickly nab it and then continue forward.
Star 3: Several Biddybuds will appear in your path and then you’ll come to a stretch where the flooring builds upon itself as you approach. Carefully maneuver through here dodging lava tiles and enemies. A Green Star will be floating on the left just past some lava tiles. Throw a Boomerang at it to get your prize.
When you get to the last stretch you’ll see some Big Piranha Plants. You’ll need to defeat them in order to make a Warp Box appear that lets you get to the flagpole.
World Flower-11: Spiky Spike Bridge Sneak (3 Stars)
Pro tip: As with previous spotlight levels, bad things happen when any main characters are illumnated. Stay in the shadows as much as possible to keep from setting things off. You will need a Super Bell or Lucky Bell powerup on you to get all of the Stars in this level.
Star 1: Move along avoiding the spotlight and making your way over the blue spike platforms. They won’t activate unless you are illuminated by the light. When you get to the second stretch of spike platforms, wait for the spotlight to move to your left and then run around the platforms until you get to the orange spike platforms. These ones go off regardless of the spotlight. Carefully time your jumps and use your cat powers to climb up the tower on the left to get the first Green Star.
Star 2: Go back along the orange spike platforms and continue along the path through the Warp Blocks. You’ll come to an area with a long set of orange spike platforms and a Fire Bro enemiy on some ? Blocks on the left. To get the Green Star, you’ll need to have someone who’s currently turned into the cat call down the side of the tower and then climb back up to safety. Now continue on along the spike platforms to the right.
Star 3: Jump and dodge your way along the course until you get to a giant spotlight with two sets of brick blocks. Jump along the brick blocks and over to the far upper right to get the last Green Star. Now carefully jump along the spikey platforms until you can get to the flagpole in the back. If you get hurt, pull out any powerups you have and continue forward.
World Flower-12: Boss Blitz (3 Stars)
There are five Warp Blocks each with a different boss behind it. Thing is, only three of these bosses actually have a Green Star, but each time you defeat one of them a Key Coin will appear where the Warp Box once stood. You’ll need all five Key Coins to unlock the end Warp Block.
Boss Brolder: Enter the Warp Box second from the right to begin your Boss Brolder fight. Hit one of the normal-sized Brolders to make it recede into itself and then throw it at the Boss Brolder. Do this three times and he’ll be defeated. Make sure to dodge any fire attacks he throws at you.
- Reward: Star 1 and Key Coin
Boom Boom: Enter the Warp Box on the far right to face Boom Boom. He’ll spin around the room and then fall down dizzy. While he’s down jump on his head or hit him. He’ll then go invisible. Dodge away from his spin attacks and wait for thim to get dizzy again. Hitting him three times will defeat him.
- Reward: Key Coin
Pom Pom: Enter the Warp Box second from the left to face Pom Pom. She’ll clone herself and throw shuriken. Note which Pom Pom is throwing a pink shuriken and hit her three times to defeat her. Powerups can make this go a lot easier.
- Reward: Key Coin
Hisstocrats: The Two Hisstocrats are behind the Warp Block in the center. We recommend using a Super Bell to defeat them. Climb up the snakes to get on the saucers and then jump on both of the Hisstocrats’ heads three times each to defeat them. Grab your second Green Star when it appears.
- Reward: Star 2 and Key Coin
King Ka-thunk: Enter the Warp Box furthest to the left to fight King Ka-thunk. Get in front of him and trick him to fall on his face. Now jump on his backside to hurt him. Do this three times and he’ll be defeated.
- Reward: Key Coin
Motley Bossblob: After defeating the first five bosses, you’ll unlock a Warp Block which will take you to a fight with Motley Bossblob. As before, he’ll try to stomp on you, run away from his attacks and jump over his shock waves. When the blobs fall off, jump on him and grab a Double Cherry. Repeat two more times to defeat him.
- Reward: Star 3
All Stars in Super Mario 3D World + Bowser’s Fury
- World 1
- World 2
- World 3
- World 4
- World 5
- World 6
- World Castle
- World Bowser
- World Star
- World Mushroom
- World Flower
- World Crown
World Crown — (38 Stars, 2 Stamp)
After unlocking the rocket at World Flower, you can jump into the spaceship and ride it to World Crown. If you thought the World Flower levels were hard, just wait. Things are about to get seriously tricky, but we’ll help you through it. Here’s where to find the 38 Green Stars and both Stamps in World Flower.
World Crown-1: Champion’s Road (3 Stars)
This level is incredibly difficult, but you’ve got this. Here’s what to do.
Star 1: Head right along the blue and pink blocks jumping from section to section as needed. In this next section, you’ll see Chargin’ Chucks on thin platforms. Run along these platforms and dodge past them. Then, jump into the Warp Box. You’ll come to a quickly alternating Beep Block section. You’ll basically only have time to land and then immediately jump again so plan your movements accordingly and continue forward. The first Green Star is on top of a platform after walking up a few Beep Block steps. Continue through the Clear Pipe Cannon.
Star 2: You’ll need to defeat three Magikoopas. Thing is, any square you step on will fall away into the void below before getting replaced. Carefully defeat them all without falling and then head through the Warp Block that appears. Jump over the spike roller and grab the potted Piranha Plant standing alone on a platform. Now continue along and have the Piranha Plant eat the Fuzzy enemies you encounter to make it easier to move forward. Pass over the moving yellow platforms and Jump over the spike rollers to reach the next Green Star. Then enter the Warp Box.
Star 3: Wall jump up the red blocks while avoiding hitting the Horned Ant Troopers. Then, jump up the next wall by landing on Piranha Creeper’s heads. Next, you’ll need to quickly swim along a moving block of water without touching any spikes until you’re able to enter a Clear Pipe Cannon. Run along the Dash Panels avoiding shock waves and enemies along the way. A Green Star will be waiting for you in the middle of the section right before the Key Coins.
Key Coins: In order to unlock the Warp Box, you need to collect all five Key Coins in this area. Here’s where they are.
- Key Coin 1: In the center of the four Ring Burners that send fiery shockwaves.
- Key Coin 2: In the corner behind the top right Ring Burner.
- Key Coin 3: In the corner behind the top left Ring Burner.
- Key Coin 4: In the corner behind the bottom left Ring Burner.
- Key Coin 5: In the corner behind the bottom right Ring Burner.
Stamp: After passing through the unlocked Warp Block, you’ll need to make your way through the Clear Pipe that spells out “Thank You !!” and then enter the next Warp Block. Now it’s smooth sailing to the flagpole and you can grab the Stamp along the way.
World Crown-2: Captain Toad’s Fiery Finale (5 Stars, 1 Stamp)
Star 1: Drop down immediately on your left and land on the grated platforms. Run around the corner where you came in and you’ll find the first Green Star.
Star 2: Get back on those grated platforms. As soon as the lava falls all the way down, head left and quickly get on the next grate. When it rises to the top get off. Drop down on your left while the lava recedes and grab the Green Star in the cavern. Quickly run to the grate you just crossed over.
Star 3: Head left onto the Propeller Platform and activate it to keep it in the air. Step off on the next grate platform when it rises to your level. When the lava levels fall again, drop off on the left and continue to the next Propeller platform. Immediately activate it to keep yourself out of danger. This will also cause you to reach the third Green Star.
Star 4: Drop onto the next platform when the lava goes down and then get on the next Propeller Platform. Activate it to bring you up to the yellow and orange Donut Blocks. Quickly walk across them to get the next Green Star.
Stamp: Head towards the Fire Piranha Plant taking care not to get hit, but then dive around the corner and step on the Propeller Platform. Activate it to bring you up to the clouds. You’ll be able to grab a bunch of Coins and the Stamp up here.
Star 5: While on the clouds drop down into the hole in the center to defeat the Fire Piranha Plant and then grab the last Green Star.
World Crown-3: Mystery House Marathon (30 Stars, 1 Stamp)
This gauntlet of Stars is super challenging, but here’s what you need to do get all 30 Green Stars. Remember, you can always take a break by pausing the game or not entering the next pink Warp Box until you’re ready to move on. You might want to play as Rosalina since her spin attack makes it easier to defeat enemies.
Star 1: You need to defeat three Koopas. Jump on one and steal its shell, then enter the shell and defeat the others while you’re temporarily invincible to make the first Star appear.
Star 2: Jump along the swinging platforms as you head to right. Jump at the right moment to snag the floating Green Star.
Star 3: You’ll need to defeat both Brolders. Jump on one’s head to make it recede and then pick it up and throw it at a P Panel. Do the same with the other one. Now jump on the last P Panel to make the Green Star appear.
Star 4: Hit the ? Block to get a Fire Flower. Now quickly light all of the torches in the room to get the Green Star.
Star 5: Jump to the left avoiding Peepas as the room rotates until you can reach the Green Star safely.
Star 6: Destroy the wooden blocks in the room until you find the Green Star. If you managed to hold onto the Fire Flower powers to this point, it will come in handy for breaking boxes.
Star 7: Defeat the Goomba and the Mini Goombas. As before, if you managed to still retain your Fire Flower powerup to this point, use it to defeat them all faster.
Star 8: Grab a baseball and throw it at just the right moment when the Biddybuds are out of the way so that it hits the Green Star at the bottom.
Star 9: Hit the Hop-Chops enemies until one of them turns into a Springboard. Ground Pound on it to jump on the wooden platform above and grab the Green Star.
Star 10: Move to the right and you’ll discover a hidden pathway, run on top of it, jump on top of the Thwomps, and then jump back on the higher level. The Green Star is now all yours.
Star 11: Jump in an Ice Skate and ride down the frozen hill avoiding Walleyes on your way down. The Green Star is waiting at the center of the bottom area.
Star 12: Hit the ? Block to get a Super Bell. Now climb up on the right and hit the P Switch. As fast as you can, climb up the wall again and jump over the next wall to get the Green Star.
Star 13: While still a cat, climb up the hill and get the Green Star in the top left.
Star 14: Carefully jump your way up the Beep Blocks and then use your cat powers to climb up the green wall and get the Green Star.
Star 15: Jump up the red and yellow blocks and grab the Green Star. You’re halfway there!
Star 16: Use your cat powers to climb up the rotating wheel between the fuzzy enemies and then jump on to the platform to get the Green Star.
Star 17: Use the dash panels to chase after the Rabbit. Once you touch it, a Green Star will appear.
Star 18: Grab a baseball and use the Jump Platform. When you’re in the air, throw the baseball and hit the P Switch on the wall to make a Green Star appear.
Star 19: Run to the right and either defeat or jump over the Piranha Plants until you reach the Green Star.
Star 20 Push the two Bully enemies into the blue lava. If you still happen to have your cat powers, swiping at them will make this very easy.
Star 21: Hit the center ? Block, then the one on the right, finally the one on the left. When they’re all activated, jump up and grab the Green Star.
Star 22: Run along the wooden planks until you reach the Green Star. If you feel comfortable, you can run straight and just jump across the gaps towards the Green Star to save a lot of time.
Star 23: Jump on the heads of the sleeping Piranha Creepers until you can reach the Green Star.
Star 24: Grab baseballs and throw them at the ? Panels when the Thwomps are in the air. Once all of the panels are activated, the Green Star will appear.
Star 25: You’ll need to defeat all enemies in the room to get the Star. Run up to a potted Piranha Plant and pick it up. Now walk towards the Fuzzy enemies and the Piranha Plant will gobble them up. Have the Piranha Plant you’re holding eat the other one and then defeat it by either swiping at it with cat claws or jumping on its head at the right moment. Just five Stars left!
Star 26: Run along the rotating ice cream sandwich, dodging attacks from the Piranha Plants until you can get the Green Star. It will be on the side closest to the camera view.
Star 27: Wall jump up between the two Brick Block pillars and then head to your right to get the Green Star. If you don’t stop moving, the Cat Bullet Bills won’t hit you and they’ll disappear shortly after getting the Star.
Star 28: Run right along the Donut Blocks doding spikey rollers along the way. Jump over the green Spike enemies and grab your Green Star.
Star 29: Jump on Boom Boom’s head one time to defeat him and grab the Star.
Star 30 & Stamp: Run along the pathway collecting Coins and the Stamp. The Green Star awaits you at the end.
Super Mario 3D World The last 5 stamps
The remaining five Stamps can only be unlocked by beating every single level as each of the five playable characters. For instance, if you run through every single one of the game levels as Toad, you’ll get the Toad Stamp. Same thing if you play through all the levels as Luigi and the other three characters. This is obviously really time consuming and might just be for the completionists out there, but if you put your mind to it you can do it.
- Mario Stamp: Play through all game levels while playing as Mario.
- Luigi Stamp: Play through all game levels while playing as Luigi.
- Peach Stamp: Play through all game levels while playing as Peach.
- Toad Stamp: Play through all game levels while playing as Toad.
- Rosalina Stamp: Play through all game levels while playing as Rosalina.
All Stars in Super Mario 3D World + Bowser’s Fury
Now you know the secrets and tricks to unlocking all Super Mario 3D World Stars and Stamps. Whether you’re playing alone or with friends I hope you’re able to get them all.
Get More Switch
Nintendo Switch