
Read text of any size with the zoom Accessibility feature on your Mac
How do I zoom in on Mac?
You can zoom in on apps using the trackpad on your Mac laptop or gestures on the Magic Mouse, but with the Zoom accessibility feature, you can zoom in on the whole screen. You can do it with keyboard shortcuts or by using your mouse’s scroll function along with modifier keys. Here’s how to use zoom on Mac and macOS Monterey.
How to enable shortcuts for Accessibility zoom
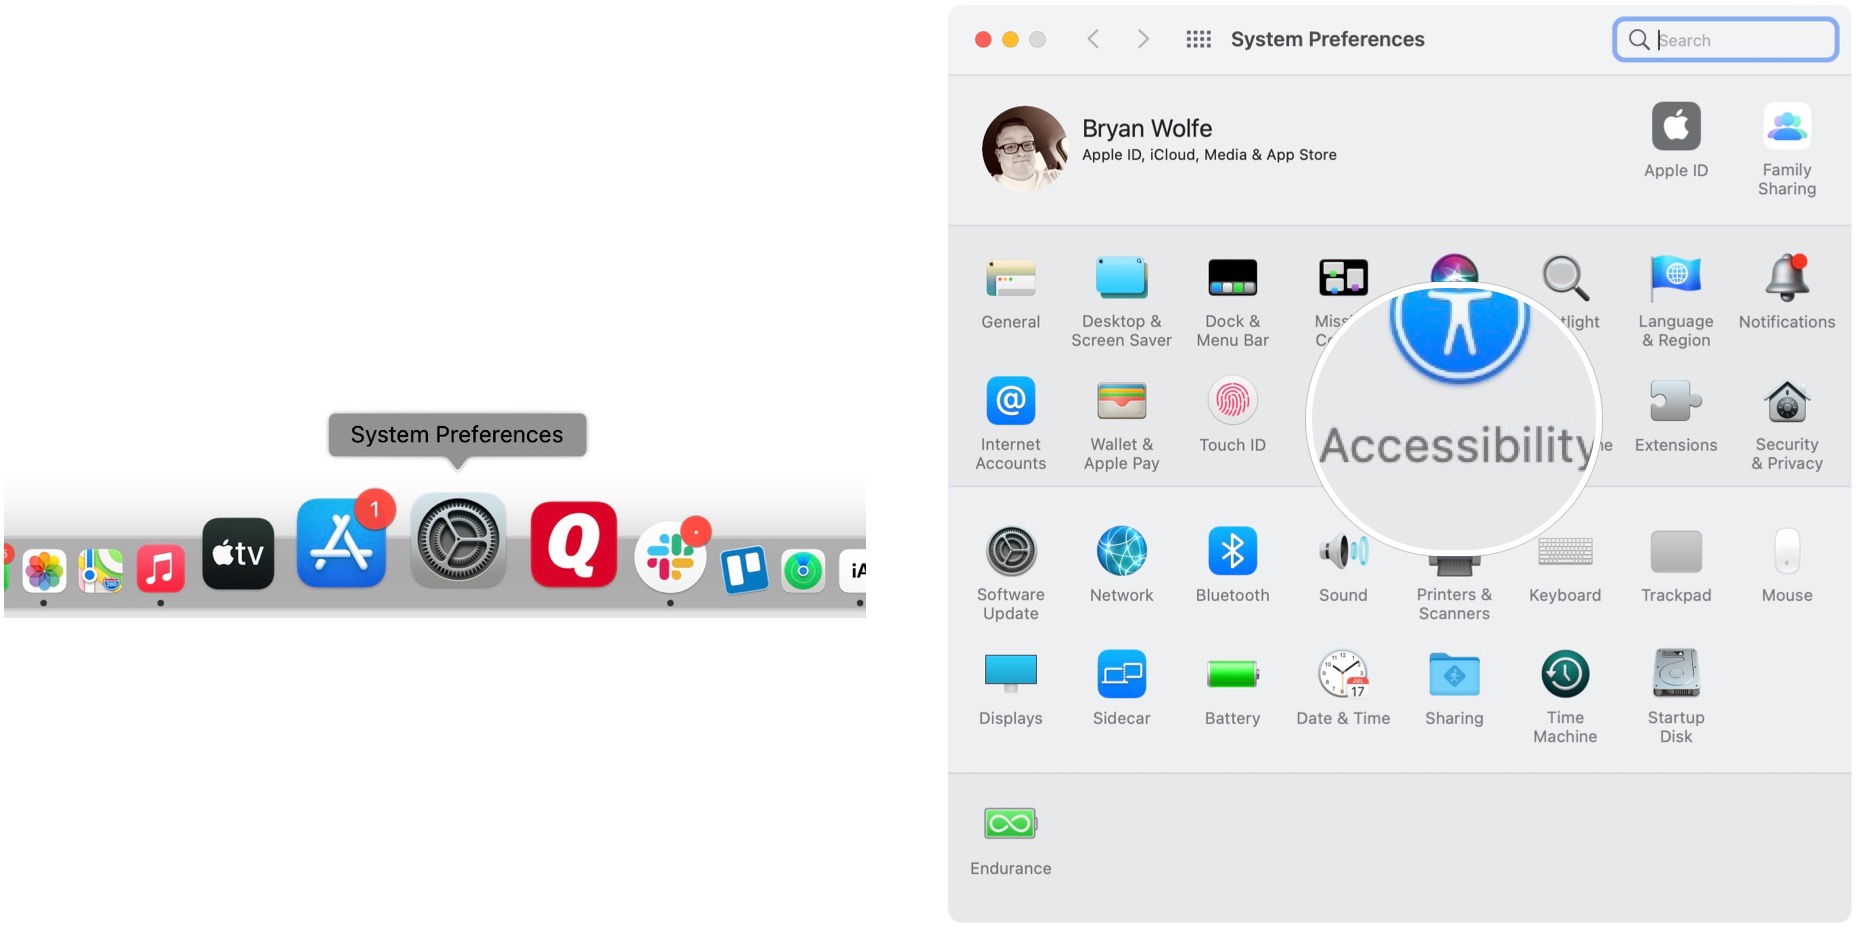
- Open System Preferences from your Dock or Applications folder.
-
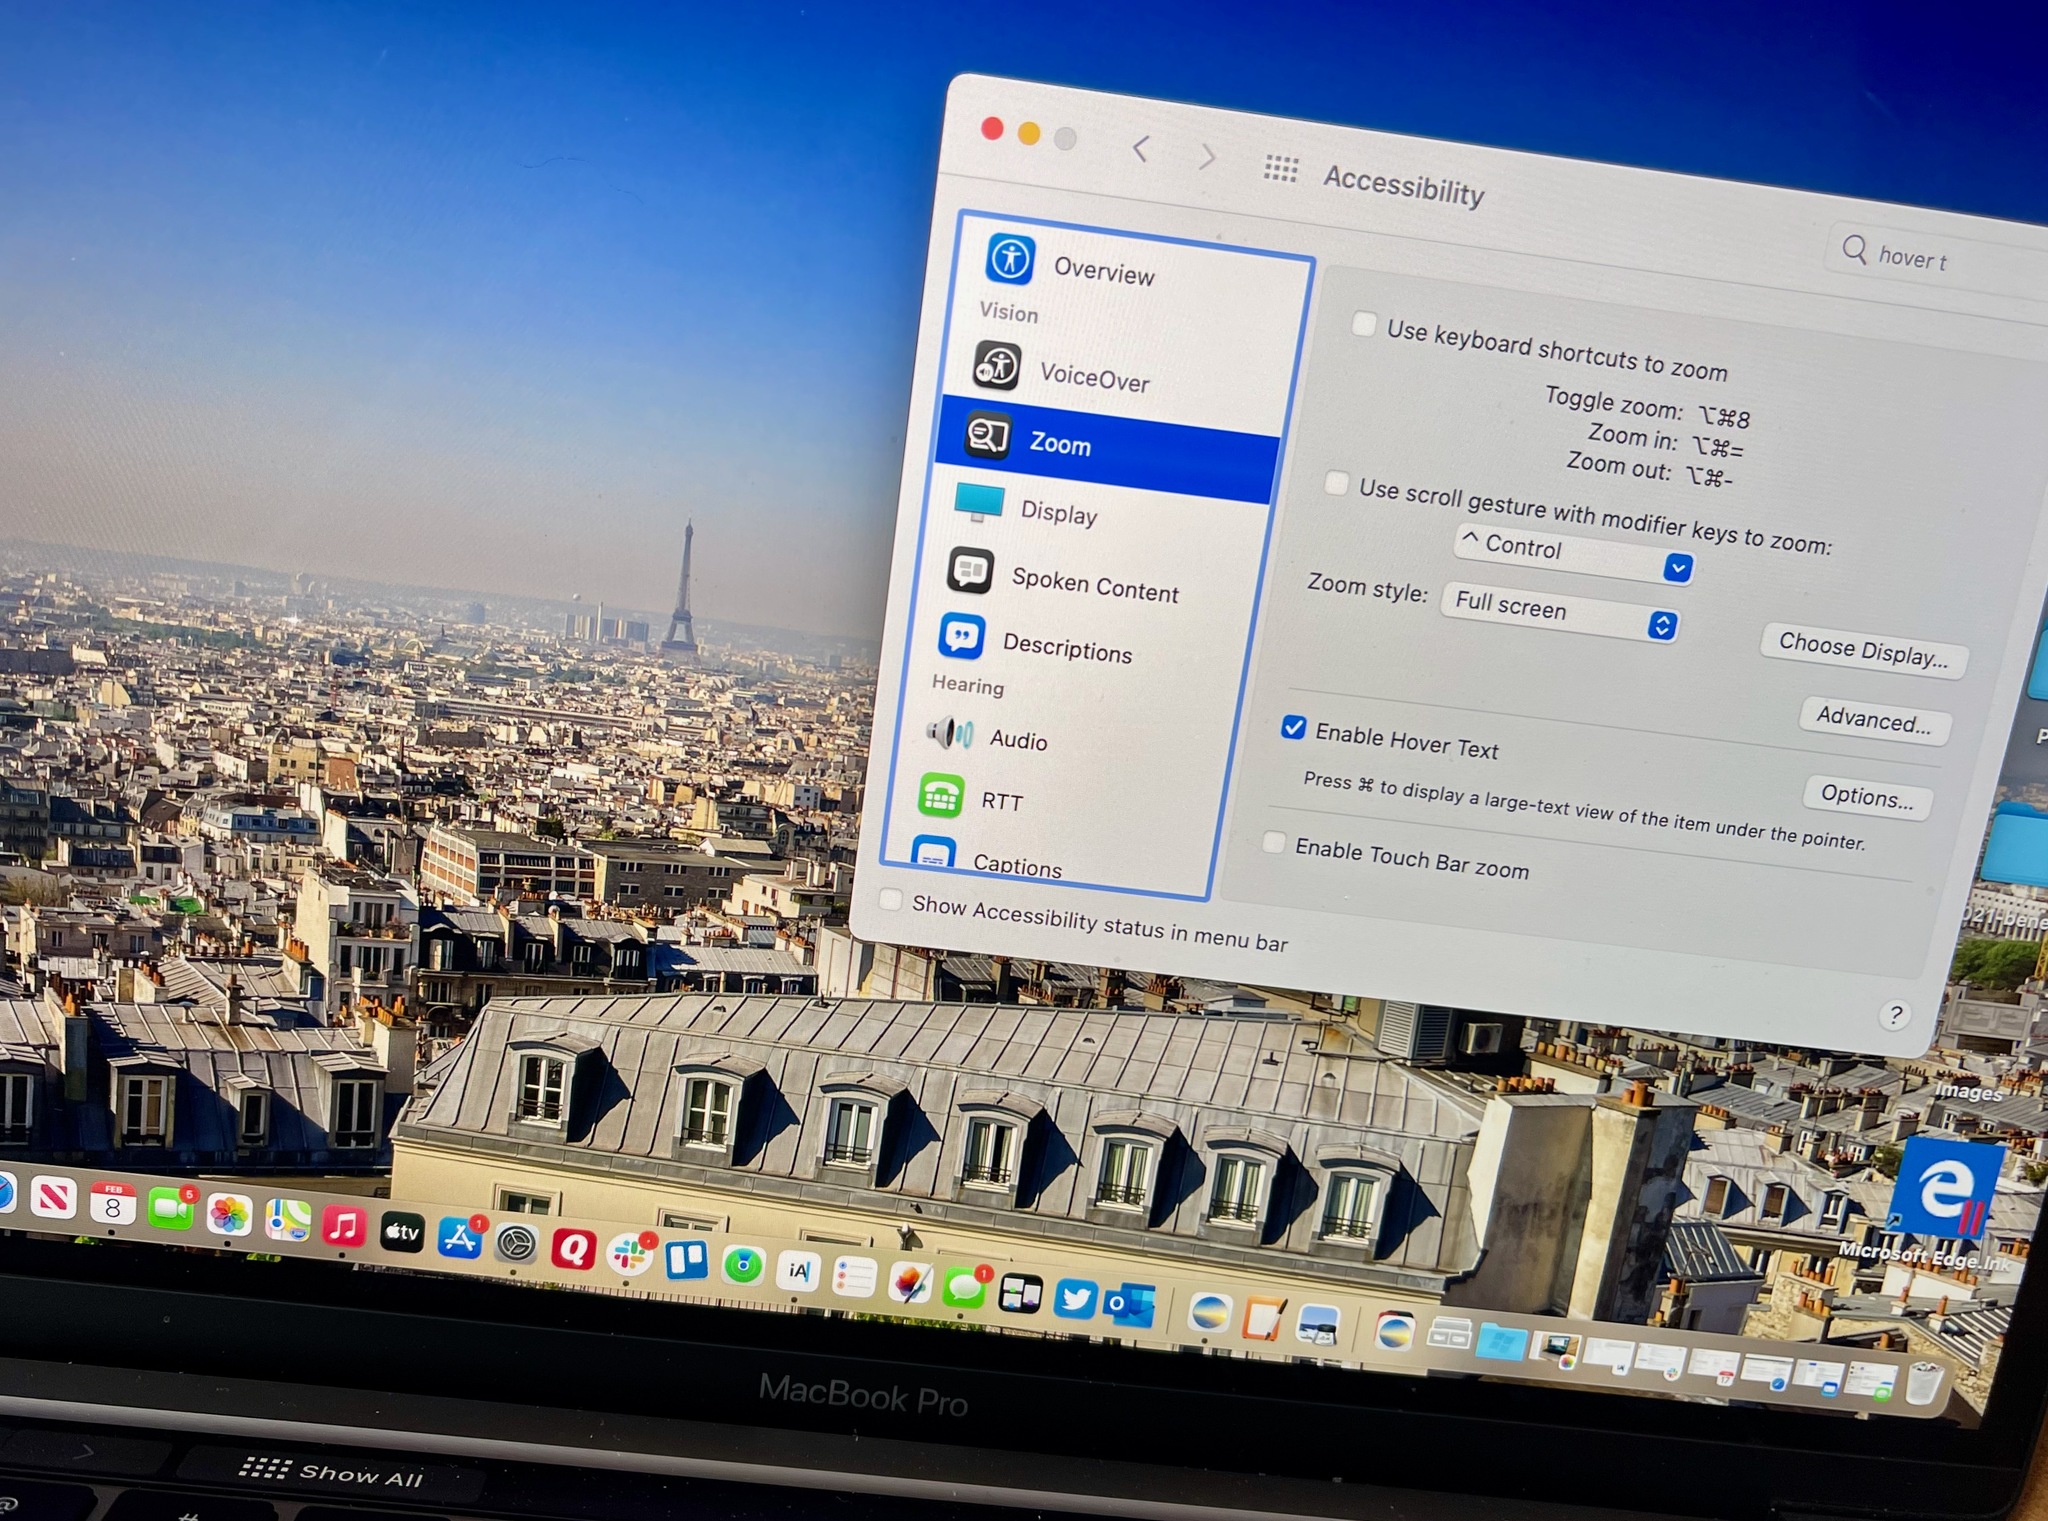
Click Accessibility.

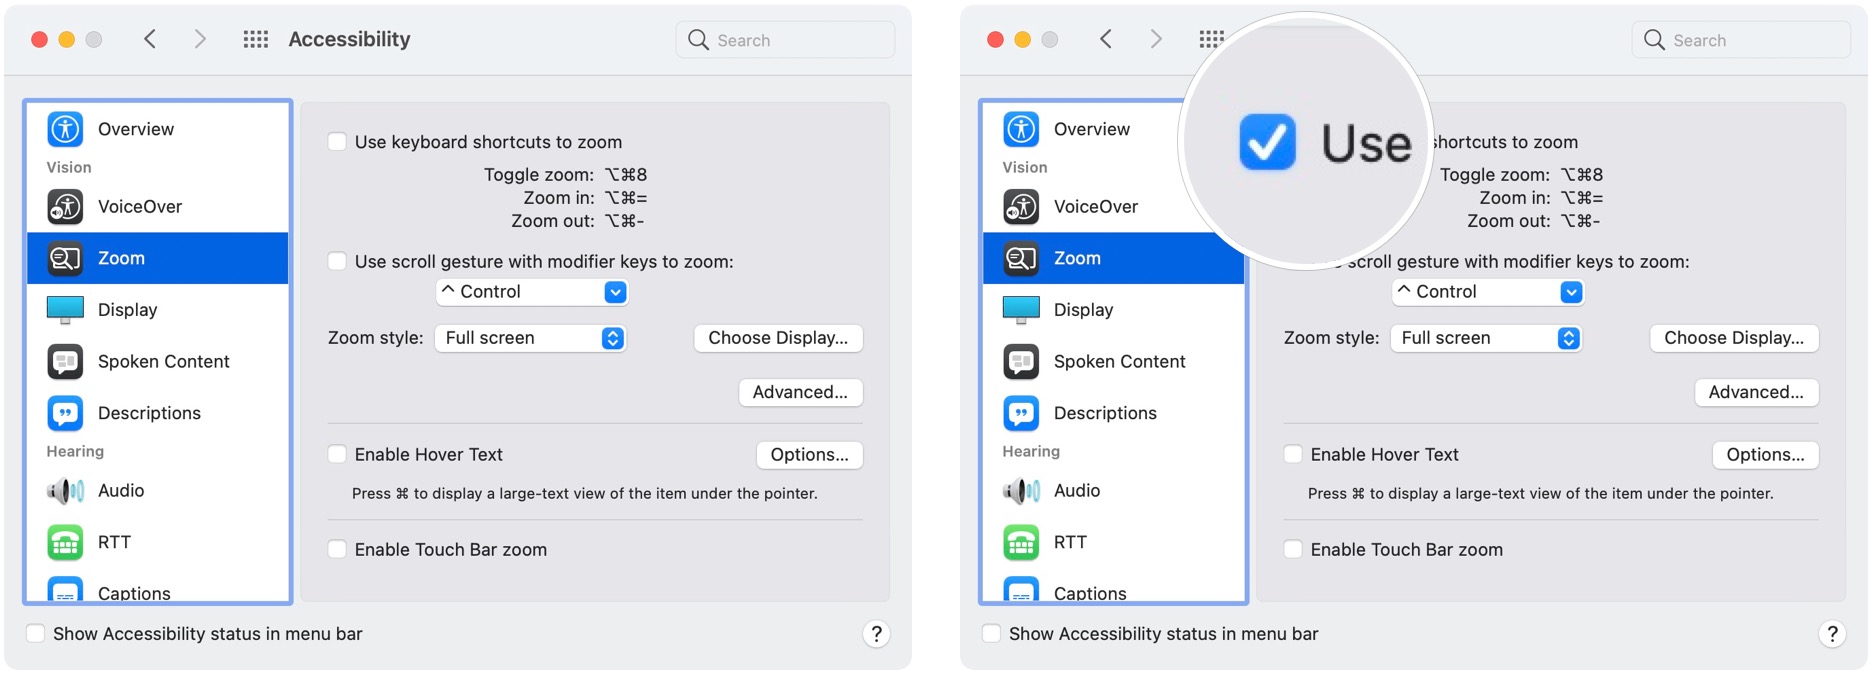
- Click Zoom in the menu on the left.
-
Choose the checkbox next to Use keyboard shortcuts to zoom to enable the feature. The shortcuts are:
- Toggle zoom: Command-Option-8
- Zoom in: Command-Option-=
- Zoom out: Command-Option- –
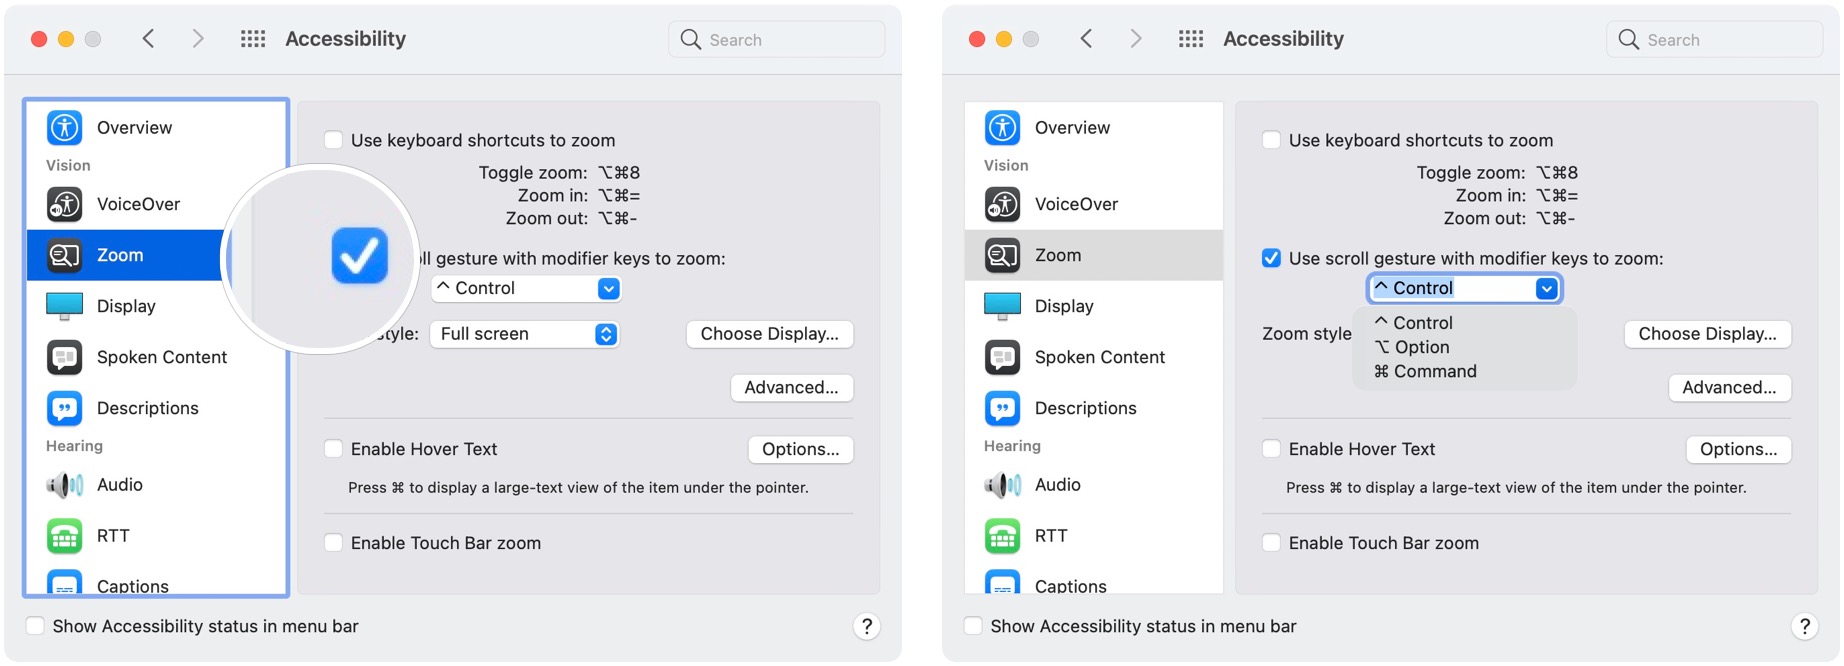
- Click the checkbox next to Use scroll gesture with modifier keys to zoom.
-
Click one of these options from the drop-down:
- Control
- Option
- Command
How to change the style of zoom
- Open System Preferences from your Dock or Applications folder.
-
Click Accessibility.
- Click Zoom in the menu on the left.
-
Select one of the options from the Zoom style dropdown:
- Full screen
- Split-screen
- Picture-in-picture

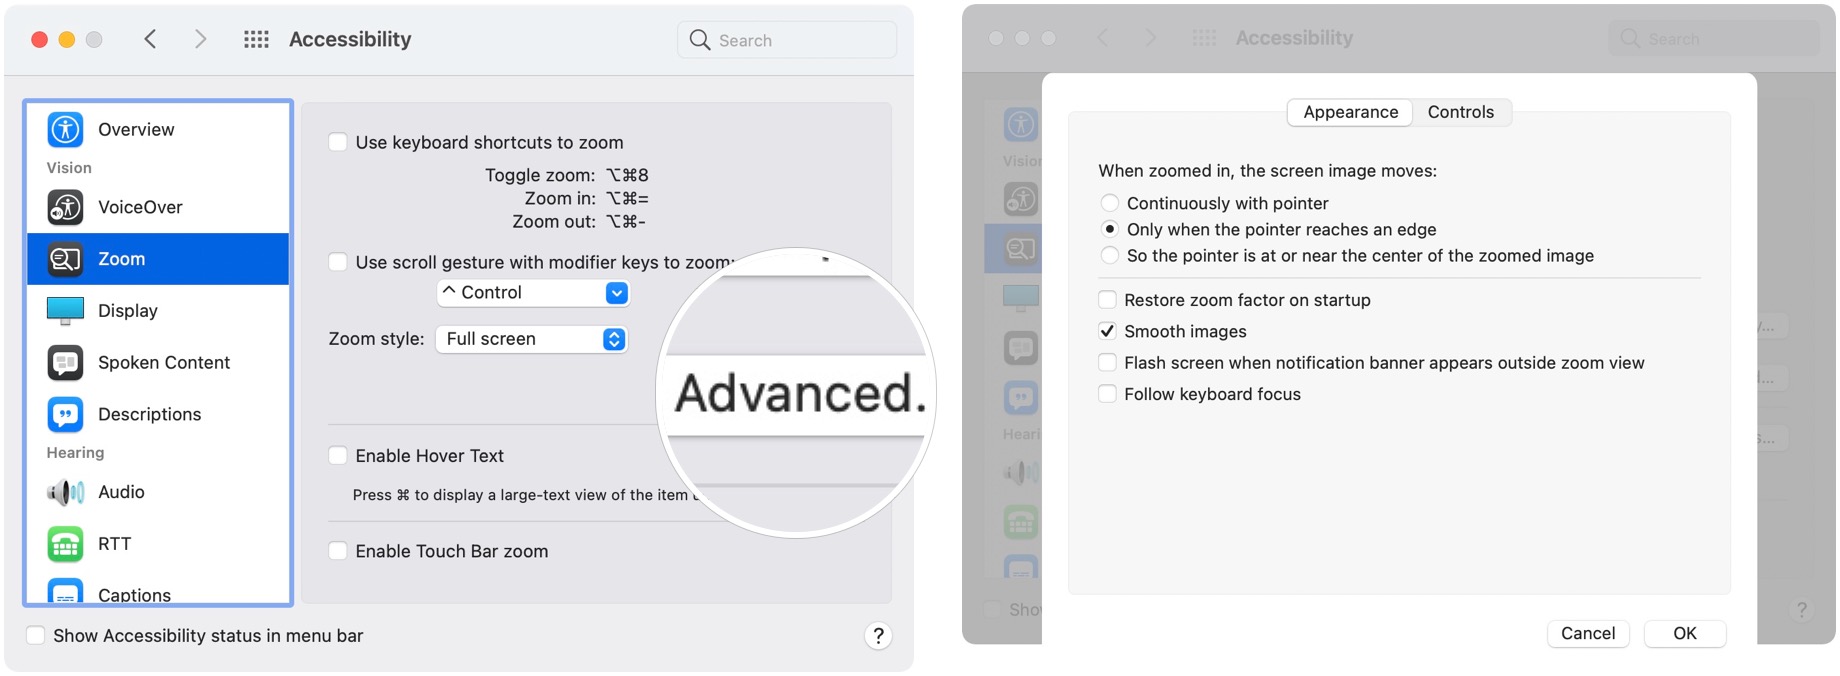
How to manage Zoom appearance
In macOS Monterey, the zoom appearance settings apply to all three zoom settings: Fullscreen, split-screen, and picture-in-picture, with one small exception.
- Open System Preferences from your Dock or Applications folder.
-
Click Accessibility.
- Click Zoom in the menu on the left.
- Select Advanced…
-
Choose a movement option under When zoomed in, the screen image moves:
- Continuously with pointer
- Only when the pointer reaches an edge
- So the pointer is at or near the center of the screen
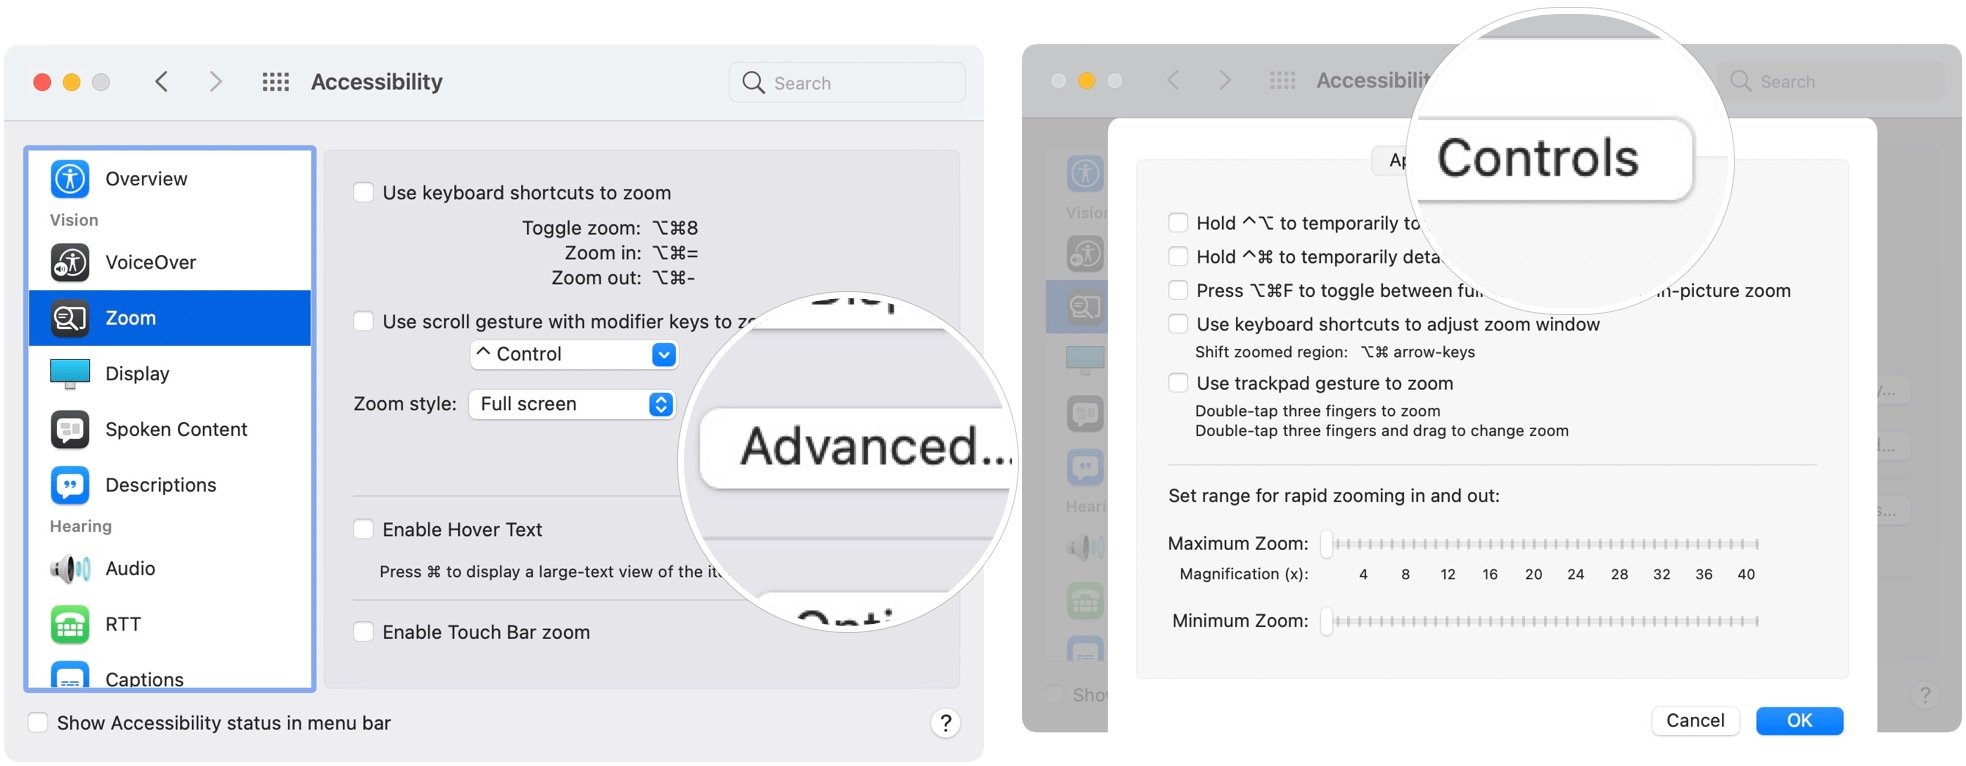
How to customize zoom controls
Just as with appearance, the settings for zoom controls apply to all zoom styles in macOS Monterey.
- Open System Preferences from your Dock or Applications folder.
-
Click Accessibility.
- Click Zoom in the menu on the left.
- Select Advanced…
-
Choose the Controls tab.
- Click the checkboxes to enable the following options:
- Holding Control-Option/Alt to temporarily toggle zoom
- Holding Control-Command to temporarily detach the zoom view from the pointer.
- Pressing Option/Alt-Command-F to toggle between full screen and picture-in-picture zoom
- Using keyboard shortcuts to adjust the zoom window
- Using a trackpad gesture to zoom
- Select and drag the sliders next to Maximum Zoom and Minimum Zoom to set each. You can start at 0 and magnify as much as 40x. If you hit the hotkeys to zoom in, you’ll immediately zoom in to the Maximum Zoom you’ve set.
-
Click OK when you’re finished.

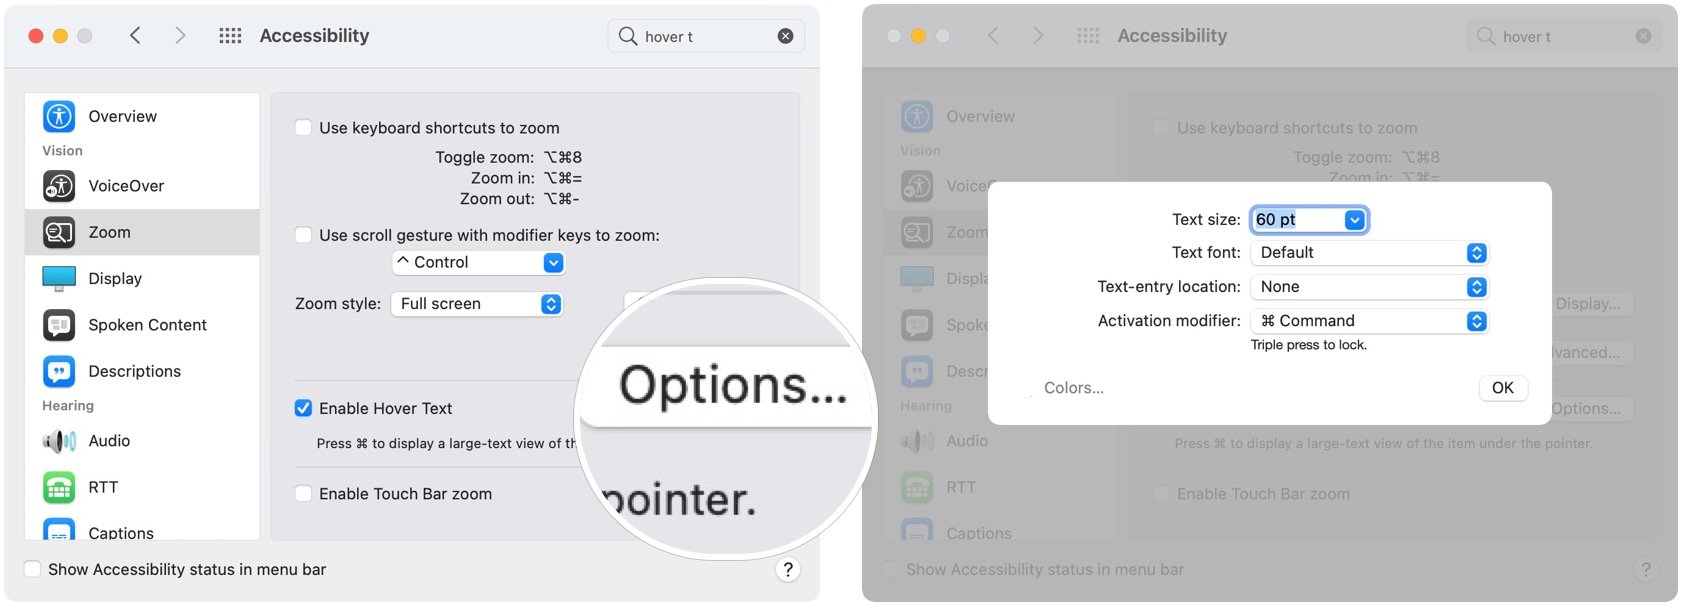
How to enable and manage Hover Text
Hover Text is a feature the lets you enlarge in a small pop-up window when you hover over text while holding down the Command key with this option enabled. It’s another great how-to-use zoom on Mac feature.
- Open System Preferences from your Dock or Applications folder.
-
Click Accessibility.
- Choose Zoom in the menu on the left.
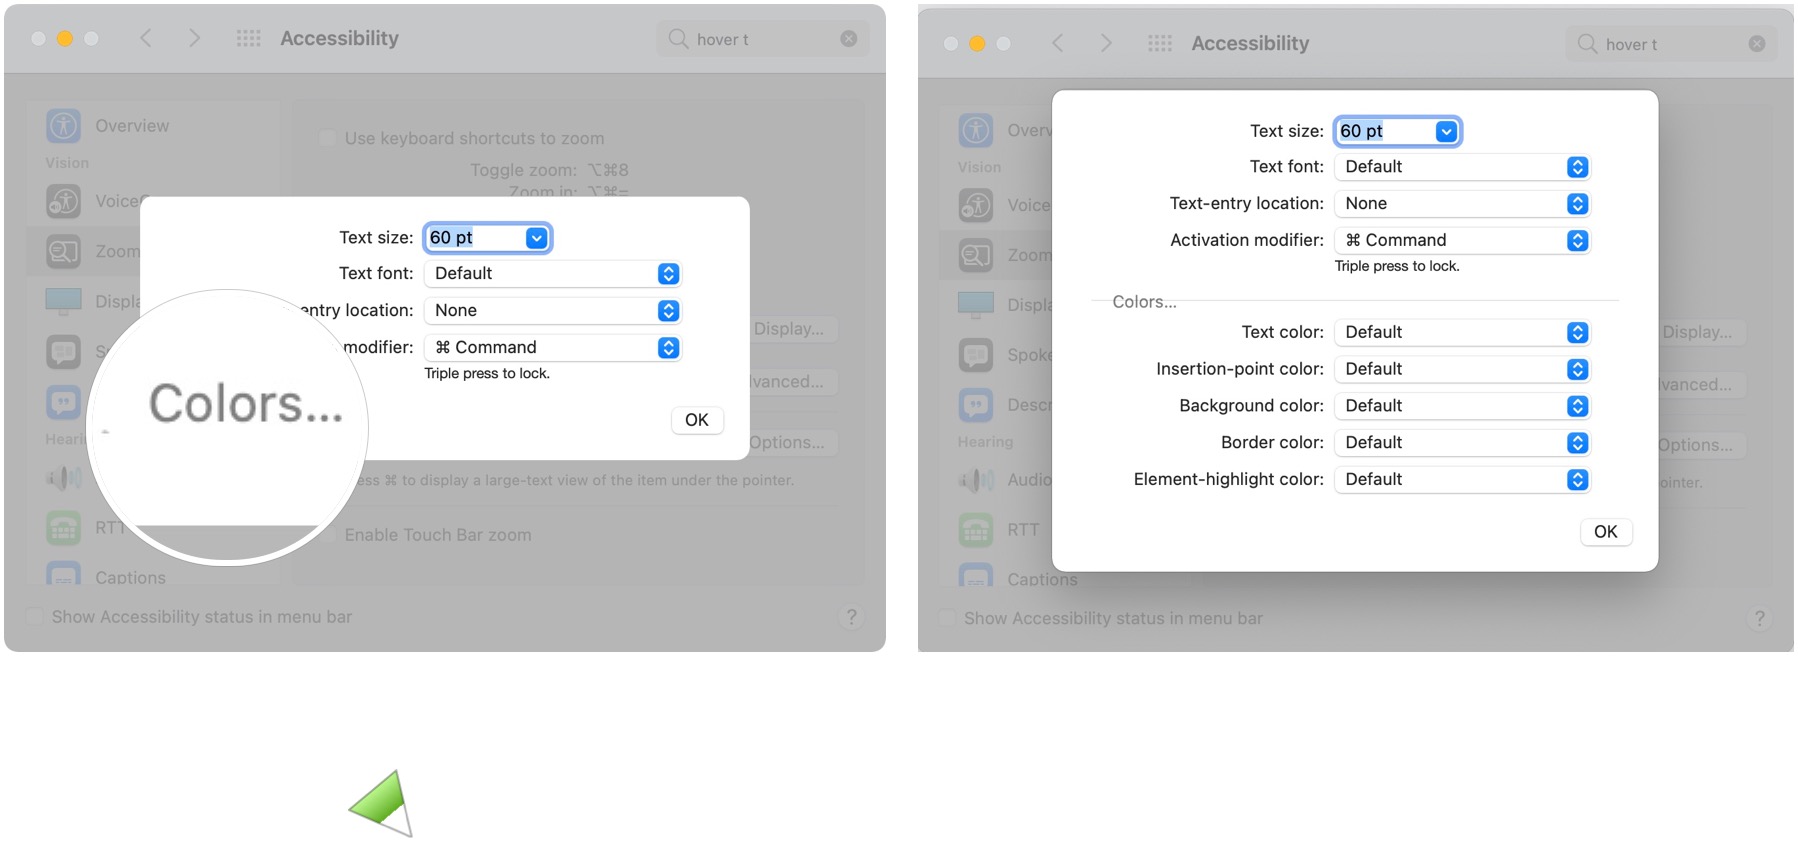
- Select the checkbox next to Enable Hover Text.
- Click Options…
-
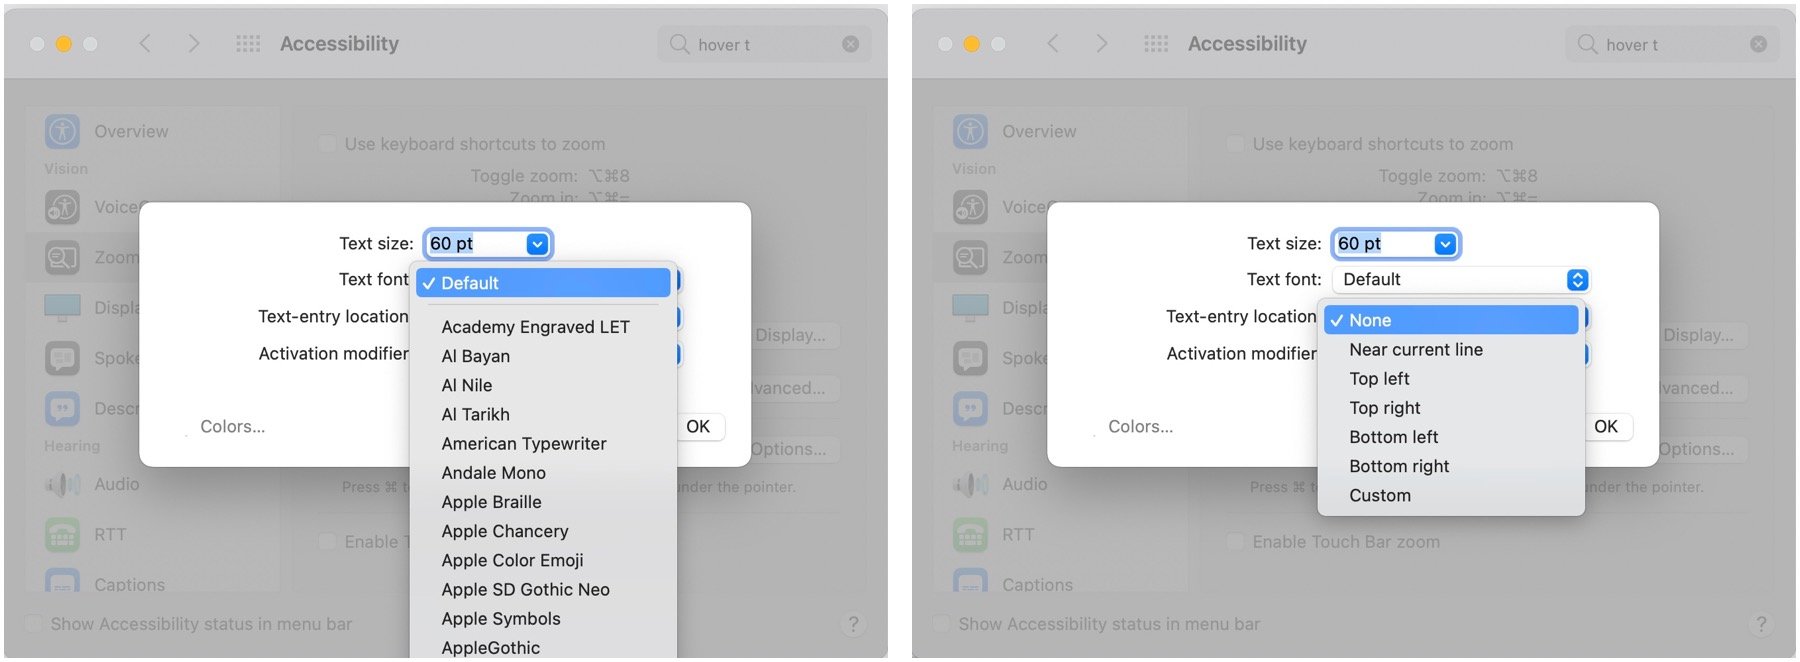
Click an option from the drop-down or enter a custom text size.
- Choose a font option from the drop-down menu. You can use any of your installed fonts for this.
- Click on of these text entry location options:
- None
- Near current line
- Top left
- Top right
- Bottom left
- Bottom right
- Custom
-
Select on one of these activation modifier options to select the key that activates Hover Text:
- Control
- Option
- Command
- Click Colors…
-
Choose the drop-downs to choose the colors for the following:
- Text
- Insertion-point
- Background
- Border
- Element-highlight
How to manage speech options for zoom
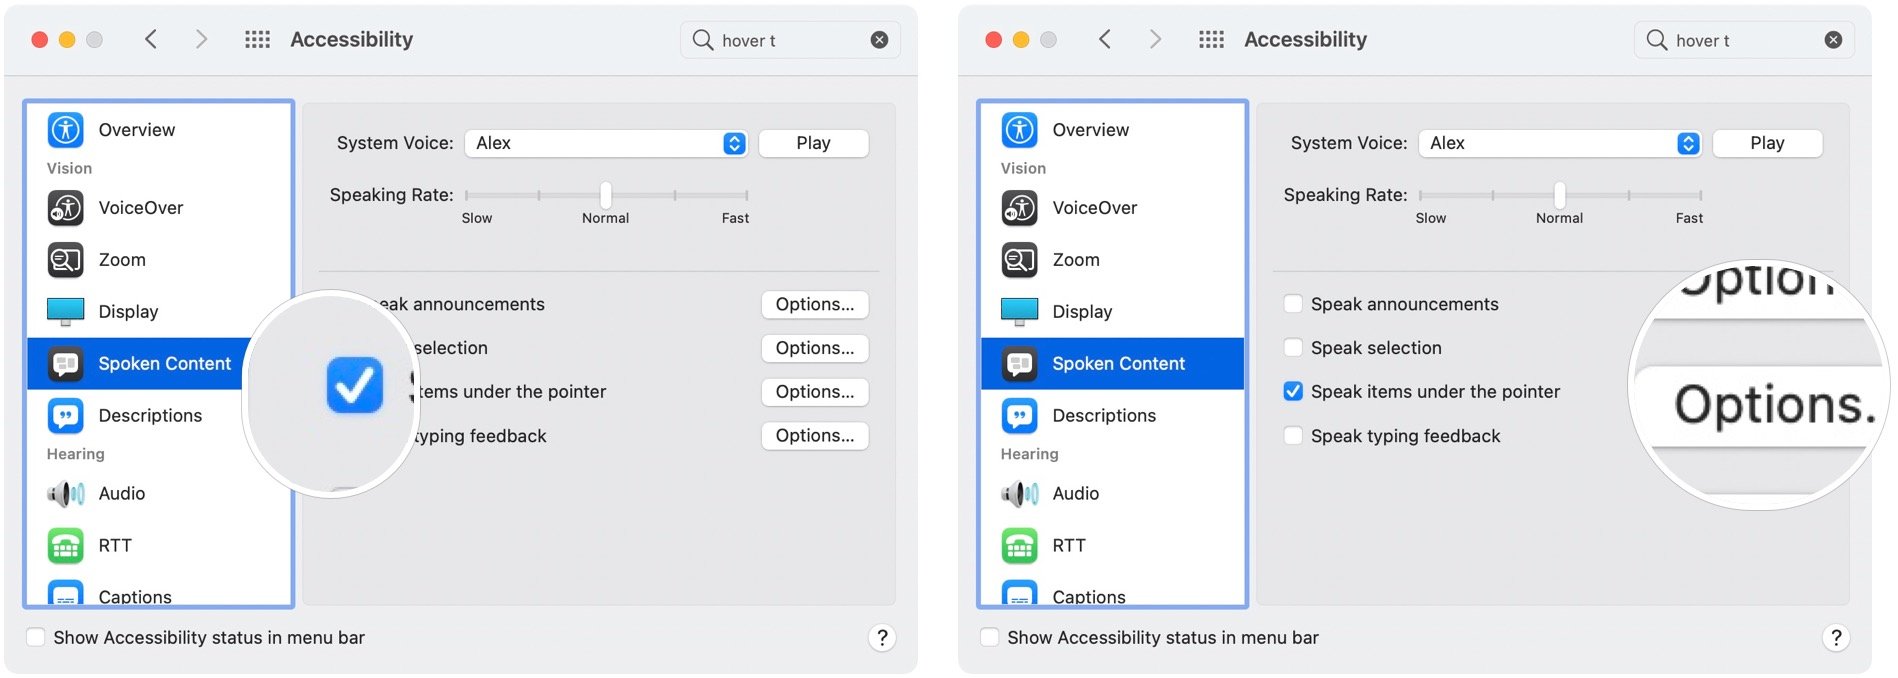
In macOS, the speech options for Zoom are in the speech menu.
- Open System Preferences from your Dock or Applications folder.
-
Click Accessibility.
- Click Spoken Content in the menu on the left.
-
Click the checkbox next to Speak items under pointer to turn that feature on.
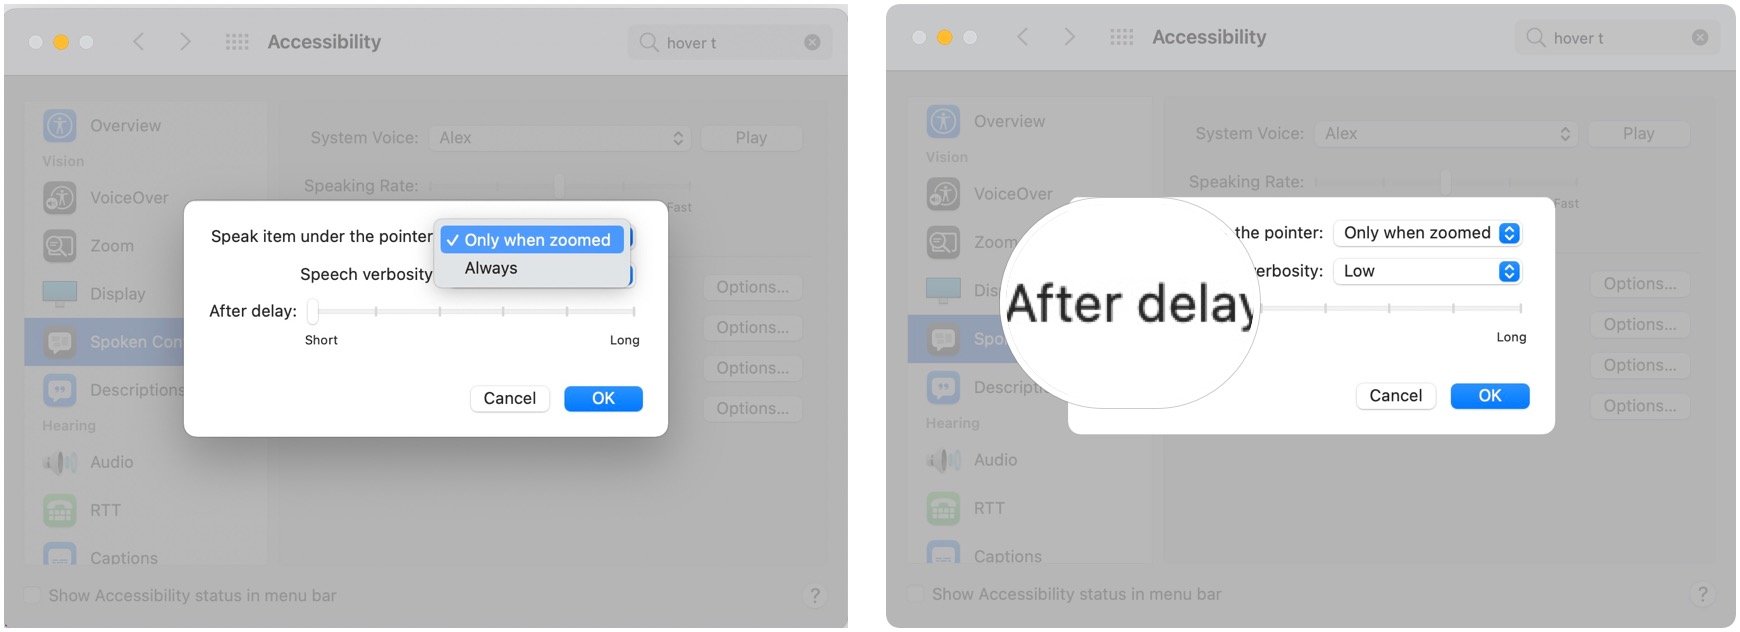
- Click Only when zoomed in the drop-down.
-
Drag the slider left or right to shorten or lengthen the delay between hovering the pointer over a word and when that word should be spoken.
Get Zooming
As you can see, Zoom is a powerful feature you can use on Mac. Use it to make better use of your workflow. If you’re looking for a new MacBook, we have some recommendations.
Updated March 2022: Updated for macOS Monterey.


