
Keep track of both friends and devices with Apple’s Find My app
Always know where your devices and loved ones are with Find My.
Find My is the one iOS app you need to find people and possessions you care about, combining the functionalities of the previous Find My Friends and Find My iPhone apps. Through this app, you can share your location with friends and family, see friend locations that have been shared with you, and track down, remotely lock, and erase lost devices.
These capabilities make it the best iPhone app for those who might need to locate important contacts and devices in a pinch. If you’ve ever used Find My Friends, Find My iPhone or both, Find My will probably feel very familiar to you, though there are new ways of doing some things in iOS 15, so let’s dive in! Here’s how to use Find My on your iPhone or iPad.
How to add friends in Find My on iPhone and iPad
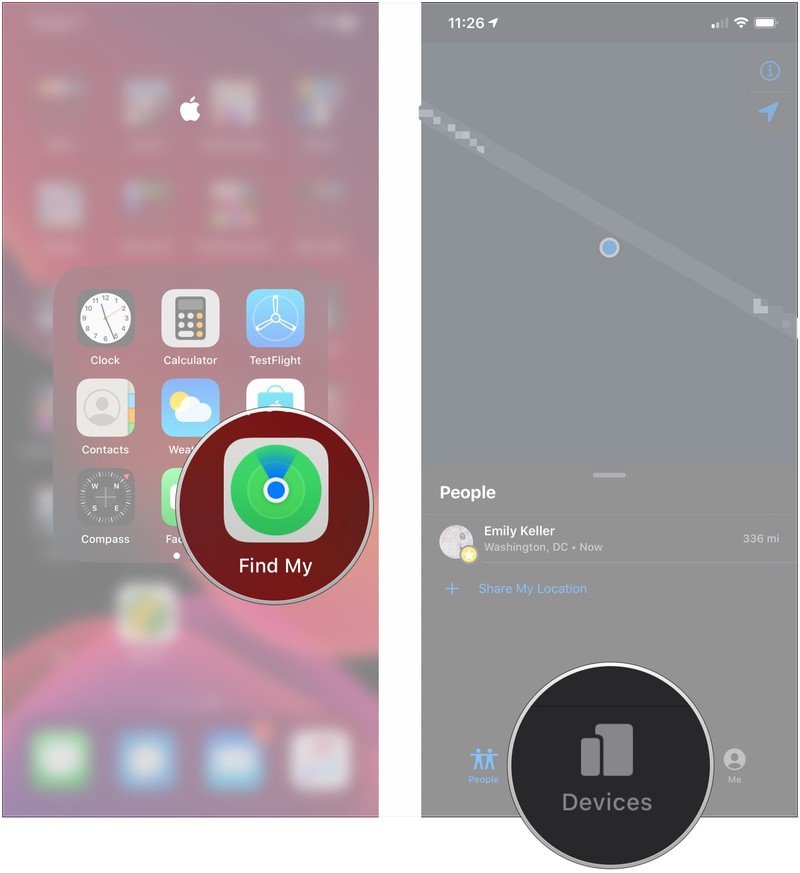
- Open Find My on your iPhone or iPad.
- Tap the People tab if the app doesn’t open to it.
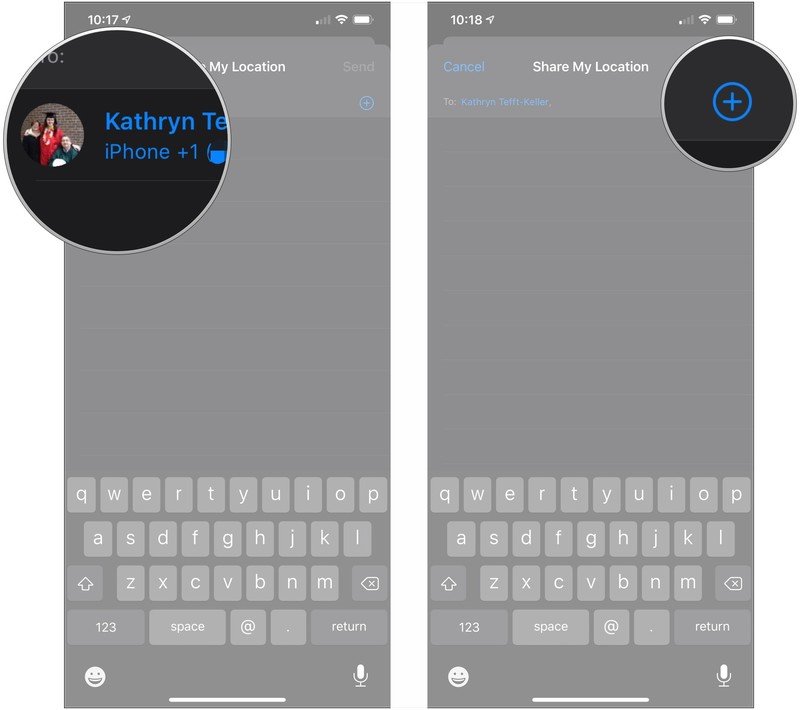
-
Tap Share My Location.

- Type the name of a contact or tap their name from the list.
-
Tap the + button to add more people.
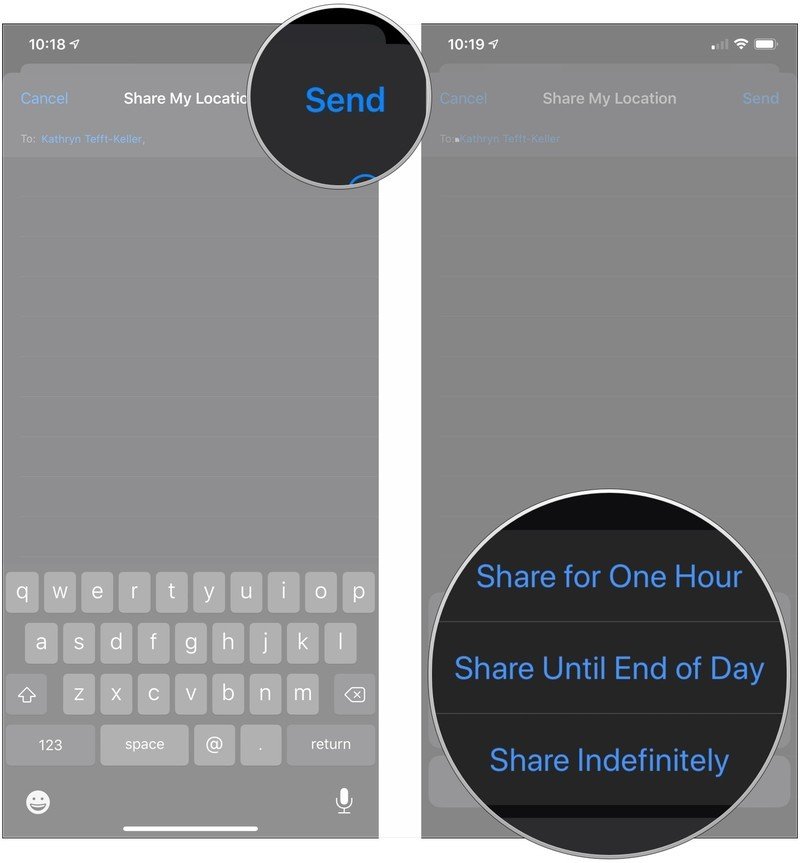
- Tap Send.
-
Tap Share for One Hour, tap Share Until End of Day, or Share Indefinitely.

You’ll now be sharing your location with your chosen contact for the time you specified.
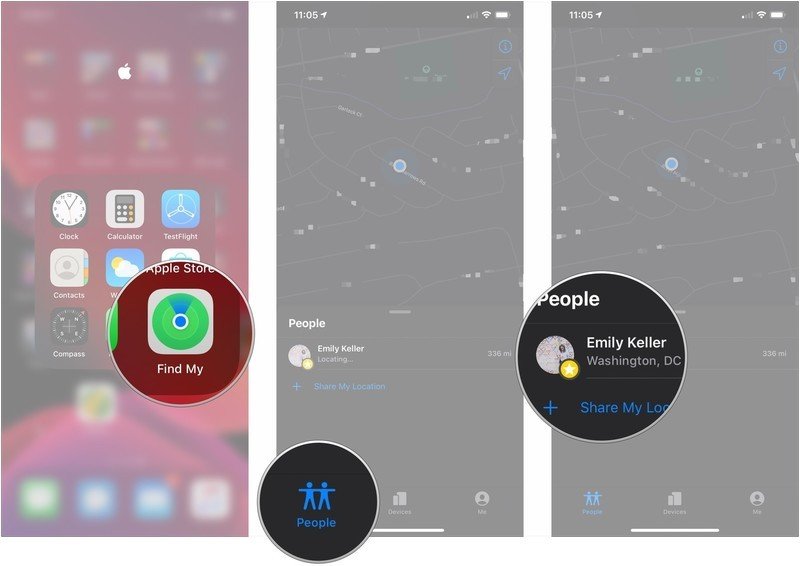
How to find friends in Find My on iPhone and iPad
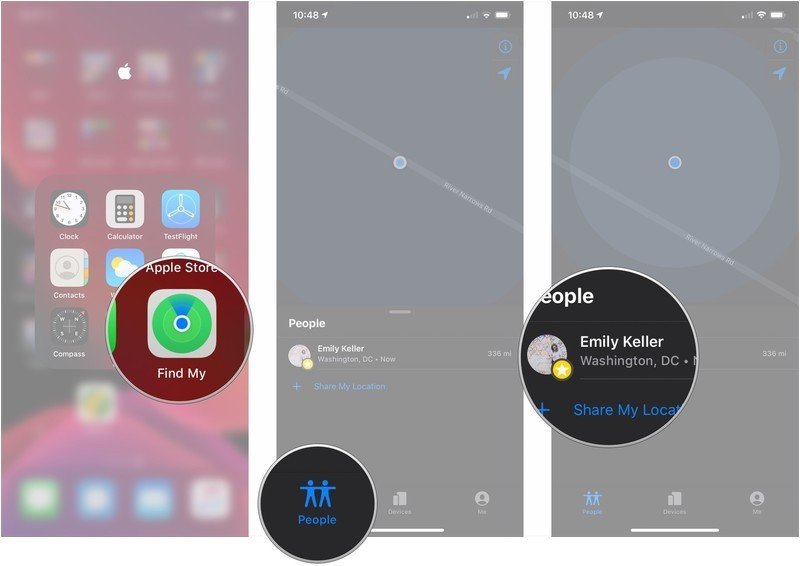
- Open Find My on your iPhone or iPad.
- Tap the People tab if the app doesn’t open to it.
-
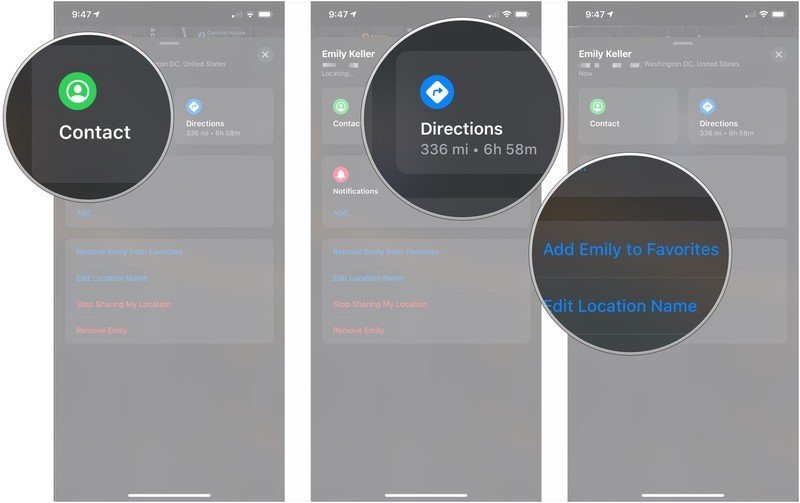
Tap the friend who shares their location in the list below the map.
- Swipe up on the card and tap Contact to bring up that friend’s contact information.
- Tap Directions to be given directions to their location in Maps.
-
Tap Add (Friend’s name) to Favorites.
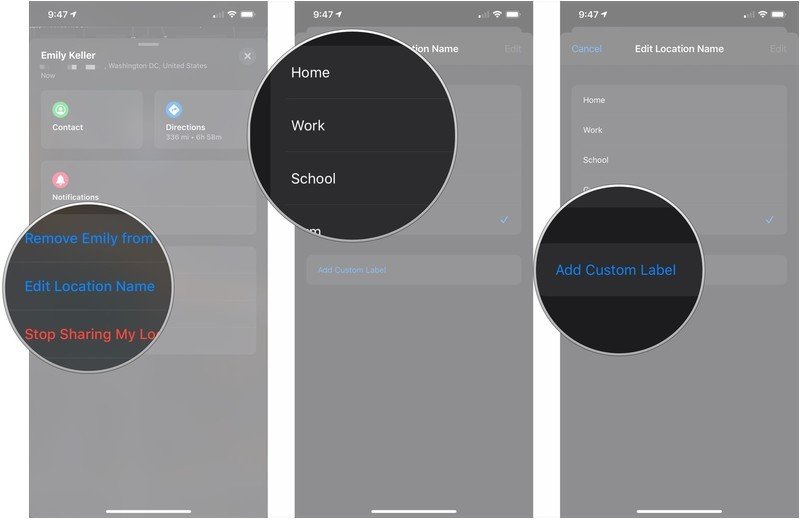
- Tap Edit location name.
- Tap a label (Home, Work, School, or Gym) to the location.
-
Tap Add Custom Label to create a custom label for their location.

How to share your location
There’s also a global location sharing toggle, with which you can allow sharing at first or turn it off for everyone.
- Open Find My on your iPhone or iPad.
- Tap the Me tab.
-
Tap the switch next to Share My Location so it’s in the green ‘on’ position.
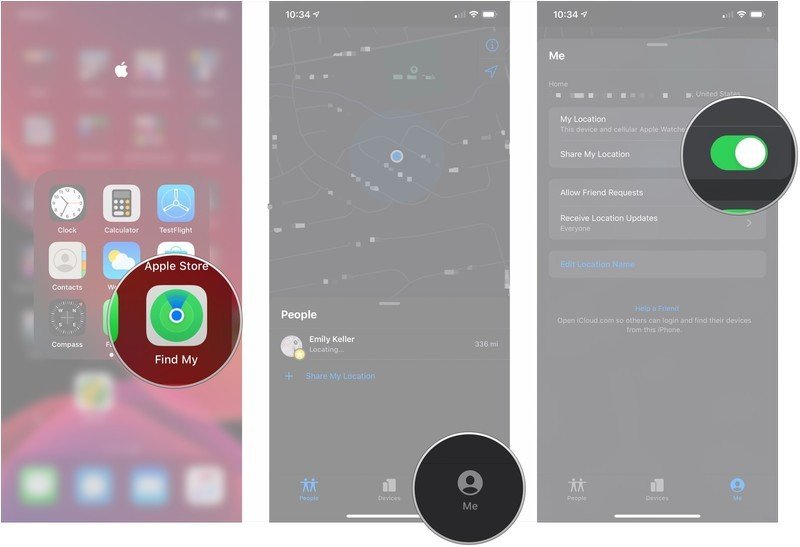
To stop sharing your location, repeat these steps, except tap the switch to turn it to the green ‘off’ position.
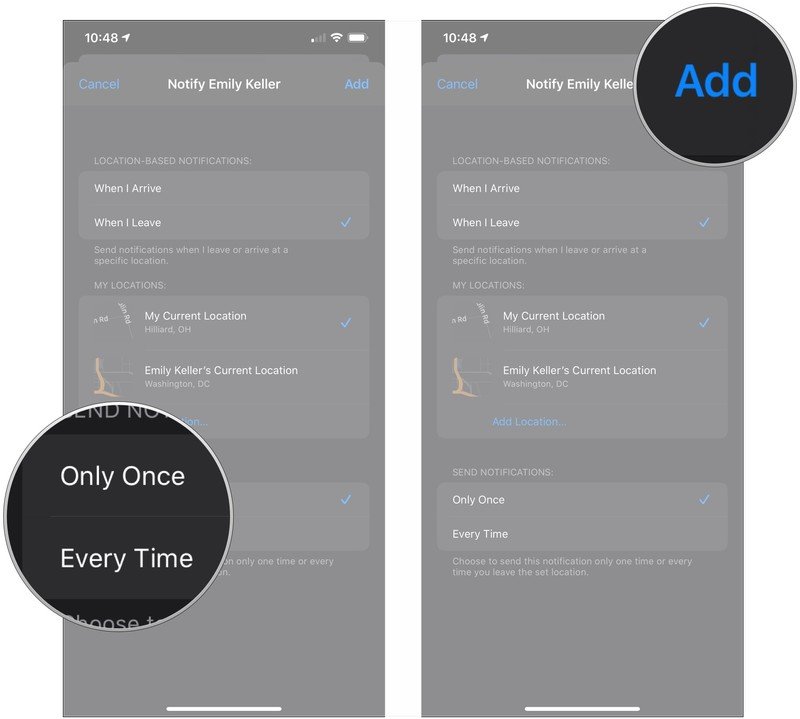
How to notify friends of your location
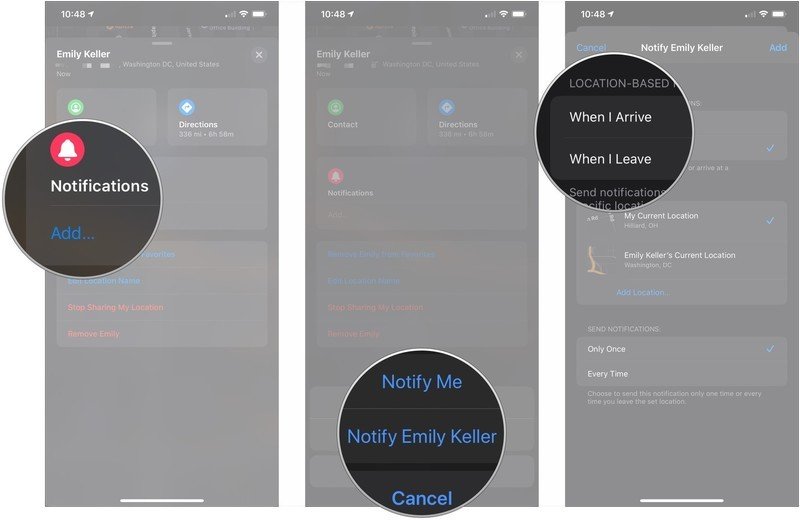
- Open Find My on your iPhone or iPad.
- Tap the People tab if the app doesn’t open to it.
-
Tap a friend who shares their location in the list below the map.
- Swipe up and tap Add… under Notifications.
- Tap Notify (friend’s name).
-
Tap either When I Arrive or When I Leave depending on when you want to notify your friend for a particular location.
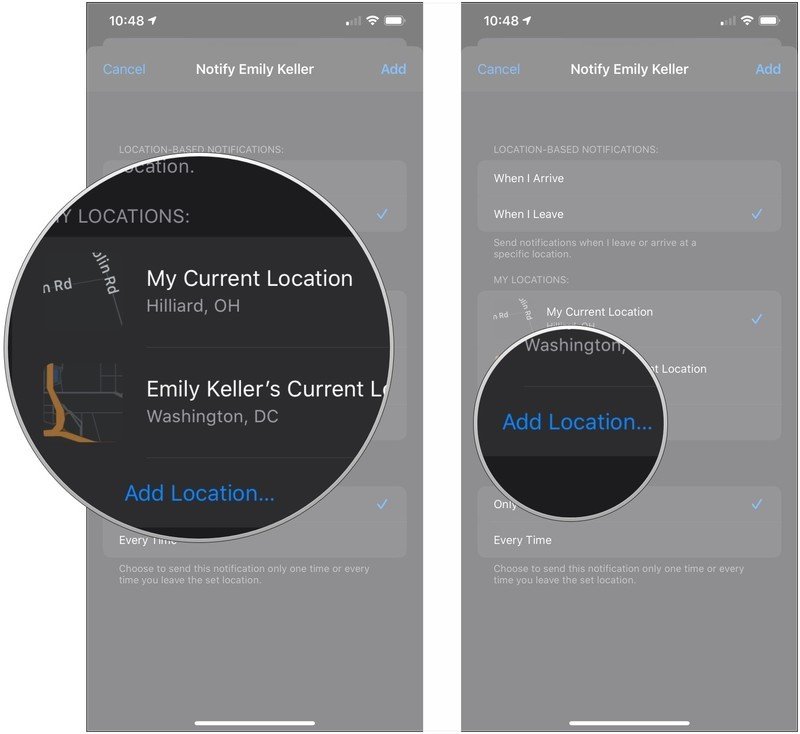
- Tap the location that the notification will be about.
-
Alternatively, tap Add Location… to add a new location other than the one on the list.
- Tap either Only Once or Every Time depending on when you want your contact notified.
-
Tap Add.
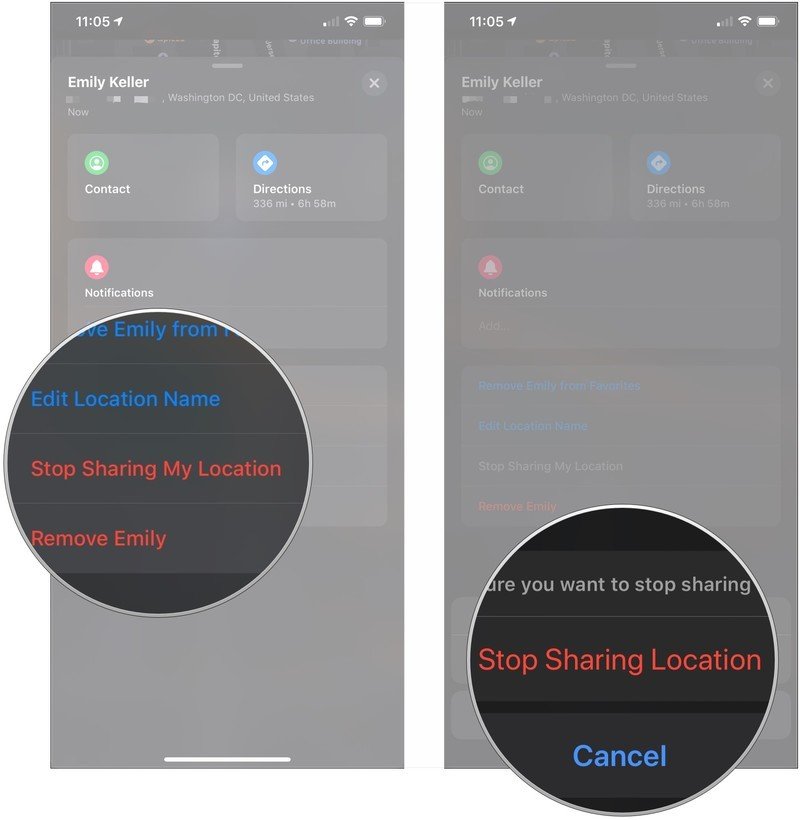
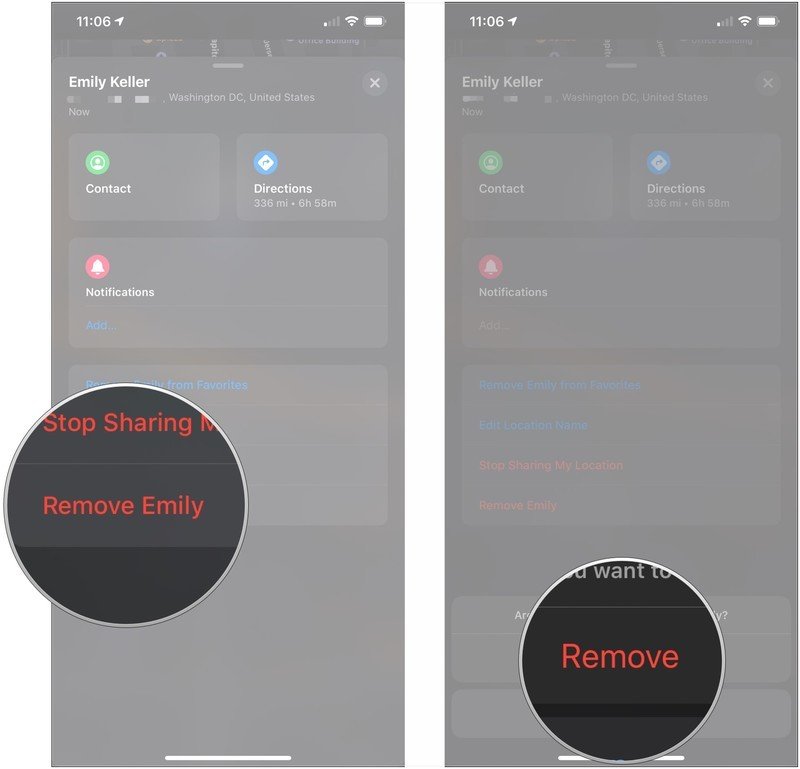
How to stop sharing your location and remove a friend
- Open Find My on your iPhone or iPad.
- Tap the People tab if the app doesn’t open to it.
-
Tap a friend who shares their location in the list below the map.
- Swipe up and tap Stop Sharing My Location if you want to stop sharing your location with a particular friend.
-
Tap Stop Sharing Location.
- Tap Remove (friend’s name) if you want to remove them from your list of friends.
-
Tap Remove.
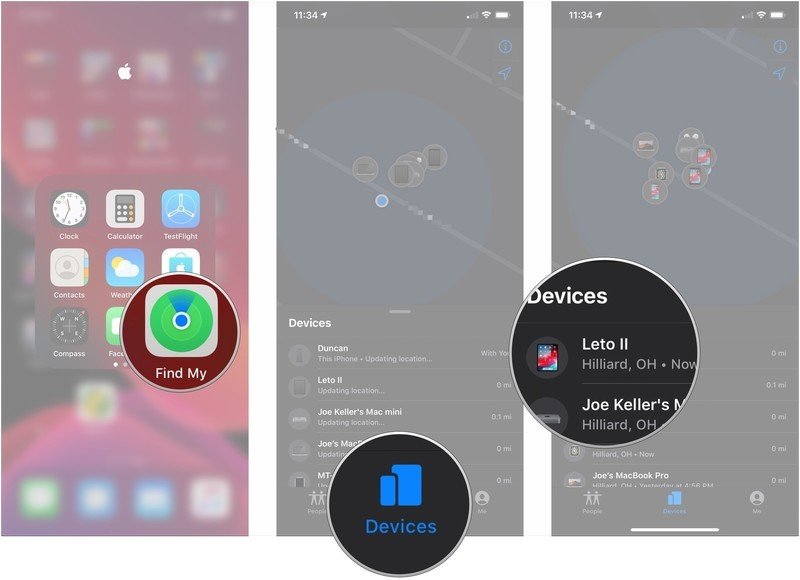
How to find devices with Find My on your iPhone and iPad
- Open Find My on your iPhone or iPad.
-
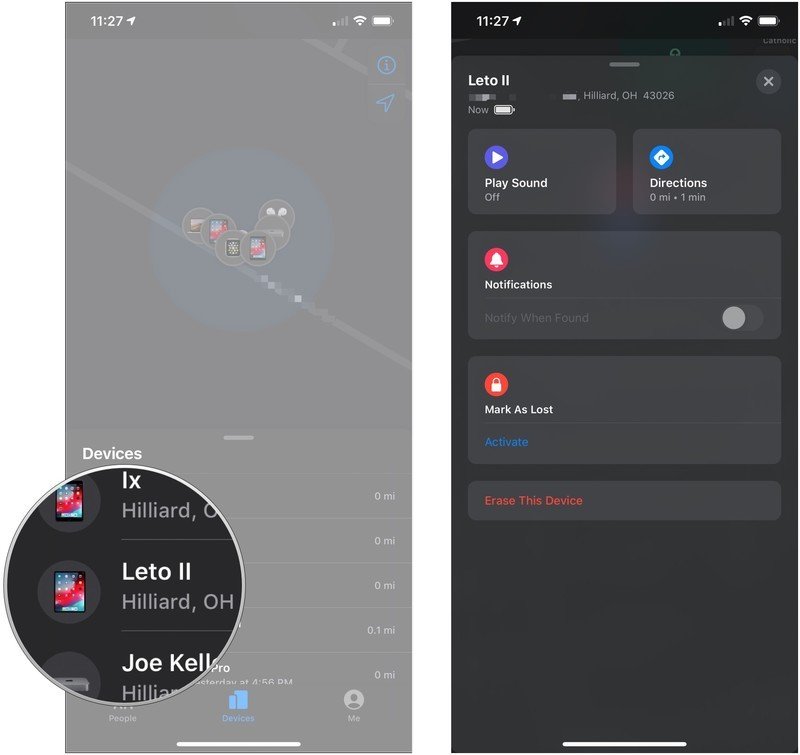
Tap the Devices tab. Devices near you should appear on the map.
- Tap the device that you want to find.
-
Swipe up and tap one of the buttons or the switch available.
- Play Sound: Plays a sound from your device to help you better locate it when it’s nearby. WARNING: Don’t test this with AirPods while wearing them. It will damage your hearing.
- Directions: Will jump to Maps to present you with directions to your device’s location.
- Notifications: Tap this switch if you’re looking for a device and want to be notified if someone finds it.
- Mark As Lost: Tapping Activate will mark your particular device as ‘lost.’ More on that later.
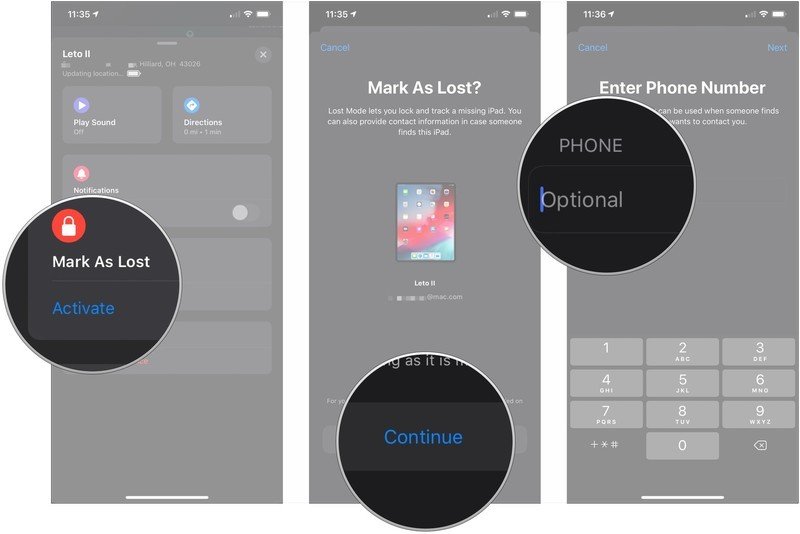
How to mark a device as lost
- Open Find My on your iPhone or iPad if the app doesn’t open to it already.
- Tap the Devices tab. Devices near you should appear on the map.
-
Tap the device that you want to find.
- Swipe up and tap Activate under Mark As Lost.
- Tap Continue.
-
Optionally, enter your phone number.
- Tap Next.
- Optionally, enter a message for someone who might find your device.
-
Tap Activate.

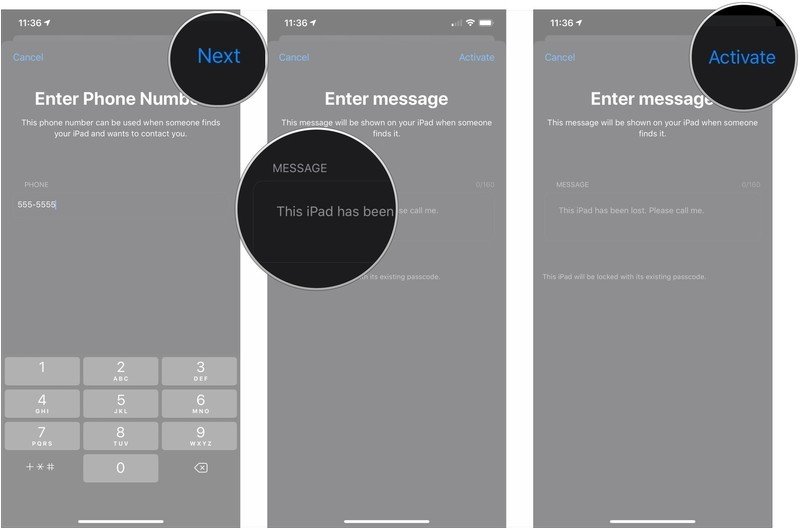
When marked as lost, your device will be locked behind its passcode as long as it’s still reachable by a wireless signal. If you directed Find My to do so, your phone number and message will be displayed on the device.
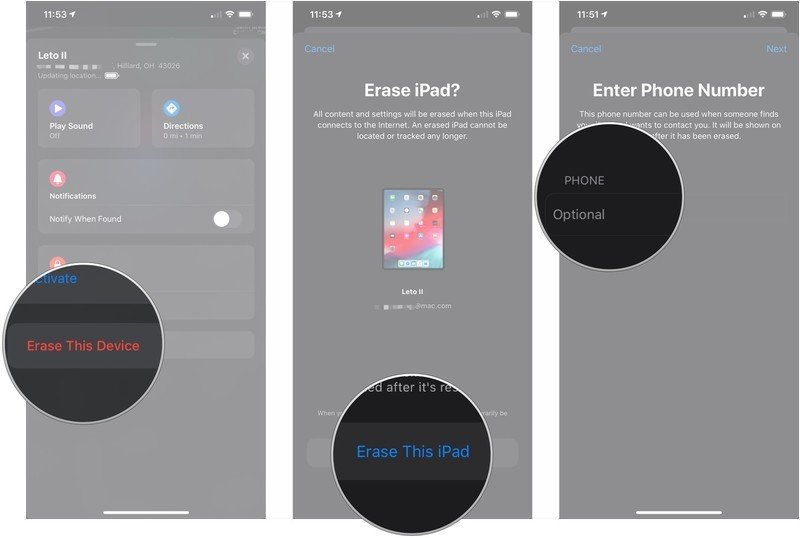
How to remotely erase a device
- Open Find My on your iPhone or iPad.
- Tap the Devices tab. Devices near you should appear on the map.
-
Tap the device that you want to erase.
- Swipe up and tap Erase This Device.
- Tap Erase This (Device).
-
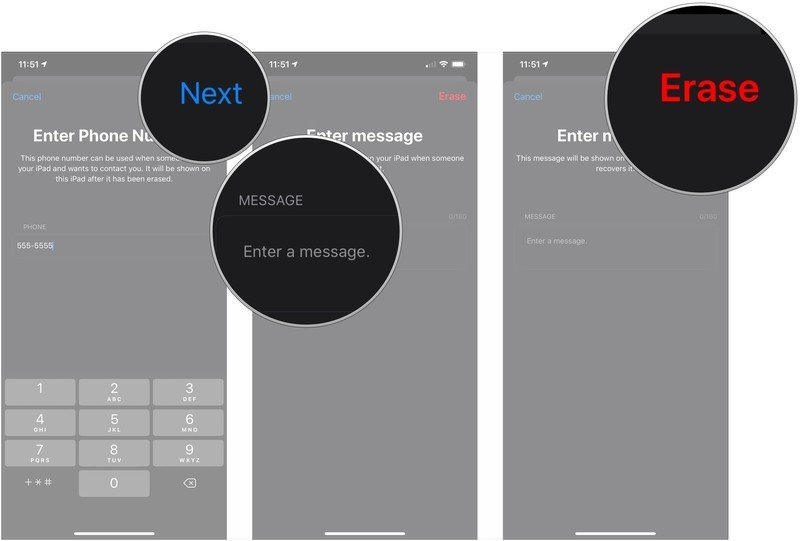
Optionally, enter your phone number.
- Tap Next.
- Optionally, enter a message for someone who might find your device.
-
Tap Erase.
Your iPhone, iPad, Mac, or Apple Watch will be wiped clean.
How to add a personal item or third-party product in Find My
Depending on what item you want to track, you have a couple of options for adding them to Find My. If you are attaching an AirTag to your bag or keys, you’ll want to follow the steps below to track an item with an AirTag. For third-party devices with Find My support built-in, you’ll want to adhere to the guidance further down on “other supported items.”
Add a personal item with an AirTag
- Open Find My on your iPhone or iPad.
- Tap Items
-
Tap Add New Item.
- Tap Add AirTag.
- Bring the AirTag near your iPhone or iPad and tap Connect.
-
Choose a name for your AirTag from the list or tap Custom Name to create your own label.
- Tap Continue to register your AirTag to your Apple ID.
-
Tap Done.


Add a third-party item with Find My support
- Open Find My on your iPhone or iPad.
- Tap Items
- Tap Add New Item.
-
Tap Other Supported Item.
- Initiate the pairing process as per the manufacturer’s guidelines.
- Follow the onscreen steps to name it and register it to your Apple ID.

How to find a personal item with an AirTag
- Open Find My on your iPhone or iPad.
- Tap Items
- Tap on the item you wish to find.
-
There are a couple of options to help you locate your item. Tap Play Sound to have the attached AirTag play a sound if you think it might be within earshot, or tap Find to enter Precision Finding mode.
- If you can’t find an item, you can turn on Lost Mode by tapping Enableand tapping Continue to confirm. You’ll also be able to turn on notifications when it is found by ensuring the Notify When Found switch is set to on.

How to manage your personal settings in Find My
- Open Find My on your iPhone or iPad.
- Tap Me.
-
To stop or restart sharing your location with your chosen list of friends and family, swipe up and tap the switch next to Share My Location.
- This section allows you to control whether you receive Item Safety Alerts for AirTag trackers moving with you that are not assigned to your account and Friend Requests. Tap the appropriate switch to turn these features on or off.
- You can also give your current location a name by tapping Edit Location Name.
- Tap a label (Home, Work, School, or Gym) to the location.
-
Tap Add Custom Label to create a custom label for their location.


Updated May 2022: Updated for the latest version of iOS 15.


