
Activating a new AirTag is as easy as 1, 2, 3!
Wondering how to set up your new AirTags? It’s super easy!
If you have a tendency to misplace your items often, then Apple’s AirTag could be your new best friend. These little discs can easily be tucked into your bag, purse, wallet, keys (with some help through accessories) luggage, car, stroller, or whatever else you want to keep track of. They’re small, super portable, and incredibly easy to set up too! Think AirPods simple, because that’s how streamlined the process is.
Here’s how to activate your new AirTag with your current iPhone.
Disclaimer: There has been controversy with people using AirTags with malicious intent for tracking people. To combat the stalking, Apple added more anti-stalking safety measures to AirTag, and iOS 16 will add Safety Check, where one can quickly revoke access that was previously granted to sensitive information, such as location, passwords, and other data.
Activating your AirTag
There are two main methods of activating an AirTag using your iPhone or iPad. First, you can activate it right out of the box after unwrapping your AirTag from its encasing plastic and pulling the last little bit out of the battery compartment. Once you do that, it’ll show up on your iPhone the same way that AirPods will.
The second method is probably best used for AirTags that have been deactivated for one reason or another, and it involves the Find My app. In the same way, you can add a third-party item compatible with the Find My network, you can also add an AirTag. Here’s how to utilize either method.
How to activate a new AirTag with your iPhone or iPad
- Take your AirTag out of the box.
- Unwrap the AirTag from the plastic that it’s in, taking care to gently pull the last bit of plastic out of the battery compartment. You should hear a chime.
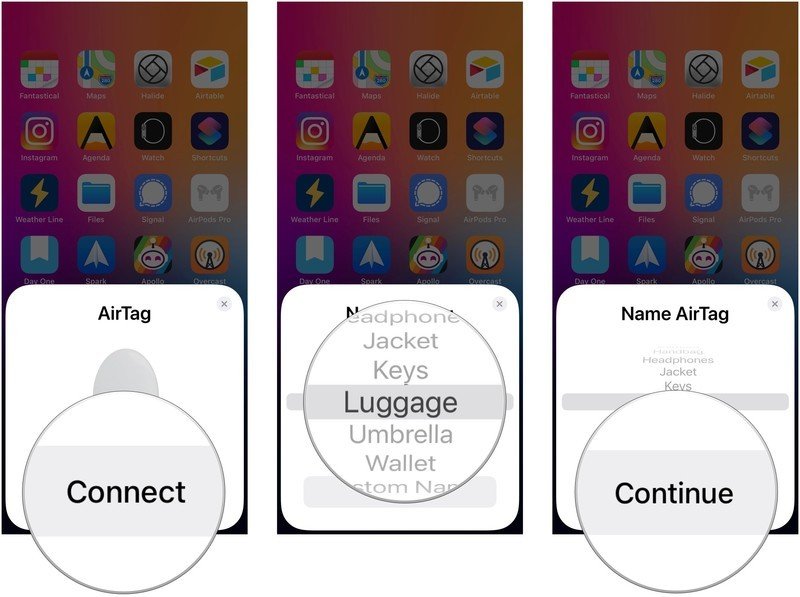
- Tap Connect on your device.
- Select an item name for your AirTag with the scroll wheel, or enter a custom name.
-
Tap Continue.

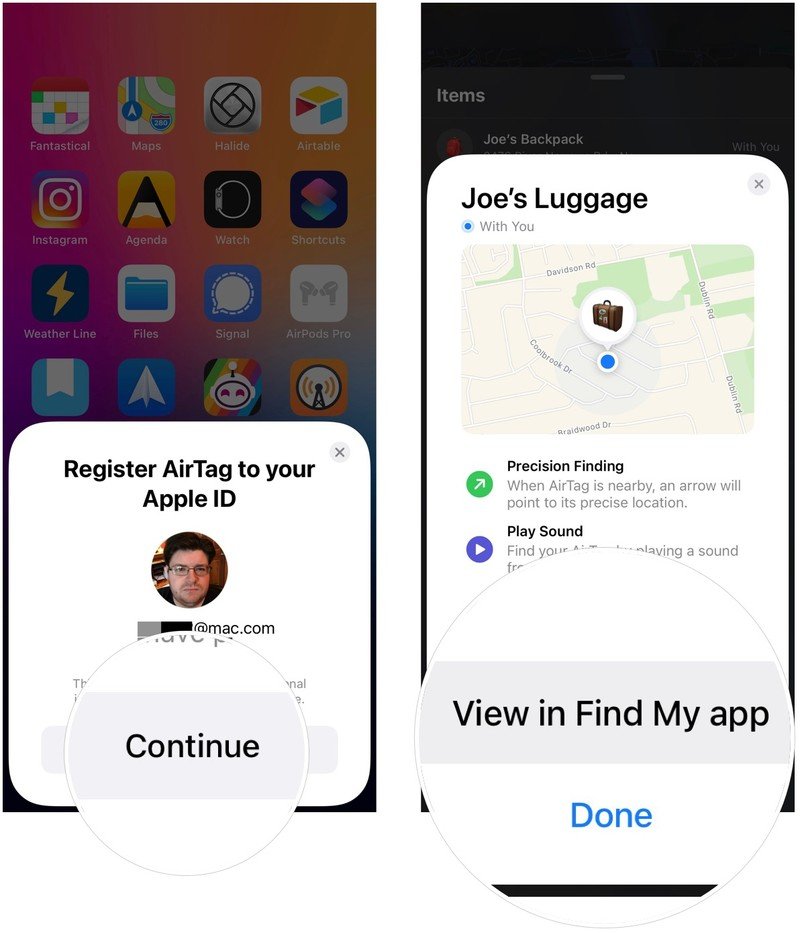
- Tap Continue after looking over your Apple ID information. Your device will now set up your AirTag.
-
Tap View in Find My App or Done if you don’t care about seeing your AirTag in the Find My app.
And that’s it. Your AirTag is now ready to use.
How to activate an AirTag in the Find My app
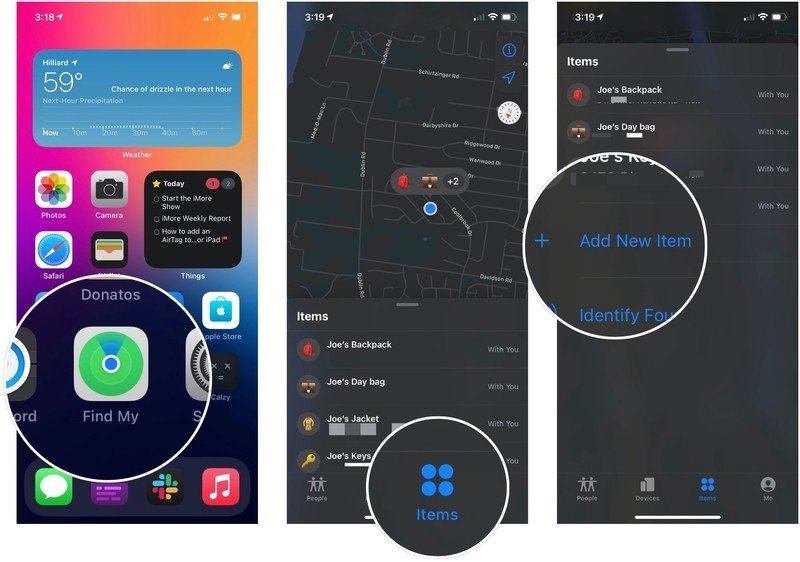
- Open Find My on your iPhone or iPad.
- Tap Items if the app isn’t already in the Items tab.
-
Tap Add New Item.
- Tap Add AirTag.
- Tap Connect
-
Select an item name for your AirTag with the scroll wheel, or enter a custom name.
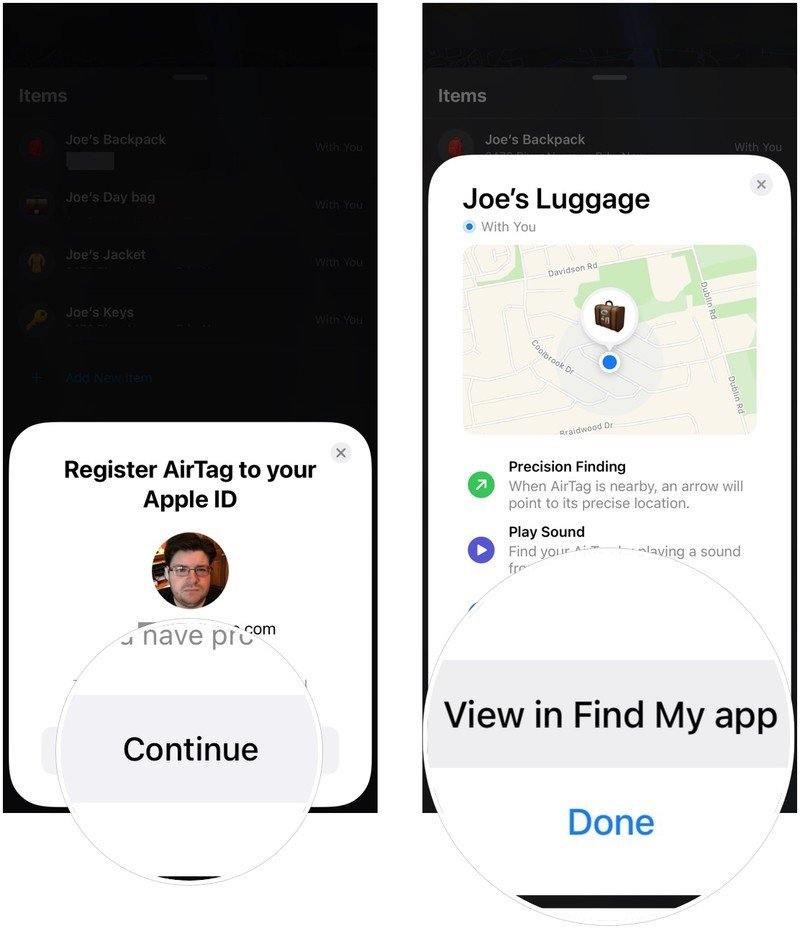
- Tap Continue after looking over your Apple ID information. Your device will now set up your AirTag.
-
Tap View in Find My App or Done if you don’t care about seeing your AirTag in the Find My app.

Your AirTag will now be activated for your Apple ID, and it’s now ready to go in that keychain, loop, or other great AirTag accessory that you just picked up.
Track all of your items!
Even though item tracking has been around forever with competing products, AirTag is our favorite Bluetooth tracker because of how easy it is to set up and how seamlessly it integrates with iOS itself. Just keep in mind that if you want to use an AirTag with your keys, you’re going to need to buy a separate accessory for your AirTag, because there isn’t a hole in it like a Tile. Thankfully, there are a lot of stylish options out there, no matter what your tastes are!
Updated June 2022: Updated for the latest versions of iOS. Added information about how others can potentially use AirTag for malicious purposes and how Apple is combating the situation.


